Create a campaign
Set up a campaign from scratch: how it dials, caller ID, phone line and calling hours, then attach a list and switch it on.
Campaigns & leads · 5 min read
A campaign is the job your dialer runs: which leads get called, how fast, during which hours and through which phone line. Think of it as the playbook, and your list as the stack of numbers it works through. This guide takes you from nothing to a campaign ready to dial.
What you need
- A running server. The Campaigns tab fills in once your server is active.
- You are the account owner, or a team member allowed to make changes on the Campaigns tab.
- A phone line (trunk) for outbound calls. You can create the campaign first and pick the line later.
- Leads in a list, or a CSV ready to upload. See Upload leads.
Step 1: Open the Campaigns tab
- In the left sidebar, click My Servers, then click your server.
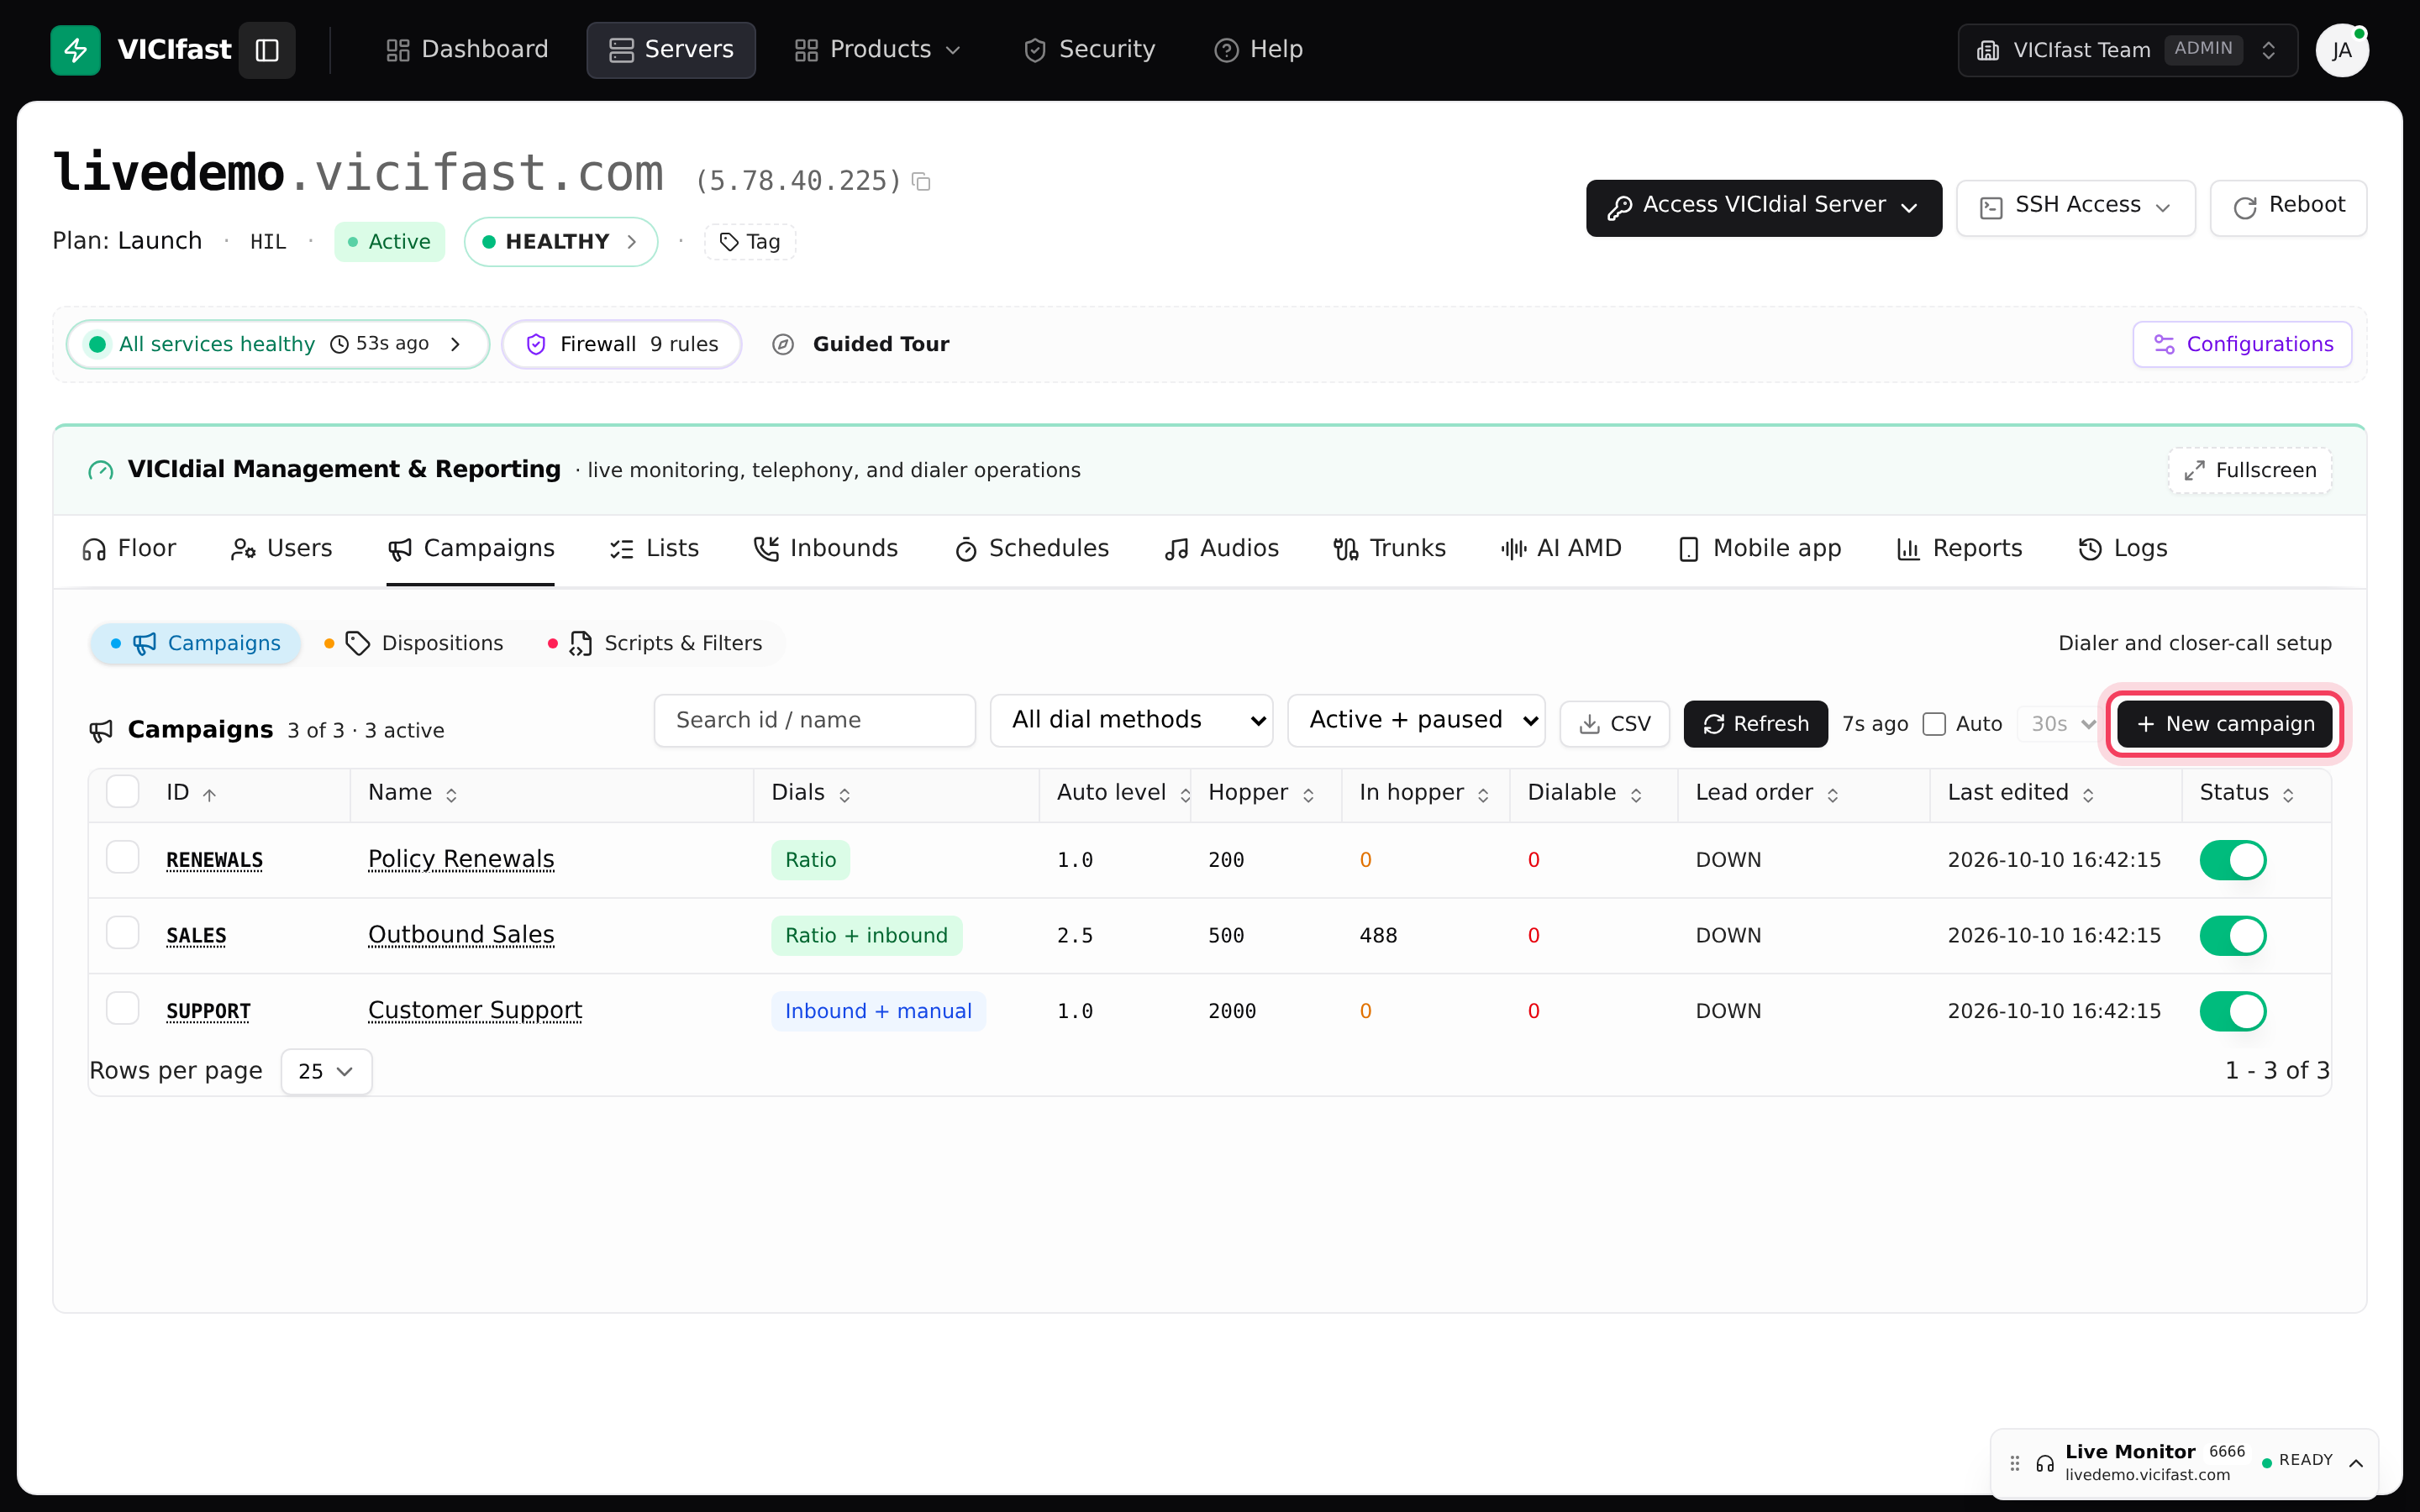
- Click the Campaigns tab.
- Make sure the Campaigns pill is selected. The pills next to it are Dispositions, Scripts & Filters and, on plans that include it, Soundboards.
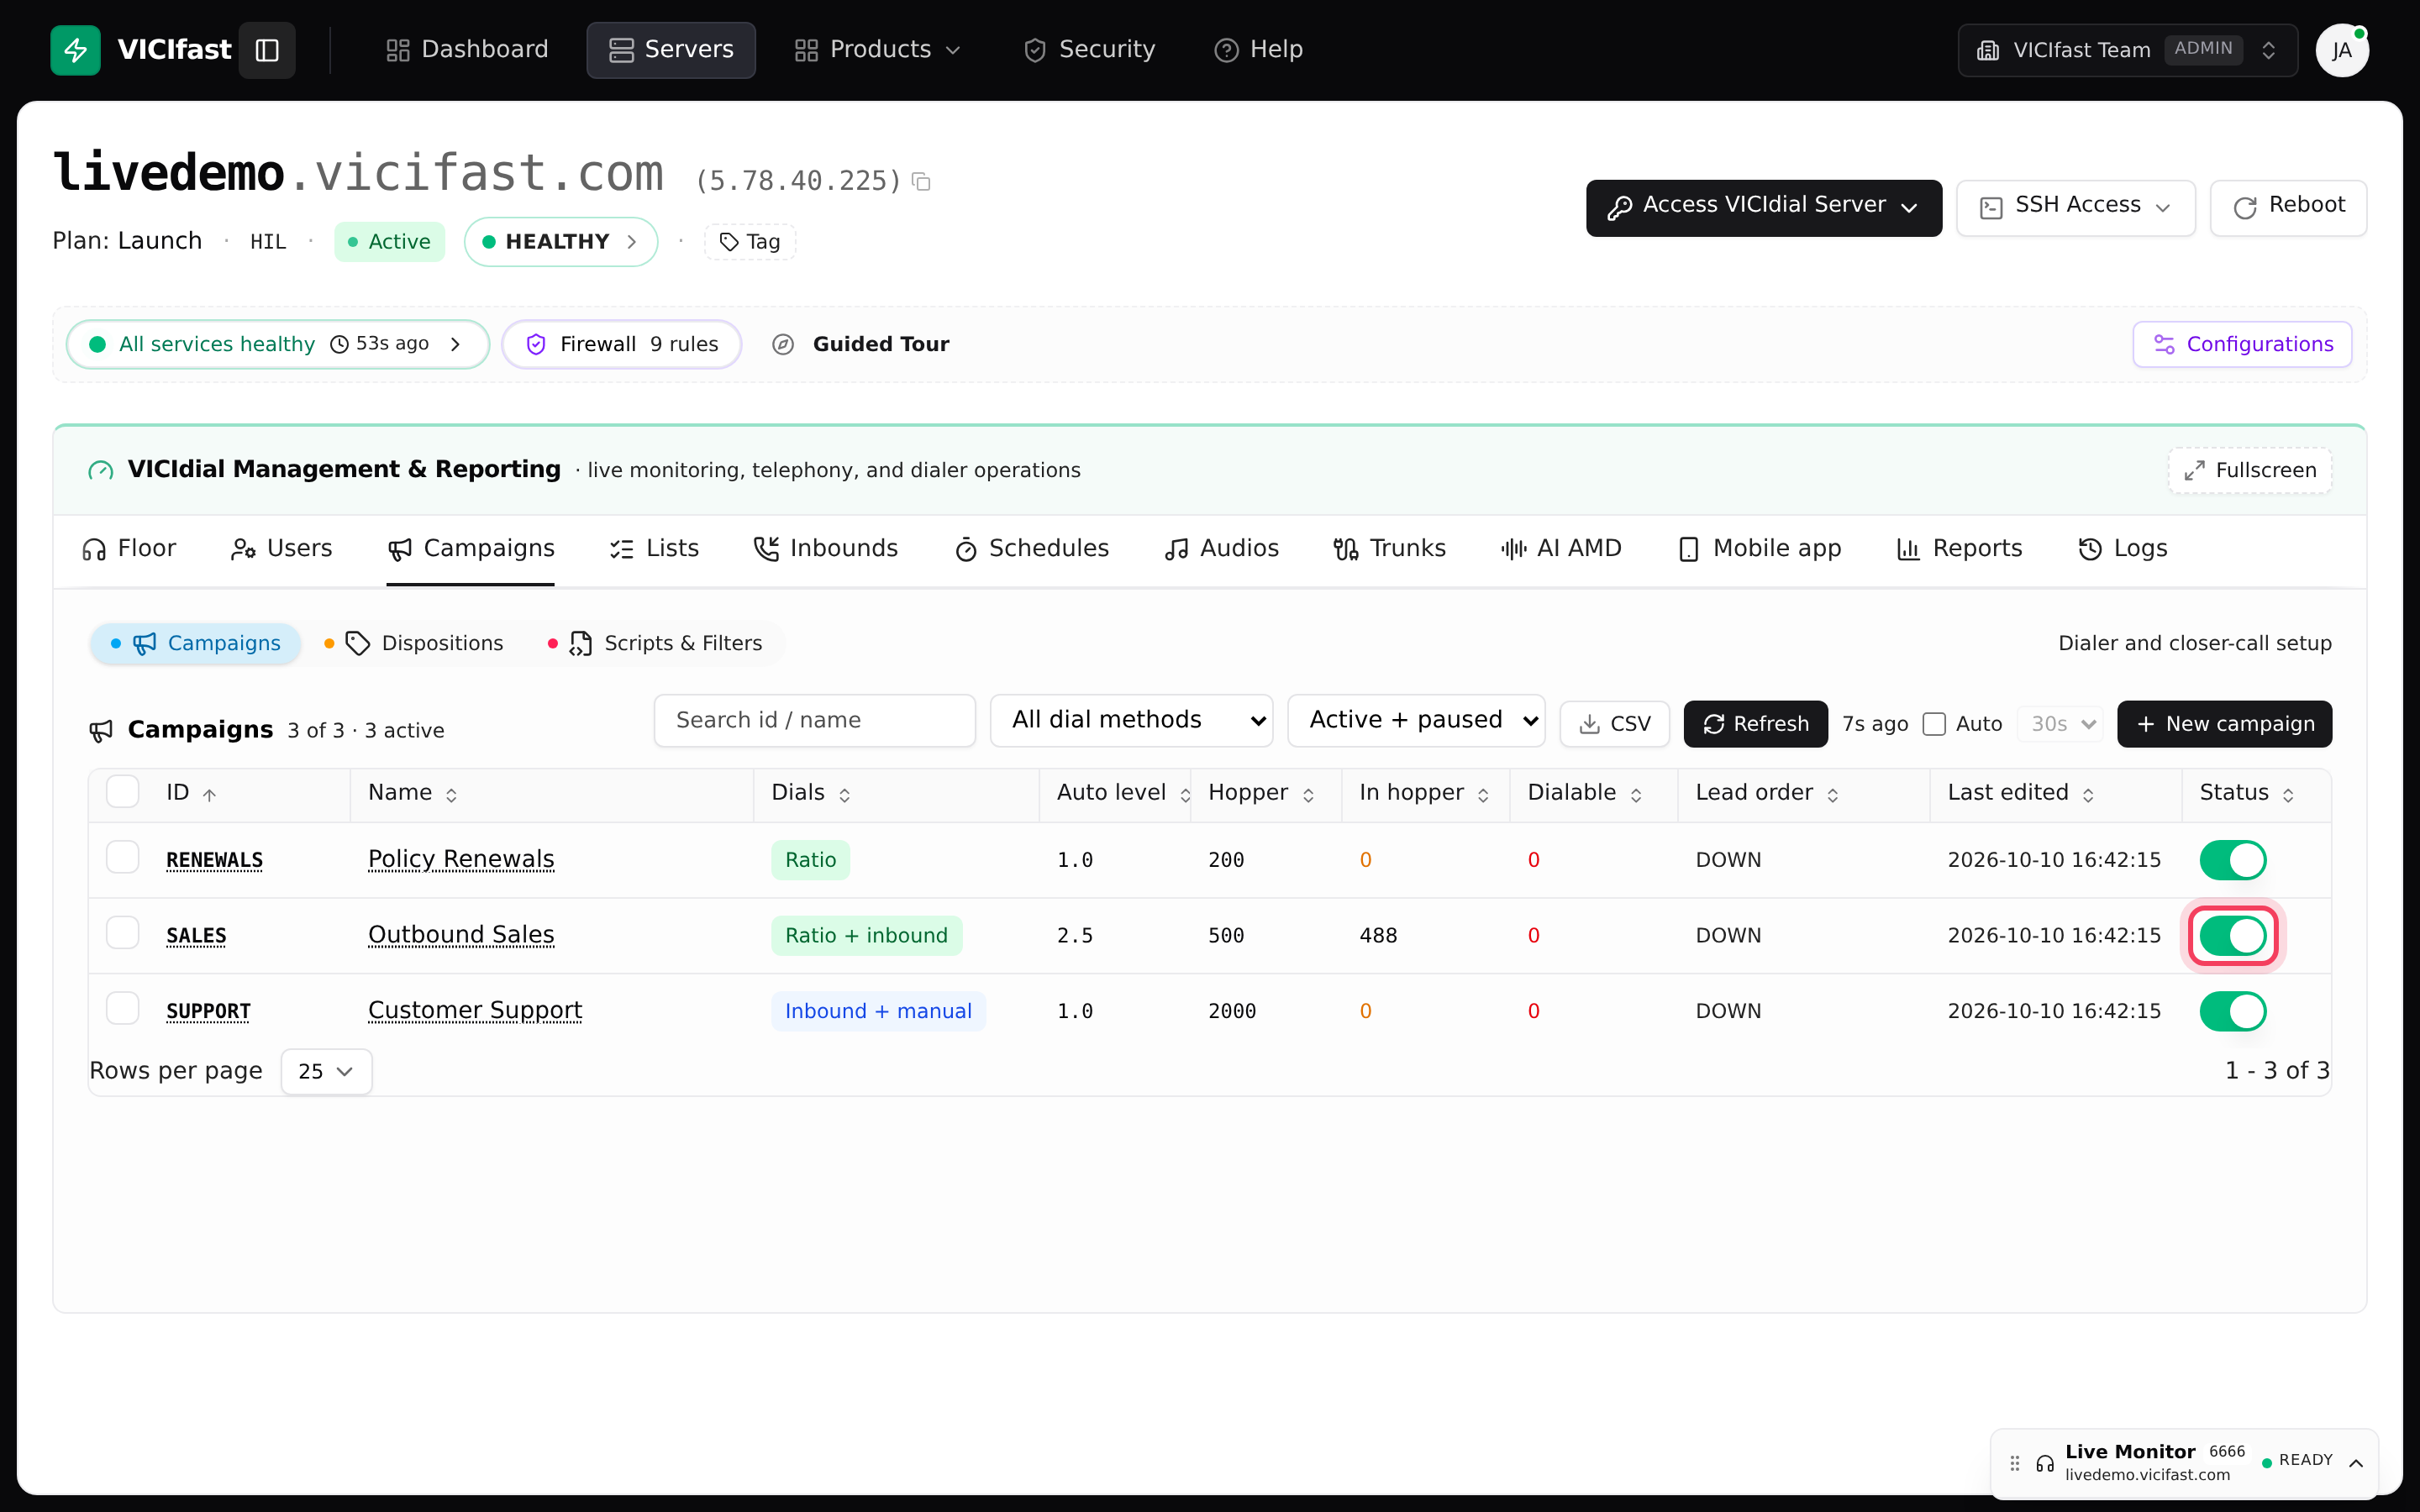
Each row is one campaign, with how it dials (Dials), how many leads can still be called (Dialable) and the Status switch that turns dialing on and off.
Step 2: Fill in the New campaign form
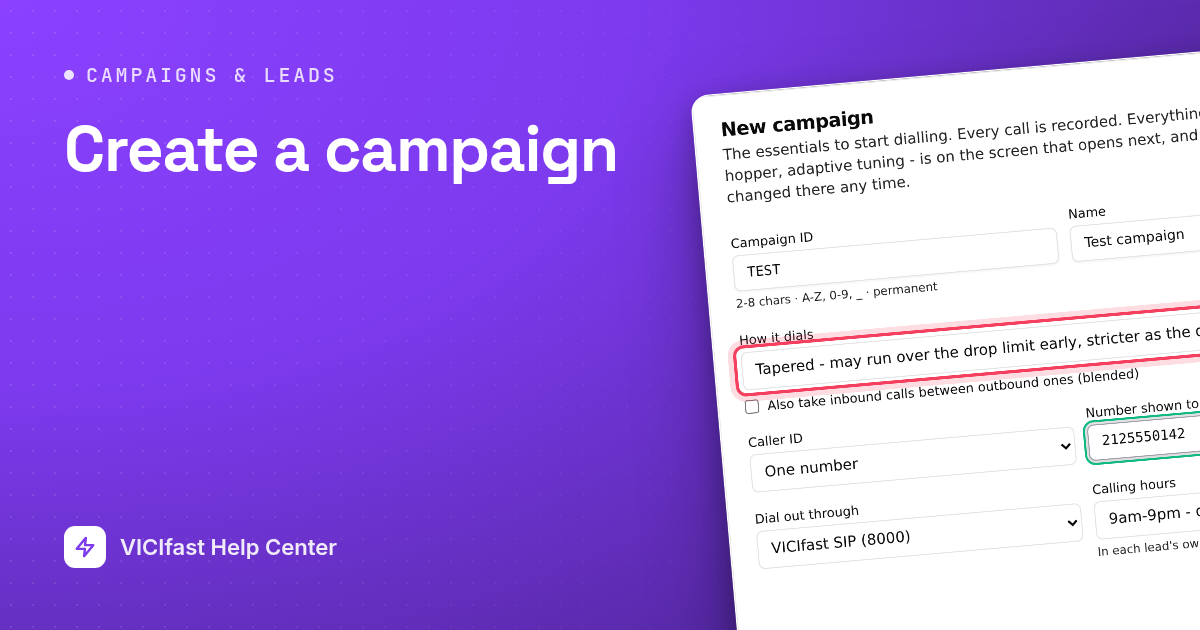
- Click New campaign.
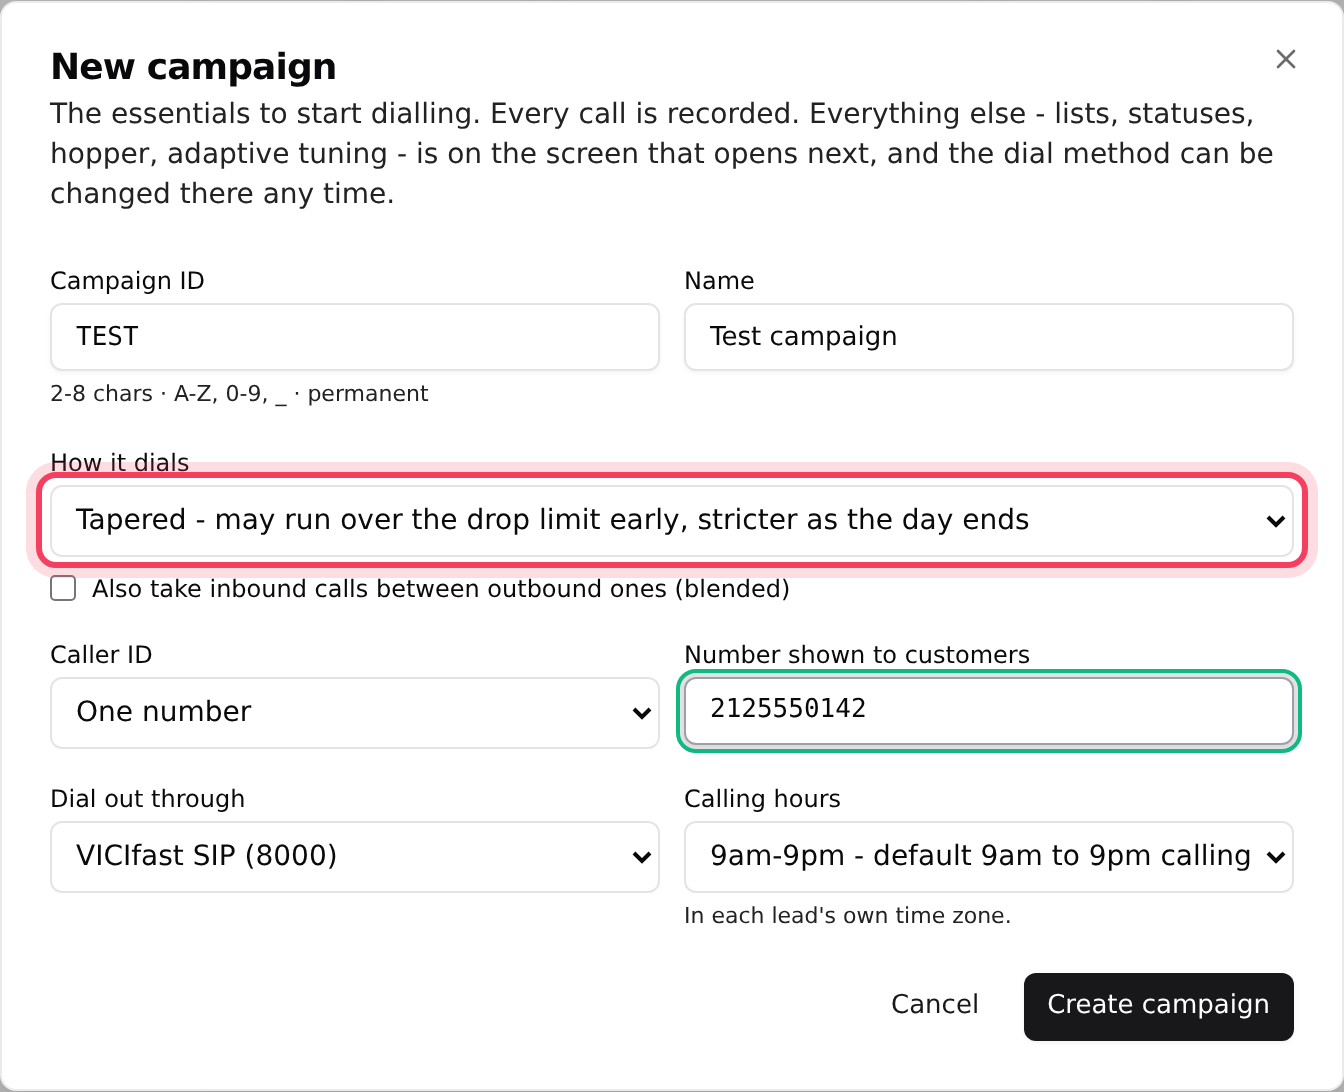
- Campaign ID: a short code such as SALES. Use 2 to 8 characters: A-Z, 0-9 and _. It is permanent.
- Name: what your team sees, for example "Outbound Sales". Up to 40 characters. You can change it later.
- How it dials: Manual means agents click to call. Inbound + manual means they also take queue calls. Ratio dials a fixed number of lines per waiting agent. The Adaptive (predictive) choices set their own speed while keeping dropped calls under a limit. New campaigns start on Tapered.
- For Ratio and Adaptive campaigns, tick Also take inbound calls between outbound ones (blended) if the same agents should also answer queue calls.
- Caller ID: choose One number and type it in Number shown to customers, or choose From a CID group and pick the group. See Caller ID and caller ID groups.
- Dial out through: pick your phone line. If you have none yet, you will see No trunk yet - set it later.
- Calling hours: starts on 9am-9pm. The window applies in each lead’s own time zone.
- Click Create campaign. The campaign’s settings open straight away.
Step 3: Check what the campaign starts with
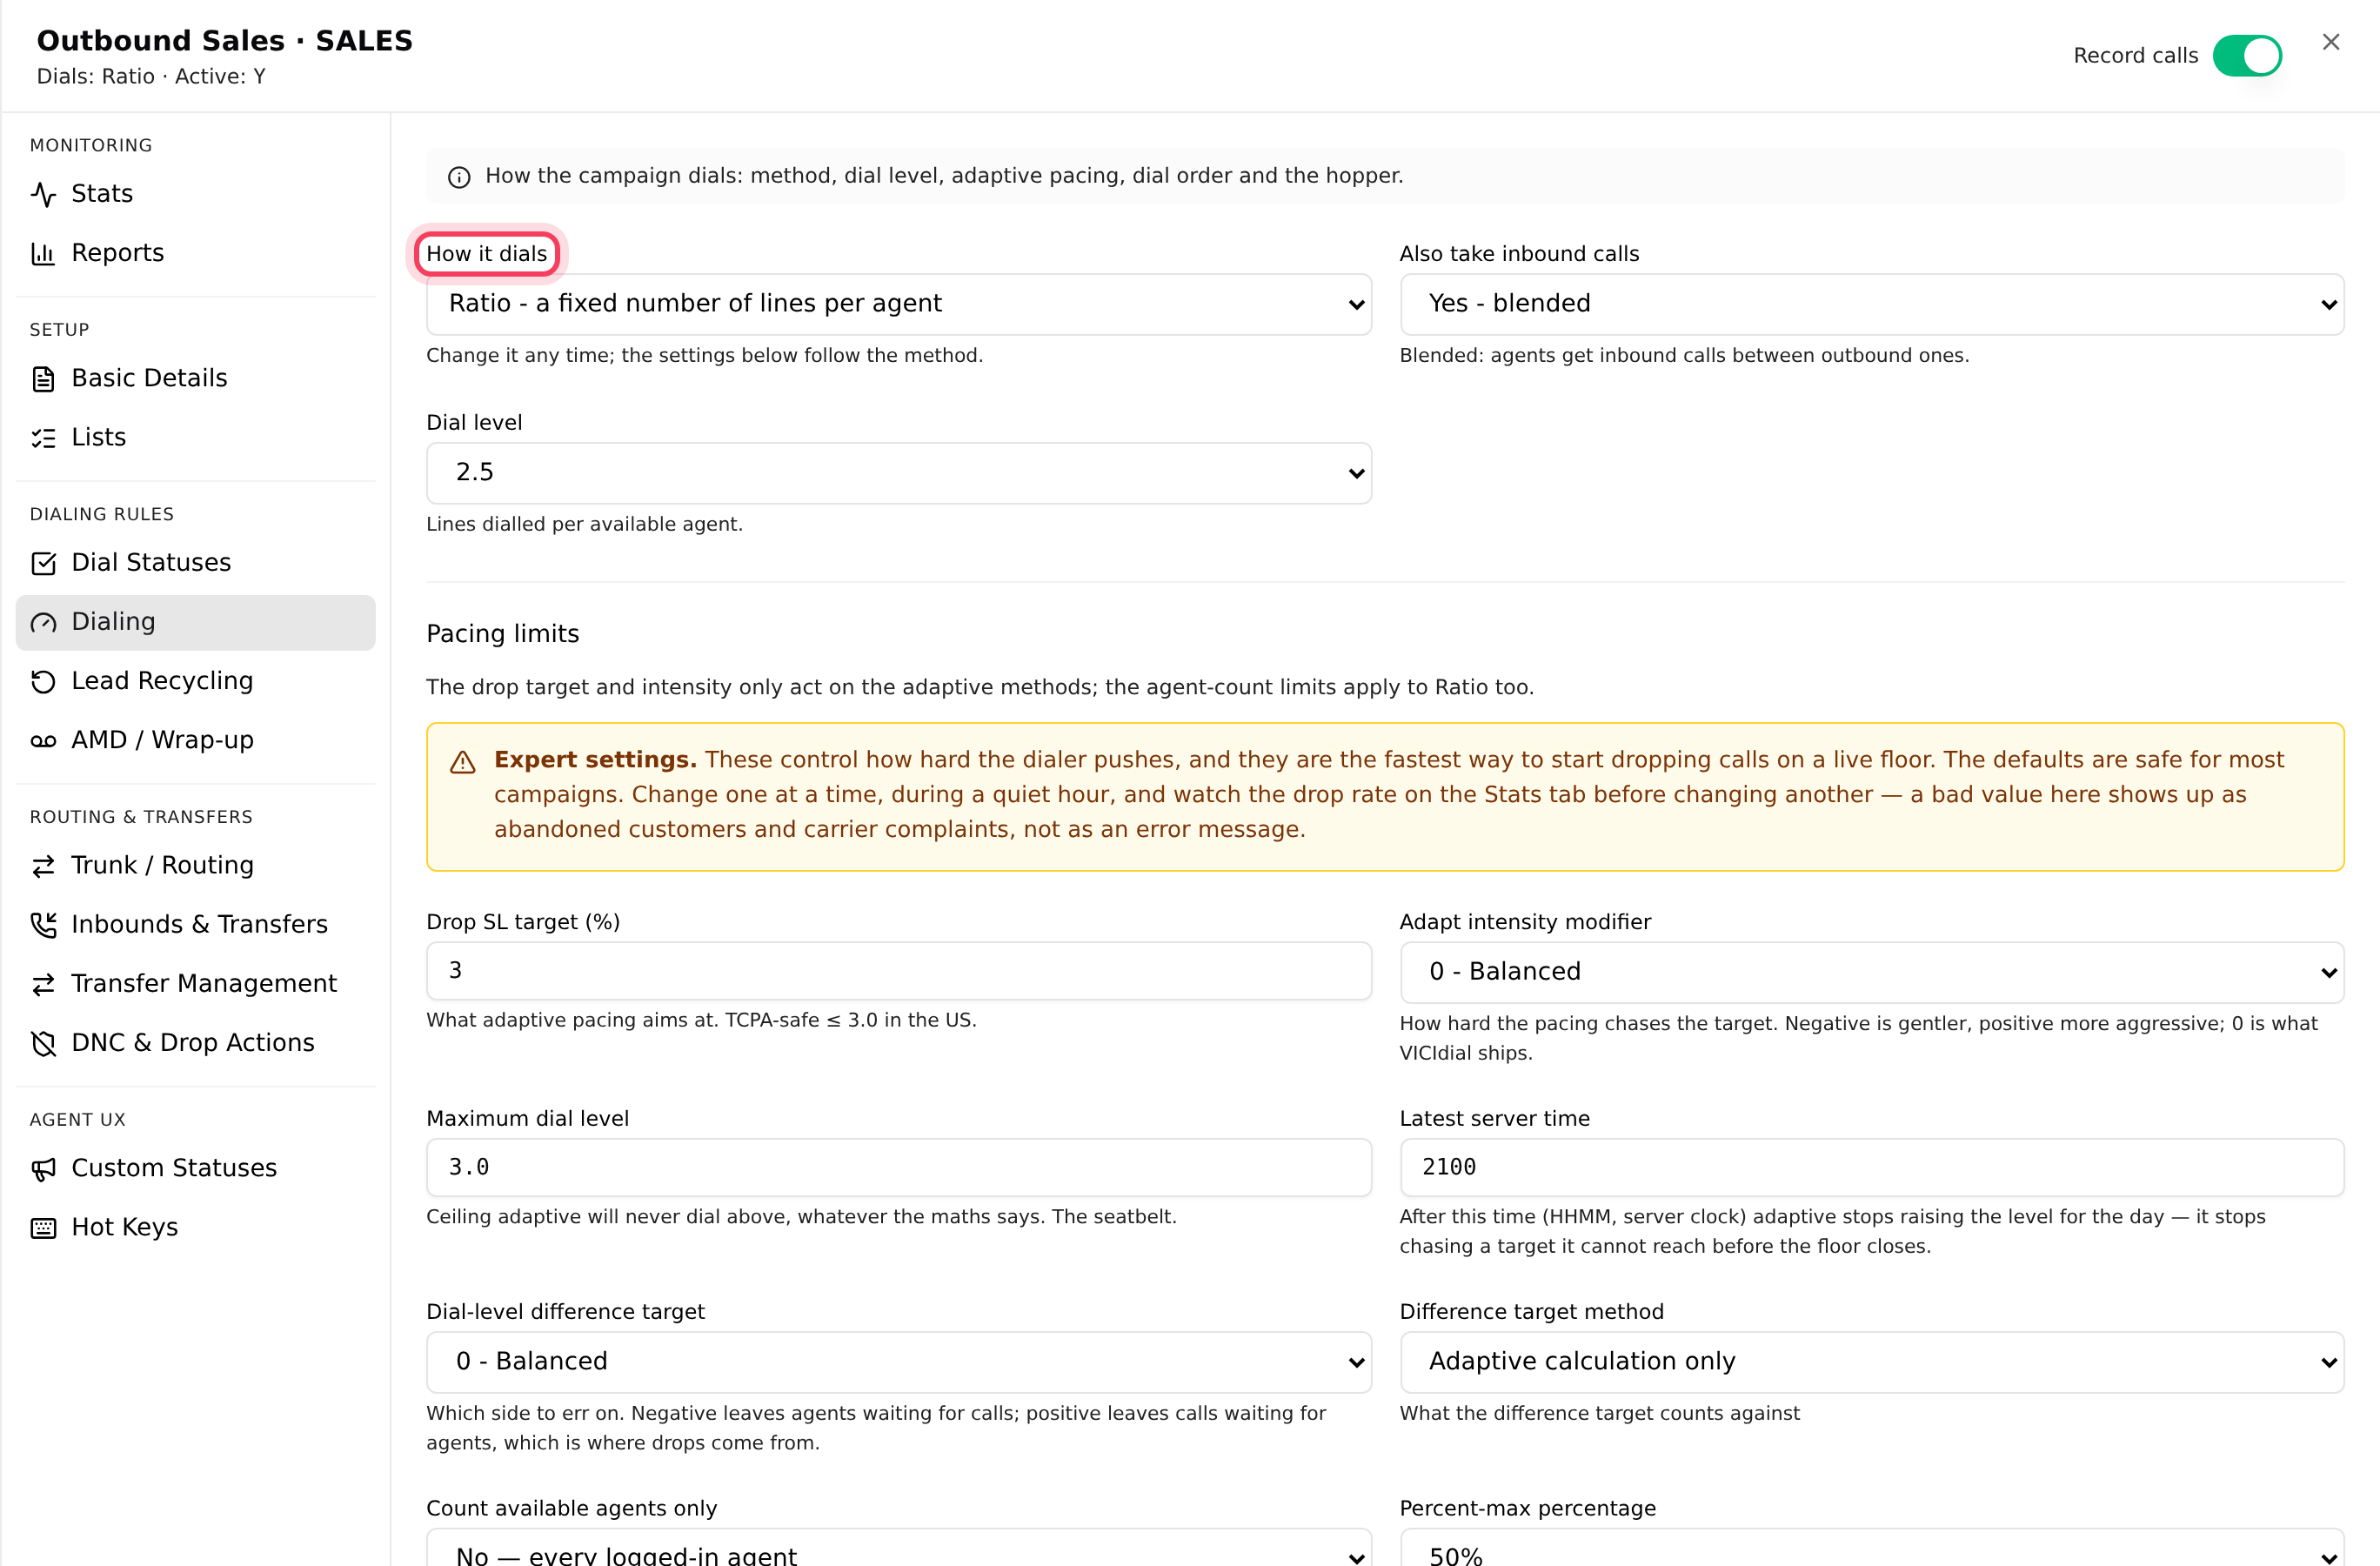
The settings open on the Stats tab. The tabs down the left are grouped under Monitoring, Setup, Dialing rules, Routing & transfers and Agent UX. A new campaign already has sensible settings:
- The Record calls switch at the top is on, so every call is recorded.
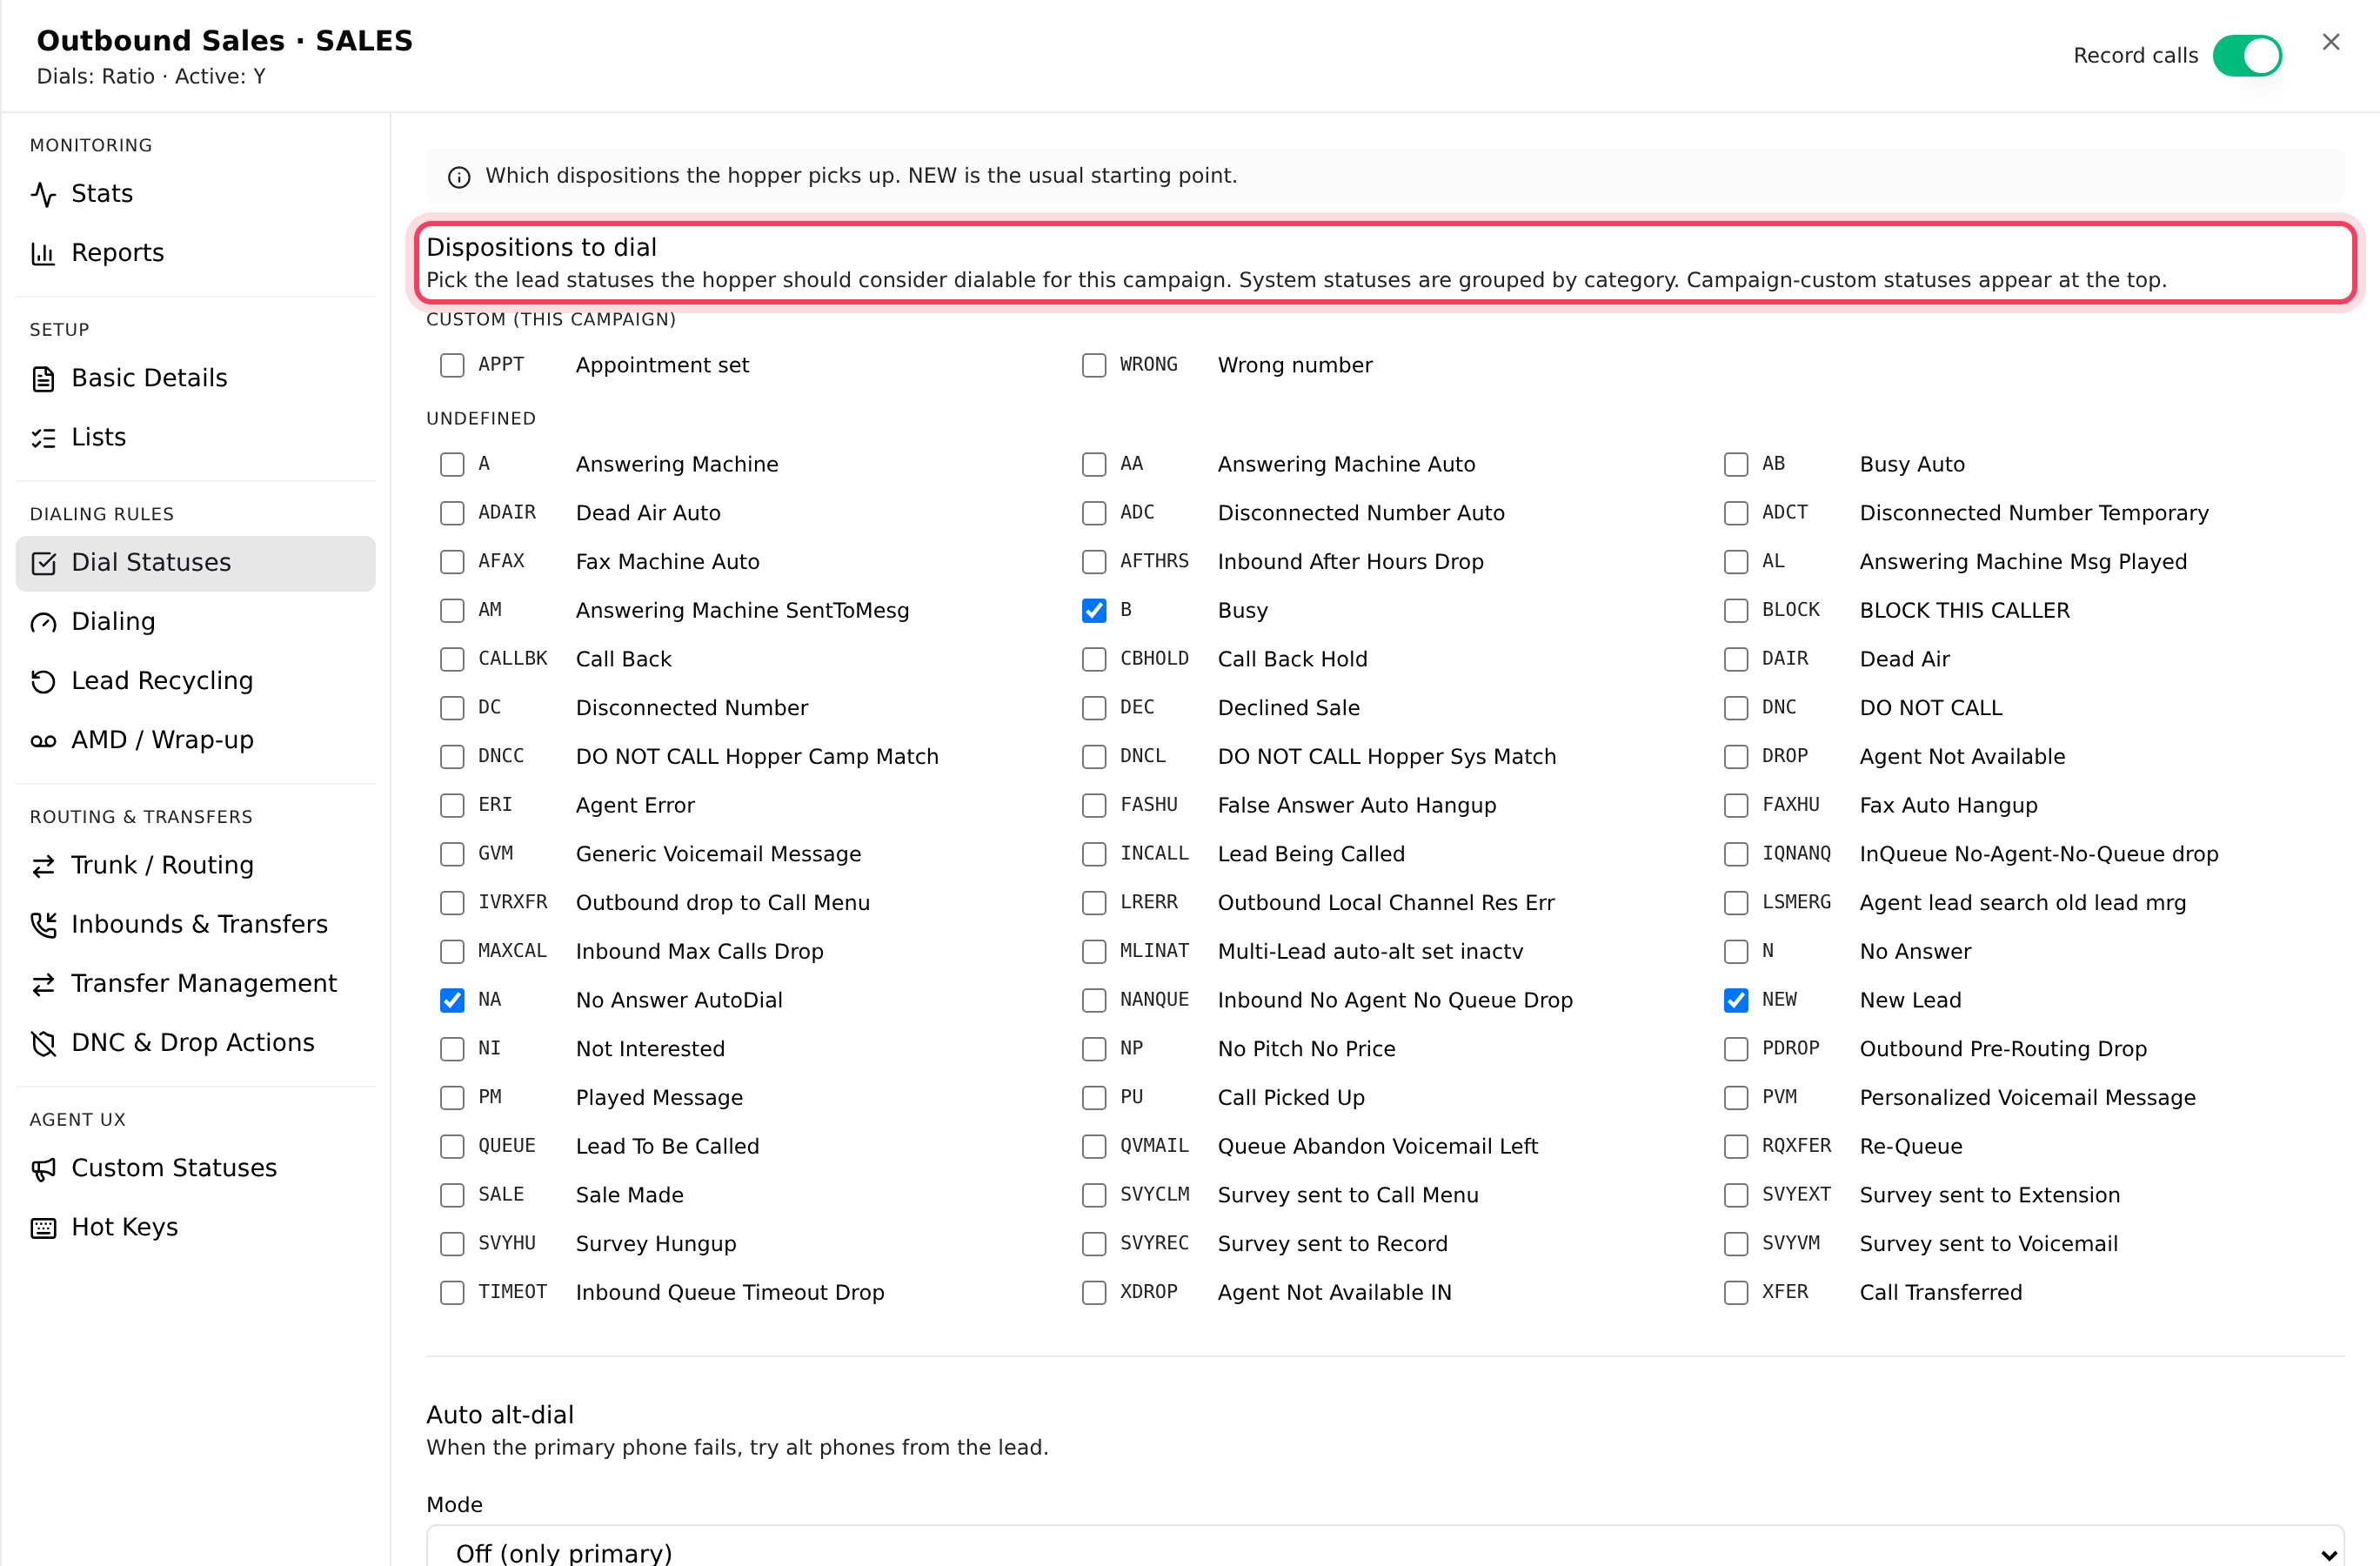
- Only brand-new leads (status NEW) are dialed until you add more in Step 5.
- Calls go to the Agent waiting longest, ring for 30 seconds, and your do-not-call lists are checked first.
- Ratio campaigns start at a dial level of 2.0. Adaptive ones start at 1.0 and aim for at most 3% dropped calls.
- Ratio and Adaptive campaigns start with Answering machine detection on (AMD / Wrap-up tab). See Answering-machine detection.
When you change a setting, a Save N changes button appears at the top (for example "Save 2 changes"), with Discard next to it. Nothing is saved until you click it.
Step 4: Attach a list
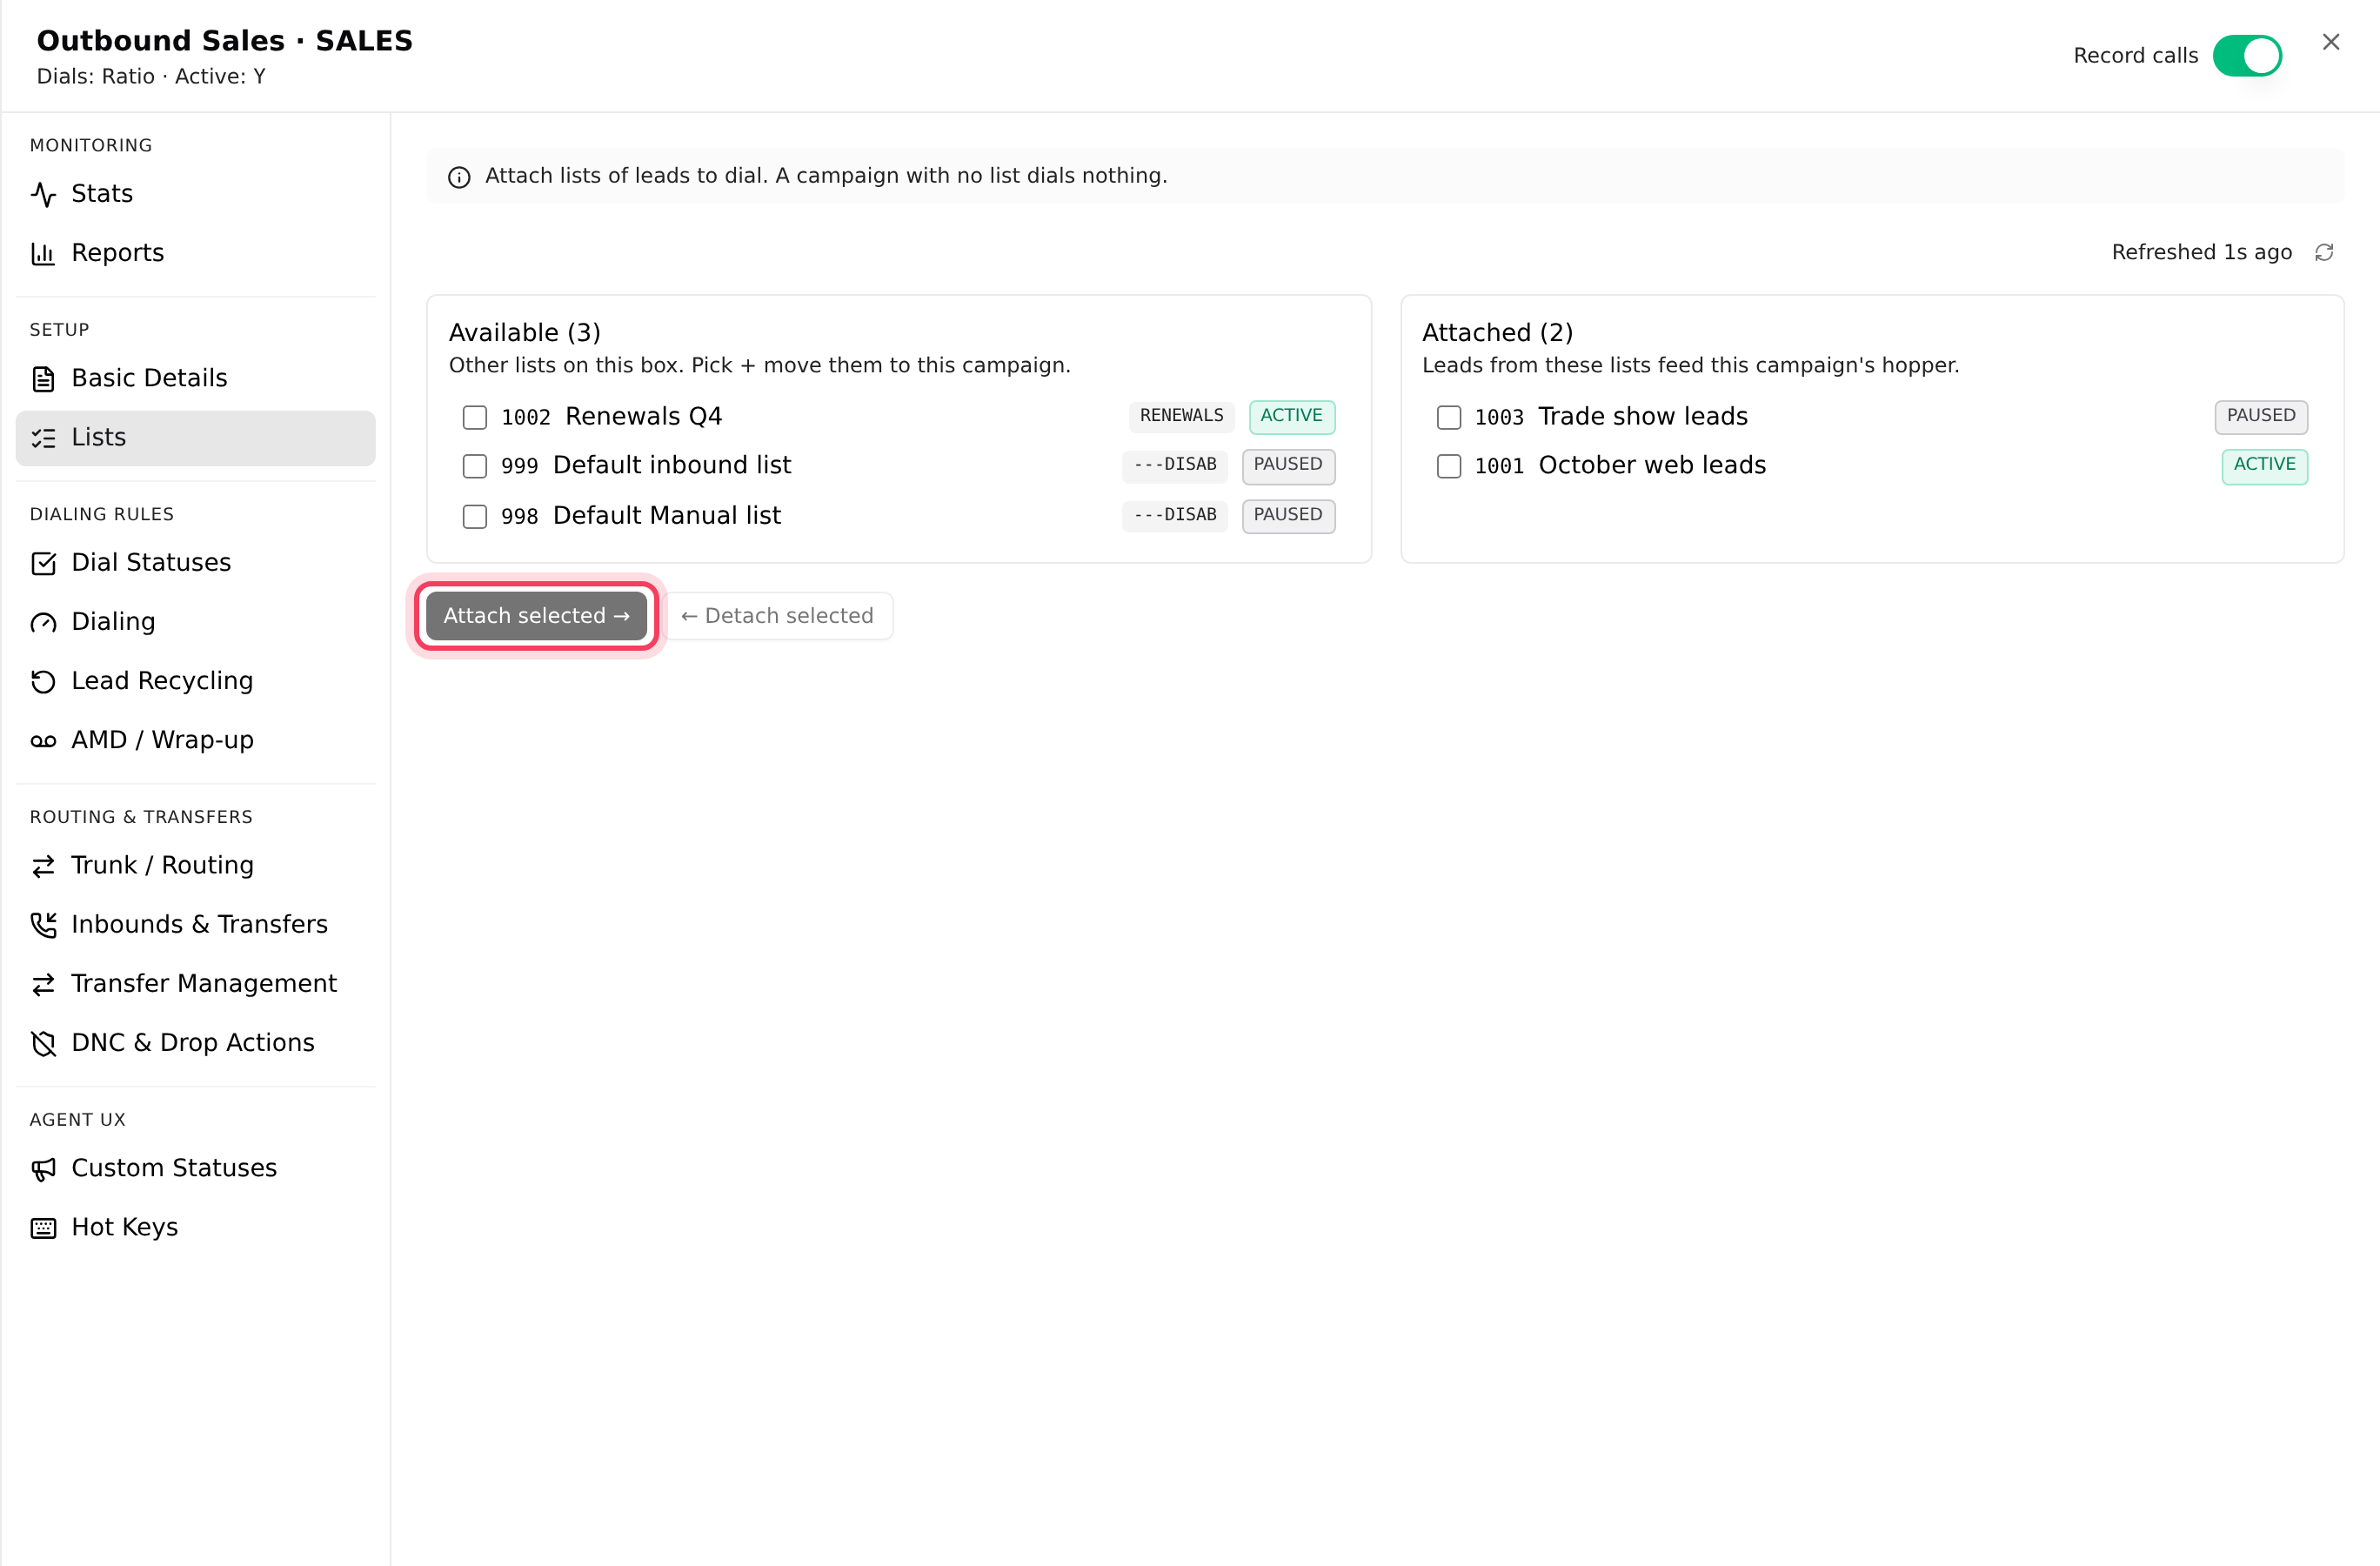
- In the settings, click Lists (under Setup).
- The left box, Available, shows the other lists on your server. The right box, Attached, shows the lists this campaign dials.
- Tick your list on the left and click Attach selected →. If that list belongs to another campaign, your browser asks you to confirm the move. A list feeds one campaign at a time.
- Check the list’s chip says Active. Click the chip to switch between Active and Paused. New lists start paused.
Step 5: Choose which leads get called
- Click Dial Statuses (under Dialing rules).
- Under Dispositions to dial, NEW is ticked. Tick the results you want called again, for example NA (no answer) and B (busy). Leave results like SALE and DNC unticked.
- Click Save N changes at the top.
How often and how soon those leads come back is explained in Redials and lead recycling.
Step 6: Switch it on
- Close the settings.
- On the campaign’s row, flip the Status switch on.
- If the campaign cannot reach a working phone line, you see This campaign has nowhere to dial. Click Leave it off, then pick a line on the Trunk / Routing tab. Only click Activate anyway if you set up a carrier for it in VICIdial yourself.
Agents can now sign in and take calls. Flip the switch off to stop dialing. For several campaigns at once, tick them and use Activate or Pause.
Copy or delete a campaign
To copy a campaign, click the Clone icon on its row, check the suggested New campaign ID and Display name, and click Clone. Settings, statuses, hot keys and recycle rules are copied; lists stay with the original.
To delete one, click the Delete icon (owner and Admin only) and type the campaign ID. It is removed for good, but lists, leads, call logs and recordings stay. To stop dialing without deleting, pause it instead.
If something goes wrong
Frequently asked
- Check that the Status switch is on, a list is attached and Active, the leads’ results are ticked on Dial Statuses, and the calling hours are open where the leads live. The Dialable column shows how many leads can still be called. More in "My campaign isn’t dialing".
- The campaign does not point at a working phone line. Open it, go to Trunk / Routing, pick your line in Campaign trunk and save. The banner on the server page can also do this for you with one click.
- Most settings save only when you click Save N changes at the top of the campaign settings. Lists, Custom Statuses, Hot Keys and Lead Recycling have their own save or attach buttons.
- No. The ID is permanent. Clone the campaign with a new ID, move the lists across, then delete or pause the old one.
- A campaign with lists attached or agents signed in cannot be deleted. Detach its lists (Lists tab, Detach selected), wait for agents to sign out, then try again.