Upload leads
Create a list, import a CSV of leads, check what was skipped, and switch the list on so your campaign can dial it.
Campaigns & leads · 5 min read
Leads are the people your dialer calls. They live in lists, and a campaign only dials the lists attached to it. This guide takes you from a spreadsheet on your computer to leads ready to dial, in about five minutes.
What you need
- A CSV file. Excel and Google Sheets can both save a sheet as CSV. One row per person, with the column names in the first row.
- Every row needs a phone number and a last name. The importer will not go on without both.
- You are the account owner, or a team member allowed to make changes on the Lists tab.
- A campaign to attach the list to. See Create a campaign.
- Only upload numbers you have the right to call.
Step 1: Create a list
- Open your server from My Servers and click the Lists tab. It has three pills: Lists, Leads and Imports.
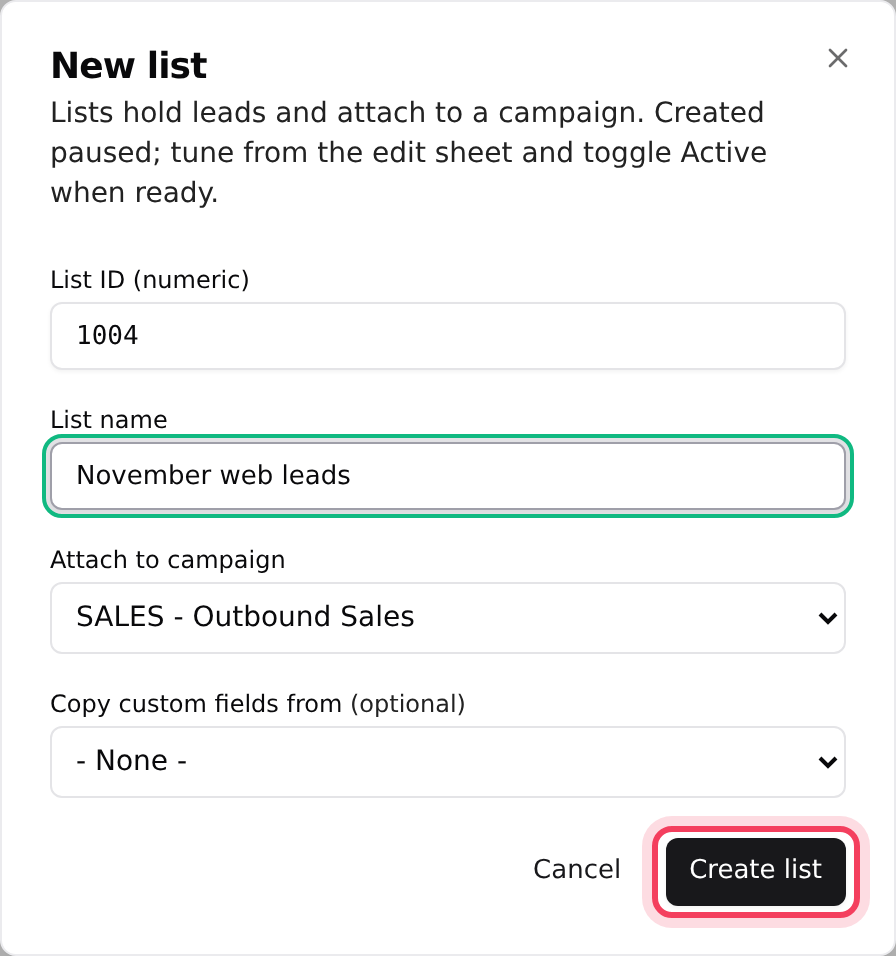
- On the Lists pill, click New list.
- List ID (numeric): any free number, for example 1001.
- List name: something your team will recognise later, for example "October web leads".
- Attach to campaign: pick the campaign that should dial these people.
- If other lists already have custom fields, you can pick one under Copy custom fields from. See Custom lead fields.
- Click Create list. The list is created paused, and its settings open.
Step 2: Pick your file
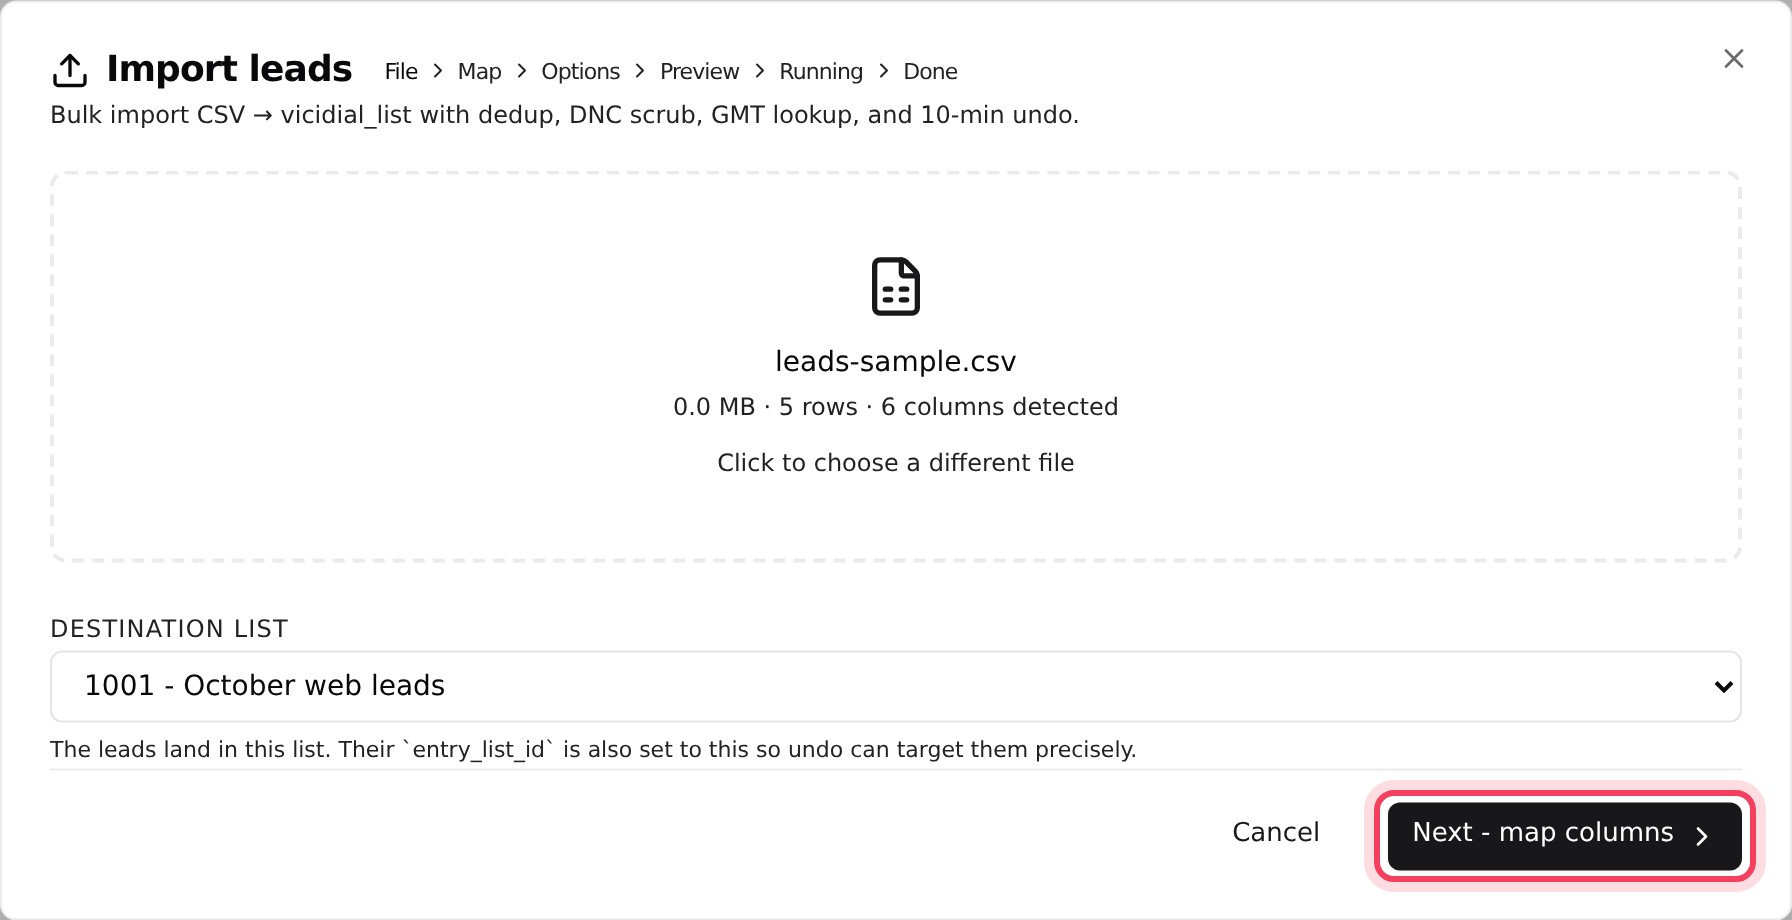
- Back on the Lists pill, click Import leads.
- Drop your CSV on the box that says Drop a CSV here, or click to choose. Files of up to about 500,000 rows (200 MB) work. The file is read in your browser, and you see how many rows and columns it found.
- Under Destination list, pick your new list.
- Click Next - map columns.
Step 3: Match your columns
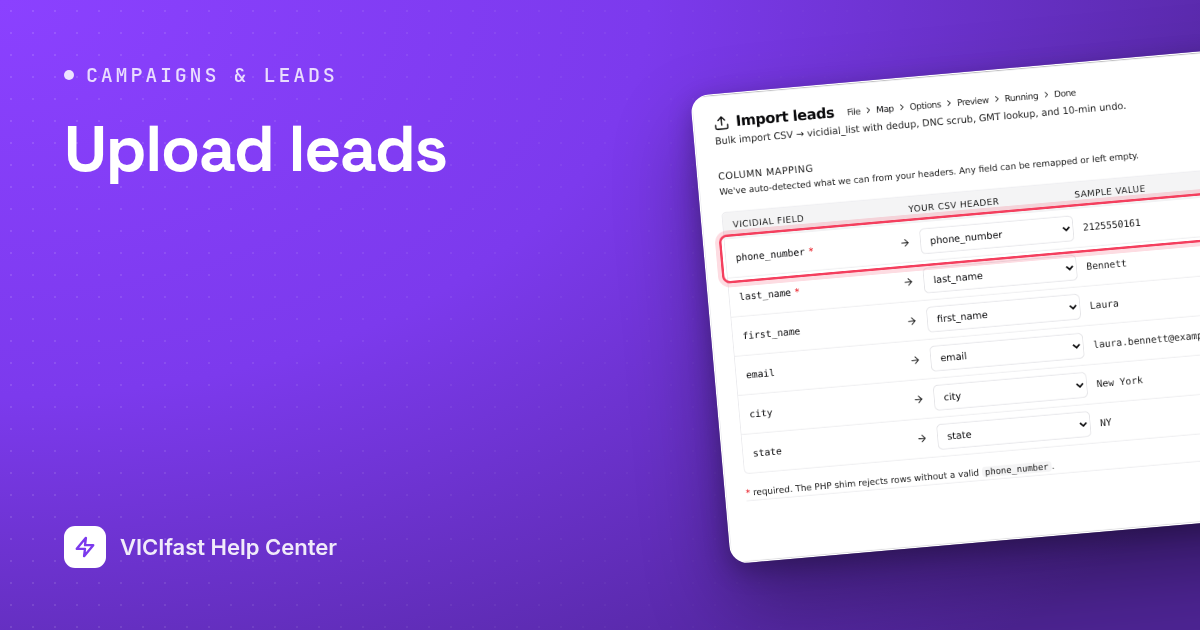
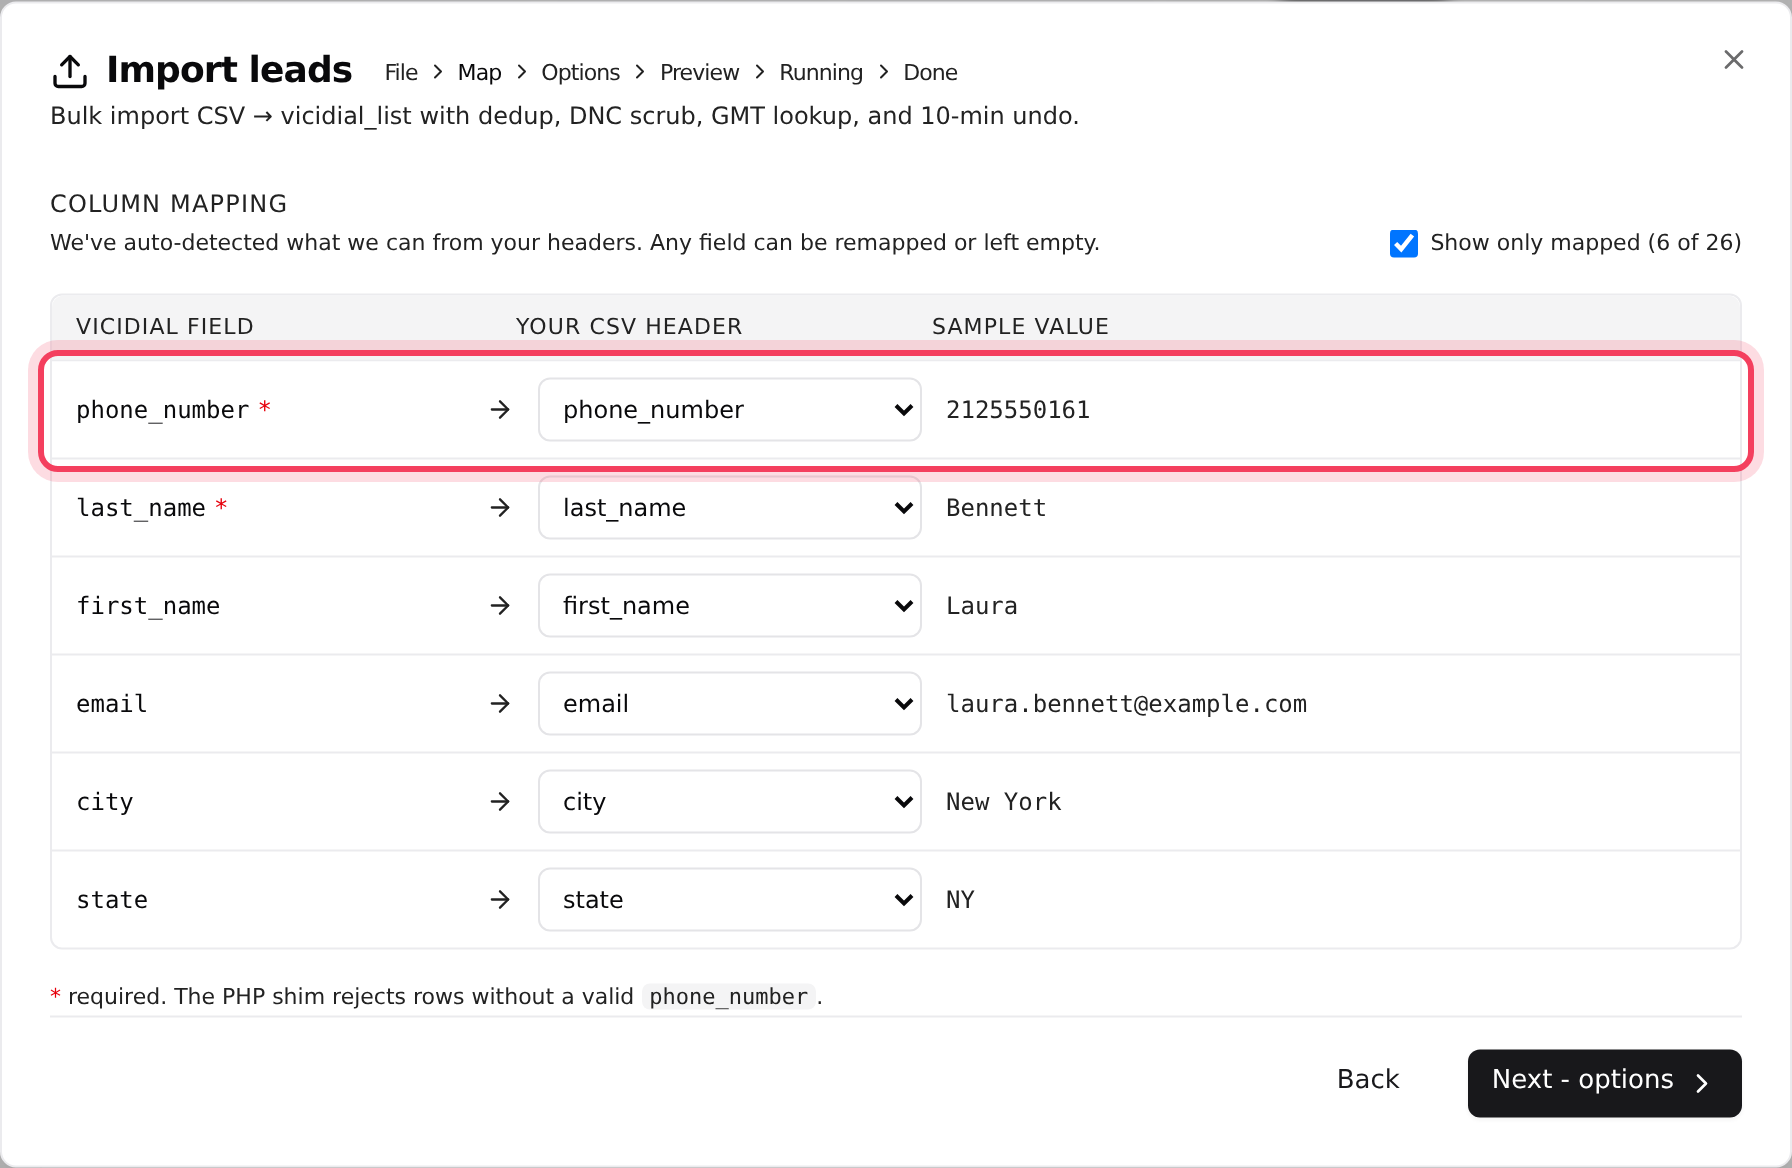
Each row on this screen is a lead field: on the left the VICIdial field, in the middle Your CSV header, on the right a Sample value from your first row. Common headers such as phone, first name, last name, email and zip are matched for you.
- Check phone_number and last_name. Both are marked with a red star. Until both are matched, an amber Required note is shown and you cannot go on.
- Match any other columns you want to keep, such as first_name, email or postal_code. Leave the rest on - skip -.
- If the list has custom fields, they appear underneath under Custom fields on list.
- Tick Show only mapped to hide the skipped rows and check your work, then click Next - options.
Step 4: Choose the options
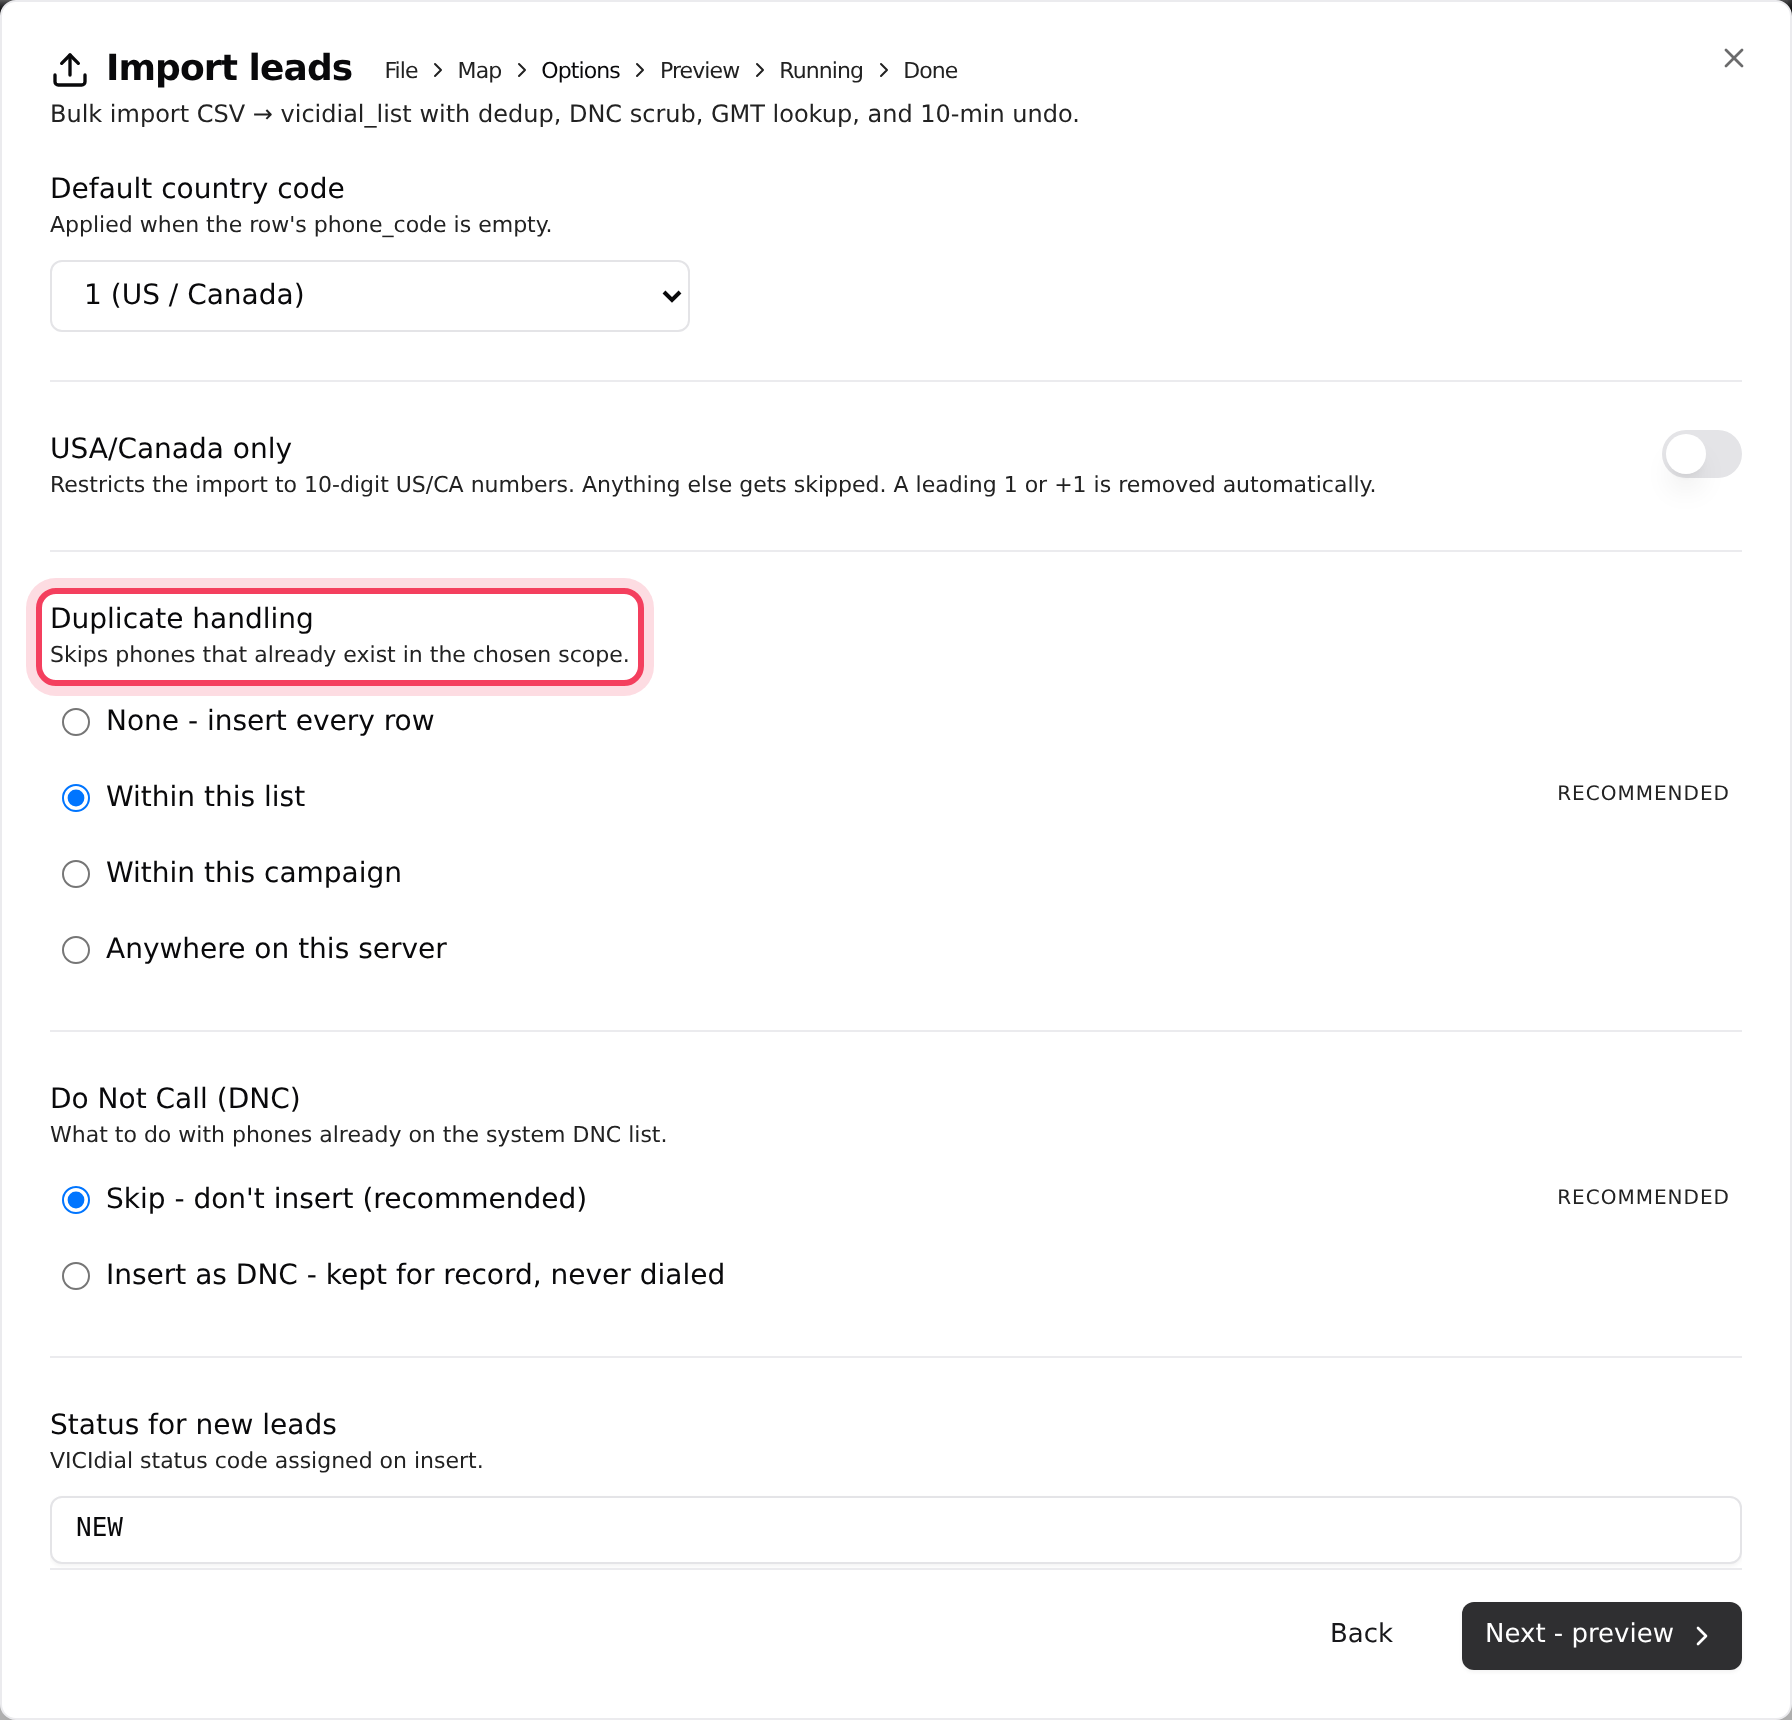
- Default country code: used when a row has no country code. Starts on 1 (US / Canada).
- USA/Canada only: skips anything that is not a 10-digit US or Canadian number.
- Duplicate handling: skips phone numbers that already exist. Pick Within this list (the default), Within this campaign, Anywhere on this server, or None - insert every row. Duplicates are skipped, not merged.
- Do Not Call (DNC): what to do with numbers already on your do-not-call list. Skip - don’t insert (recommended), or Insert as DNC - kept for record, never dialed.
- Status for new leads: leave it on NEW.
- Email notifications: one email when the import starts and one when it finishes, to you and the server owner.
Open Advanced options only if you need to. The important one is Time-zone source for GMT offset. It is how the dialer learns each lead’s local time, so that calling hours apply where the lead lives. Keep Country + area code (default - works everywhere).
Step 5: Start the import and check the result
- Click Next - preview. Check the summary under You’re about to import.
- Click Start import. The button shows how many rows will be sent.
- The file uploads, then rows are added in batches of 5,000. You can click Close - runs in background and carry on working.
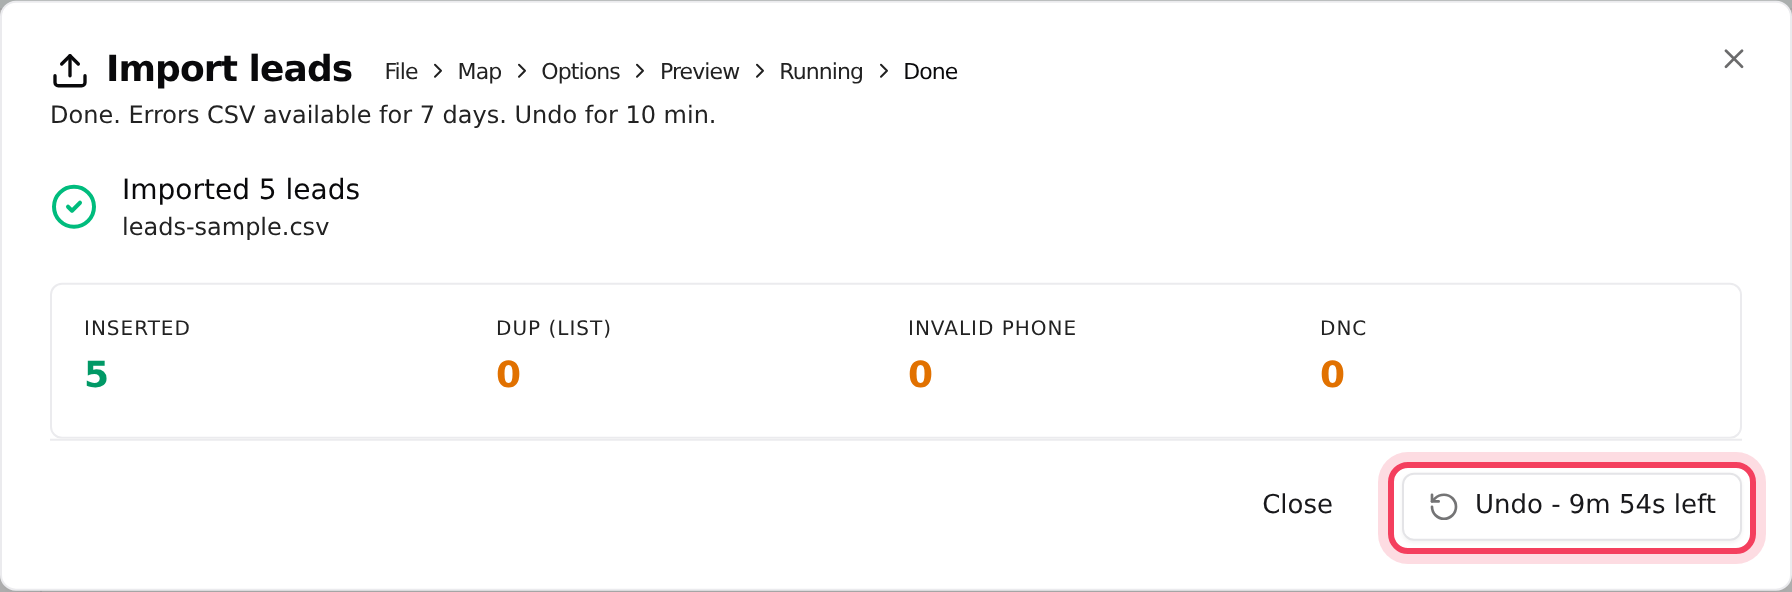
- When it finishes you see the counts: Inserted, Dup (list), Invalid phone and DNC. If any rows were skipped, an errors.csv button also appears: click it to download those rows and the reason (kept for 7 days).
- Made a mistake? Click Undo. The button counts down the 10 minutes you have after the import finishes.
Every import is listed on the Imports pill with its file, list, status, rows inserted and start time. From there you can reopen it, download errors.csv or undo while the window is open.
Step 6: Switch the list on
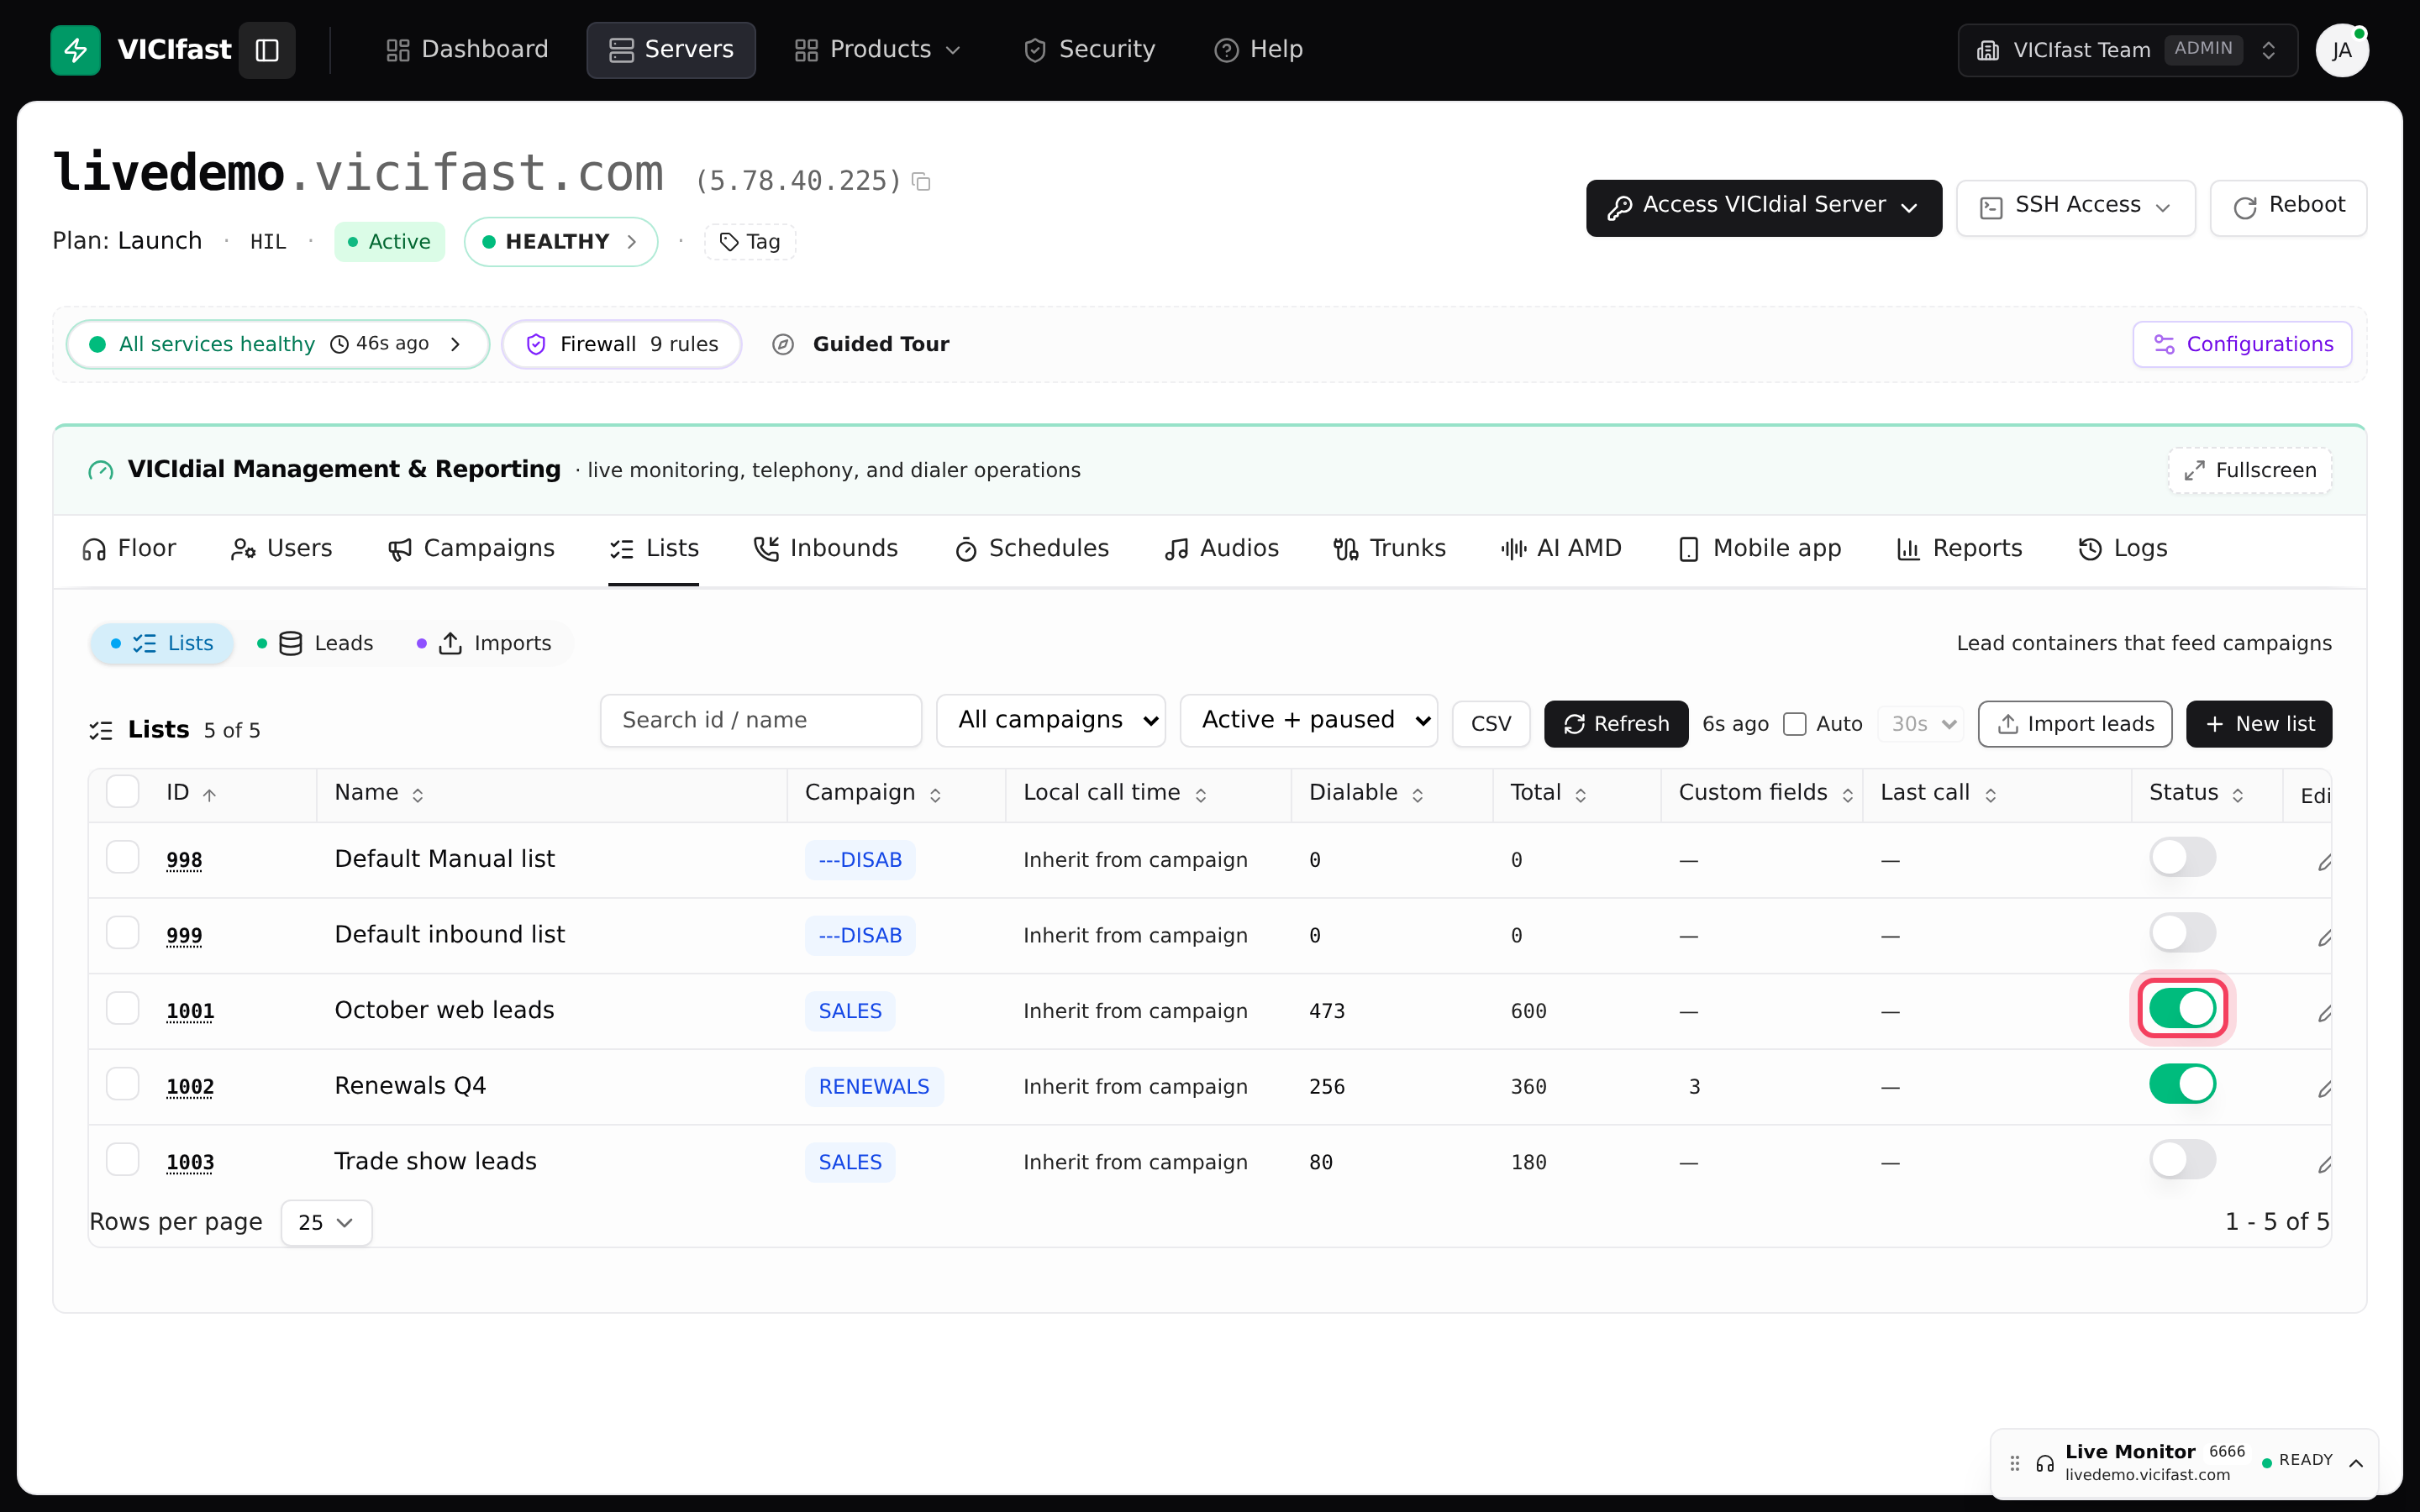
- On the Lists pill, find your list and flip its Status switch on. It turns green.
- Click the Leads pill and search for a phone number or name from your file to spot-check a few leads.
- Open your campaign’s settings and click Lists to confirm the list sits under Attached.
If something goes wrong
Frequently asked
- Pick a file and a Destination list first. If your file could not be read, an error shows under the drop box; save it again as CSV and retry.
- Every lead needs a last name. If your file has no such column, add one in your spreadsheet (for example the surname, or the company name), save as CSV and start again.
- Download errors.csv to see each reason. For US and Canadian numbers the area code must be real and the fourth digit must be 2 to 9; these checks are under Advanced options, Phone format validation.
- Look at the counts: Dup (list) are numbers already in the list, and DNC are numbers on your do-not-call list. Both are skipped on purpose.
- Click Undo on the finished import, or on its row on the Imports pill, within 10 minutes. After that, the account owner can delete the whole list (this deletes every lead in it), or ask us in the chat.
- Check the time-zone source used for the import. If it was None, the leads were treated as GMT. Re-import them with Country + area code. See "Calling hours, shifts and holidays".