Set up your dialer with the Setup Wizard
The Setup Wizard builds a campaign, user groups, a login and browser phone for each person, and an optional inbound line, all in one go.
Getting started · 5 min read
The Setup Wizard builds the basics of a call center in one go: a campaign, user groups, a login and browser phone for each person, and, if you want one, a queue for incoming calls with a phone number that rings it. Use it right after your server goes live, or whenever you start a new team.
What you need
- You are the account owner. Only the owner can run the wizard.
- Your server's status is Active, with no cancellation scheduled.
- A phone line (trunk) on the server, so the campaign has a way to call out. You can run the wizard without one, but a campaign that dials automatically is switched off until you pick a line.
- Optional: a phone number on the server, if you want an incoming line to ring.
Step 1: Open the wizard
- On your server page, click Setup Wizard in the tools strip.
- On a brand-new server it opens by itself once, on Let's get your team calling. Click Start setup.
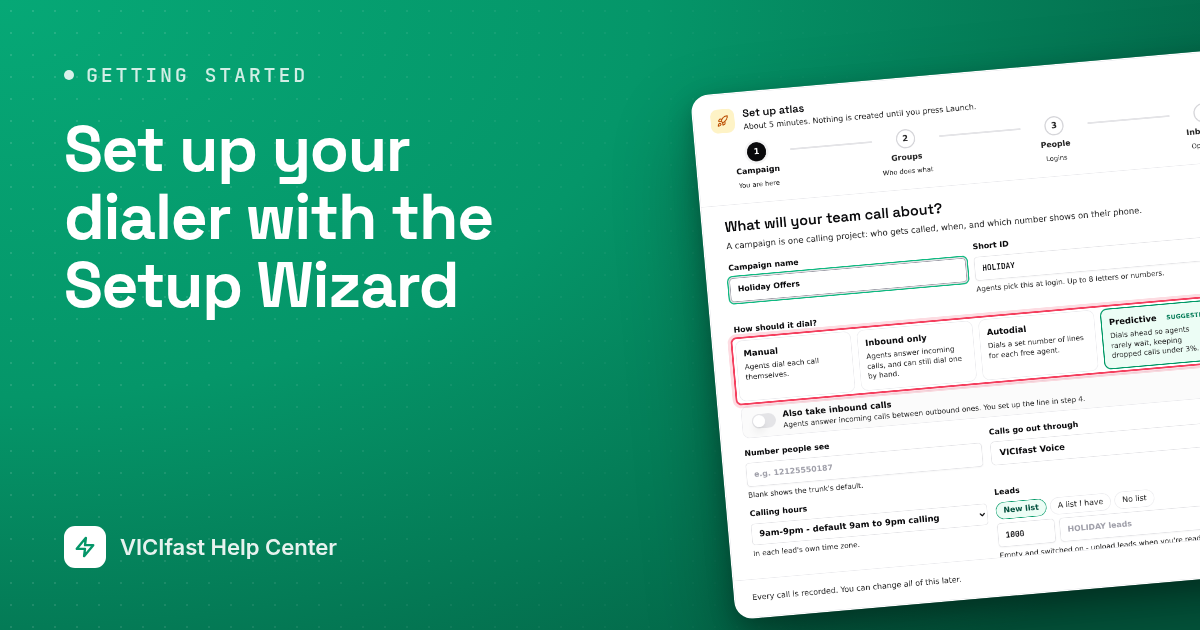
- Across the top you see the steps Campaign, Groups, People, Inbound and Launch. On the right, Your call center fills in as you go.
Nothing is created until you press Launch at the end, so you can look around safely.

Step 2: Describe your campaign
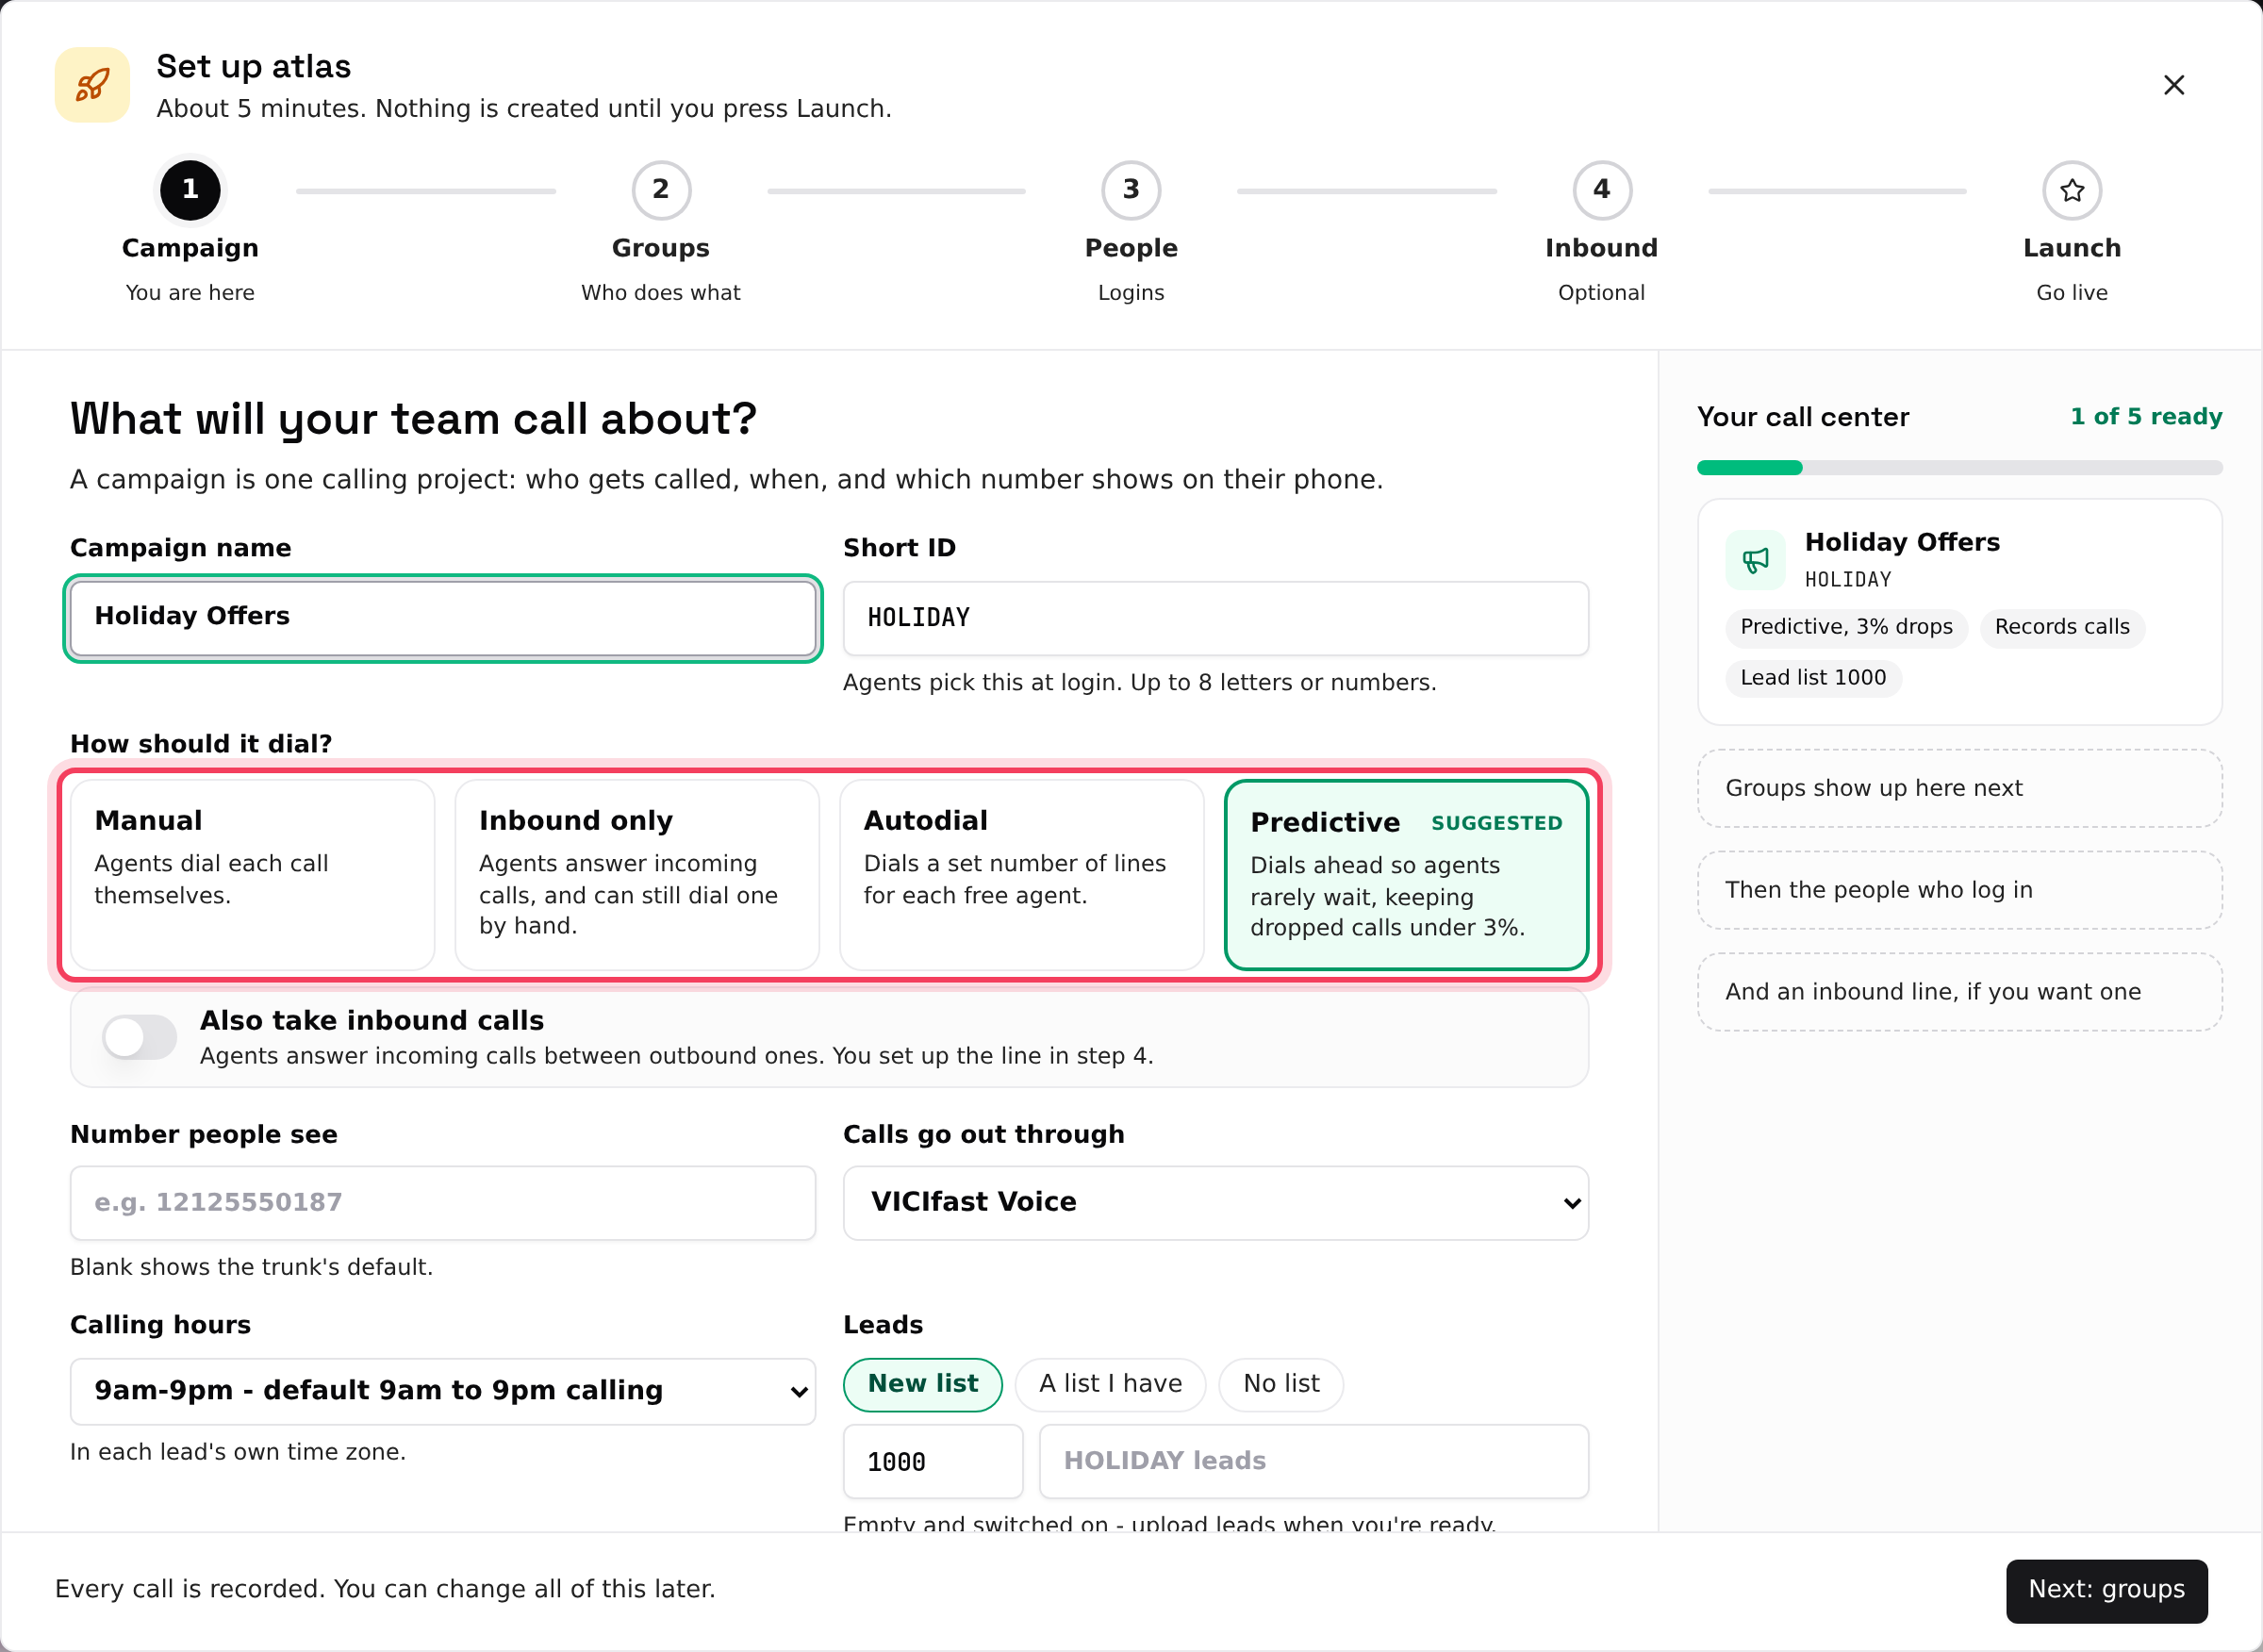
The first screen asks What will your team call about? A campaign is one calling project: who gets called, when, and which number shows on their phone.
- Type a Campaign name, for example Holiday Offers. The Short ID fills itself in (HOLIDAY). Agents pick this ID when they log in.
- Under How should it dial?, pick Manual, Inbound only, Autodial or Predictive (marked Suggested: it dials ahead so agents rarely wait, keeping dropped calls under 3%).
- Switch on Also take inbound calls if agents should answer incoming calls between outbound ones.
- Under Number people see, type the caller ID. Blank uses the phone line's default. Rotate numbers from a CID group uses a pool of numbers instead, if you have one.
- Under Calls go out through, pick your phone line, and pick the Calling hours (for example 9am-9pm, in each lead's own time zone).
- Under Leads, choose New list (empty and switched on), A list I have (moves that list here, leads and all) or No list.
- Click Next: groups.
Step 3: Set up your groups
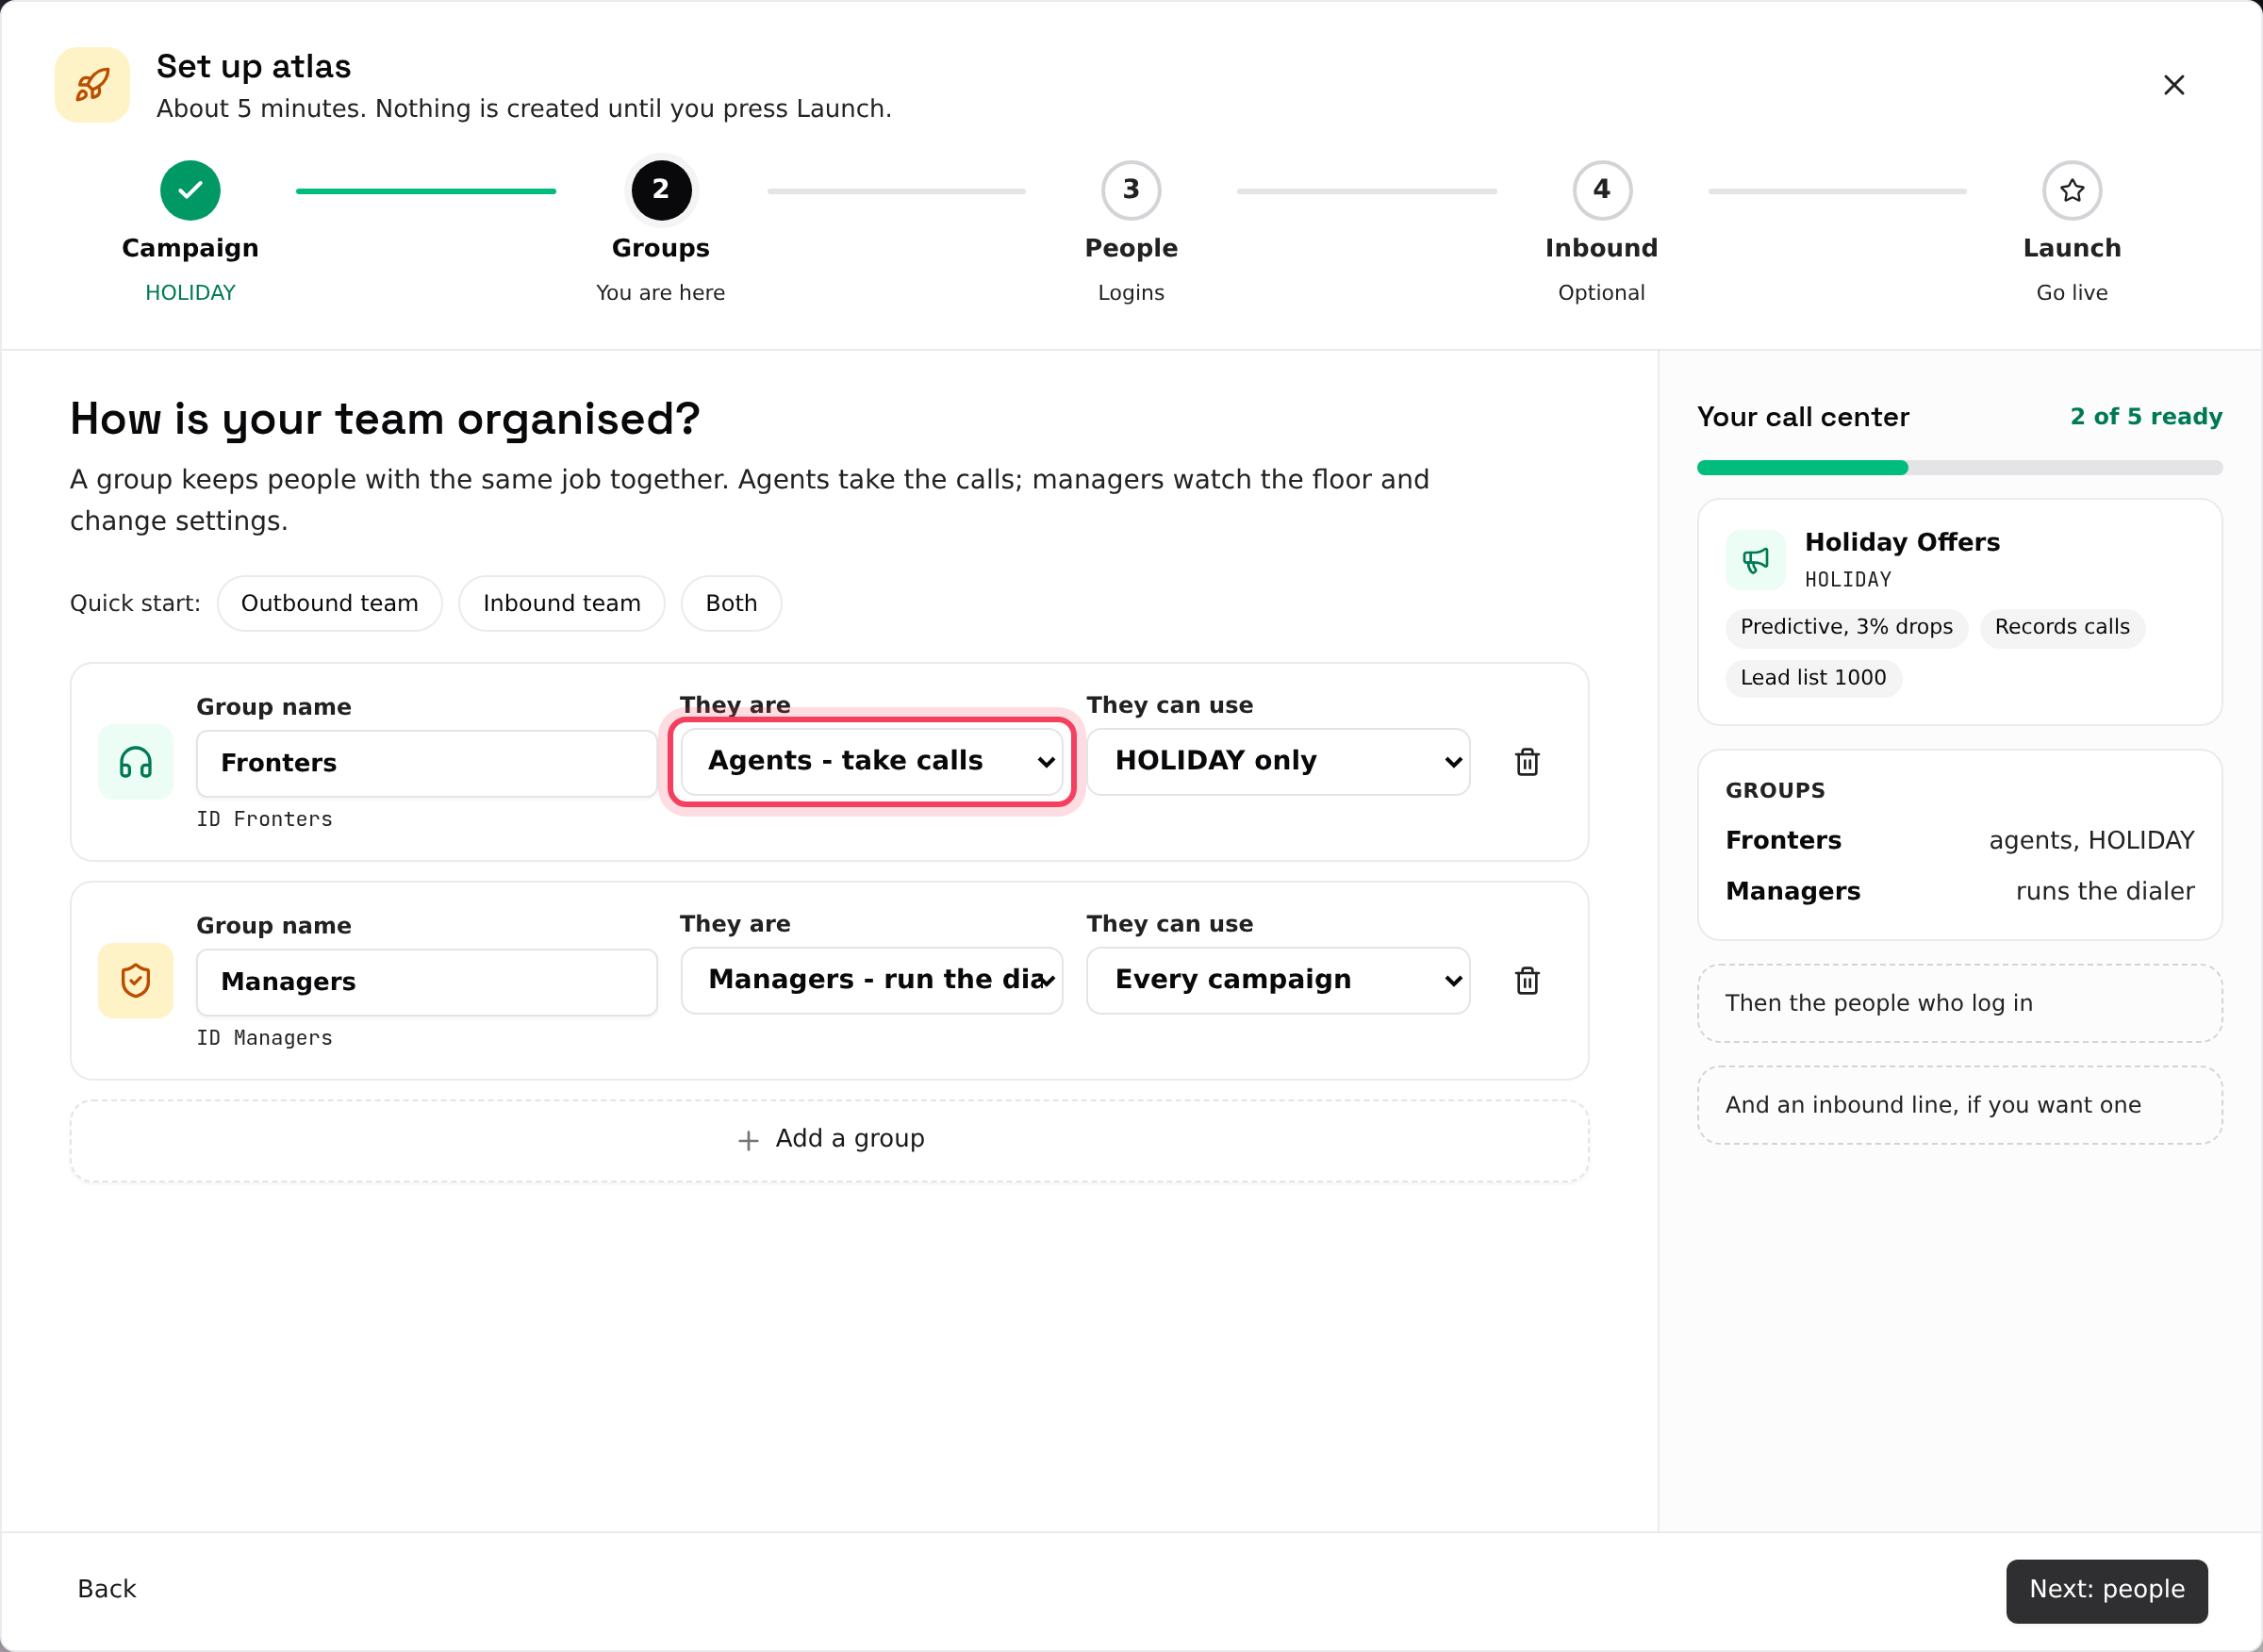
How is your team organised? A group keeps people with the same job together.
- Use a Quick start button: Outbound team, Inbound team or Both. Or edit the groups shown.
- For each group, set the Group name, what They are (Agents - take calls, Supervisors - see reports or Managers - run the dialer) and what They can use (this campaign only, or Every campaign).
- Click Add a group for more, or the bin icon to remove one.
- Click Next: people.
Step 4: Add your people
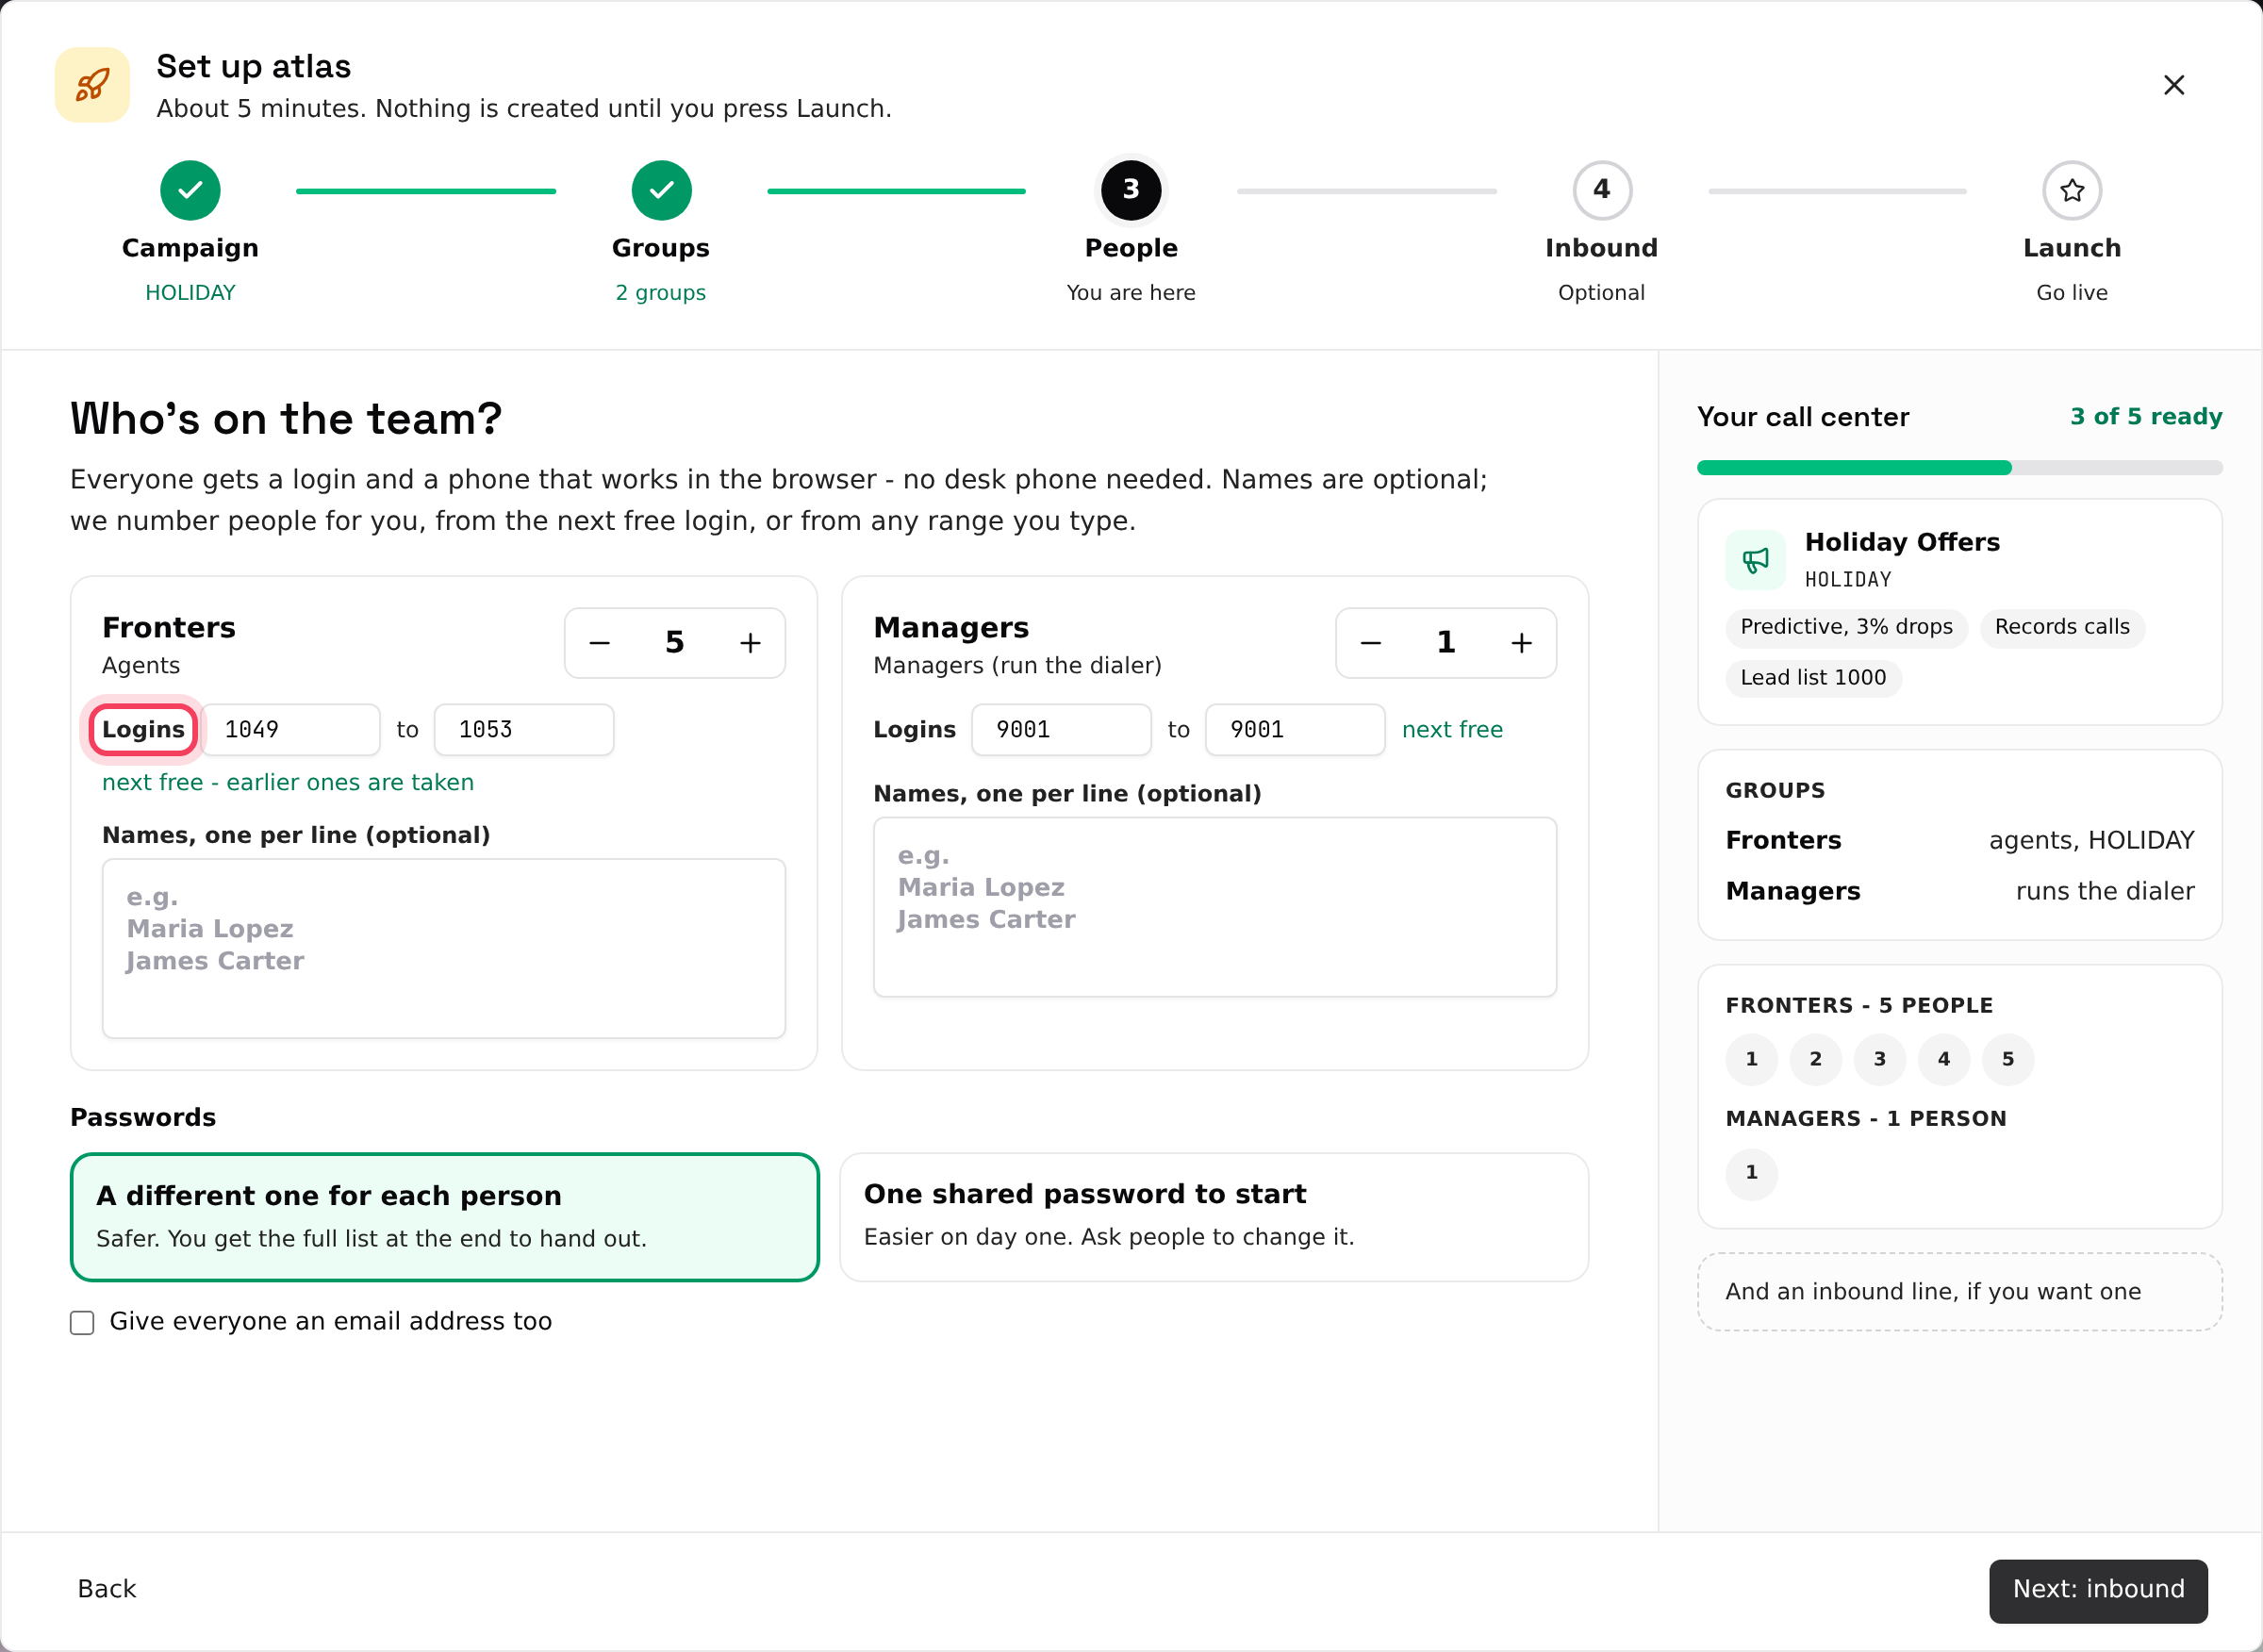
Who's on the team? Everyone gets a login and a phone that works in the browser.
- Use the minus and plus buttons to set how many people are in each group (up to 200 logins in one run).
- Under Logins, the wizard picks the next free numbers (next free). To use your own range, type the first and last login. If some are taken, click Next free from ….
- Optionally type Names, one per line (optional). People without a name are numbered.
- Under Passwords, choose A different one for each person or One shared password to start (at least 8 letters and numbers).
- To put an email on each login, tick Give everyone an email address too and set the Email pattern, for example {user}@yourcompany.com.
- Click Next: inbound.
Step 5: Add an inbound line (optional)
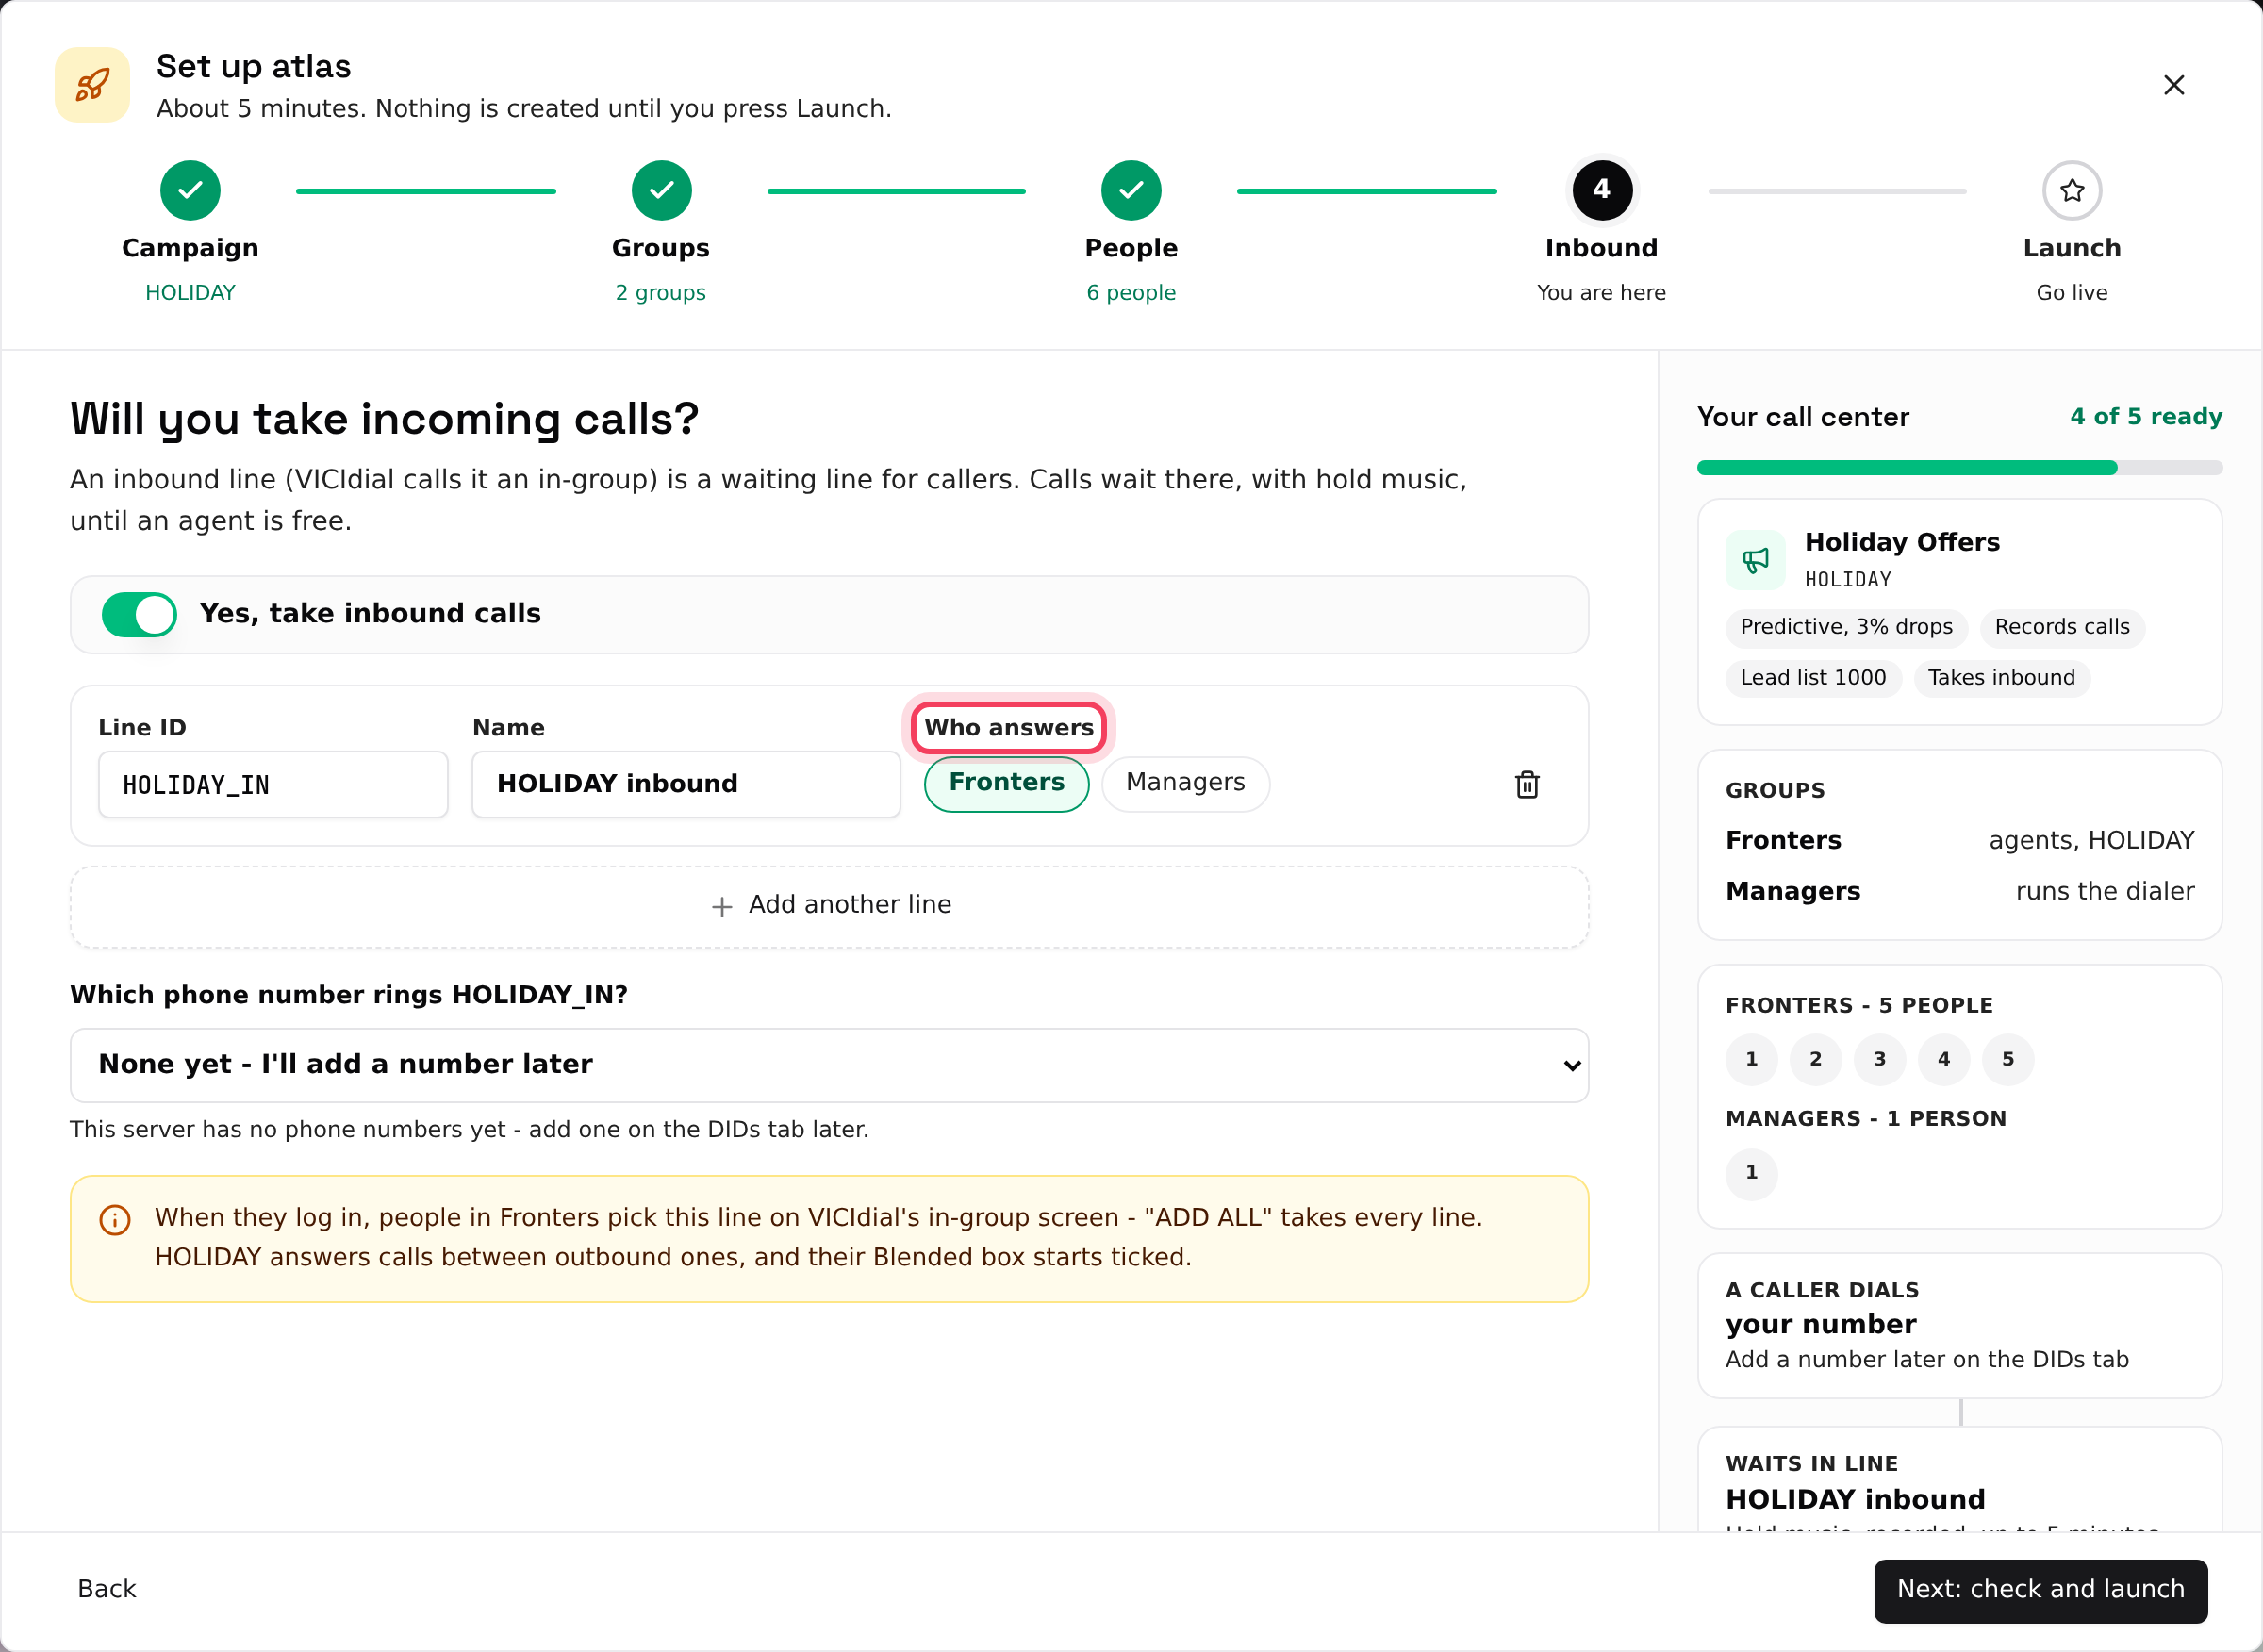
Will you take incoming calls? An inbound line is a queue (in-group) where callers wait, with hold music, until an agent is free. Skip this step if your team only calls out.
- Switch on Yes, take inbound calls. It is already on for Inbound only campaigns.
- For each line, set the Line ID, a Name, and Who answers (click the groups whose people take these calls). Add another line adds more.
- Under Which phone number rings …?, pick one of your numbers, or None yet - I'll add a number later.
- Click Next: check and launch.
When agents log in, they pick their lines on VICIdial's in-group screen. ADD ALL takes every line.
Step 6: Check and launch
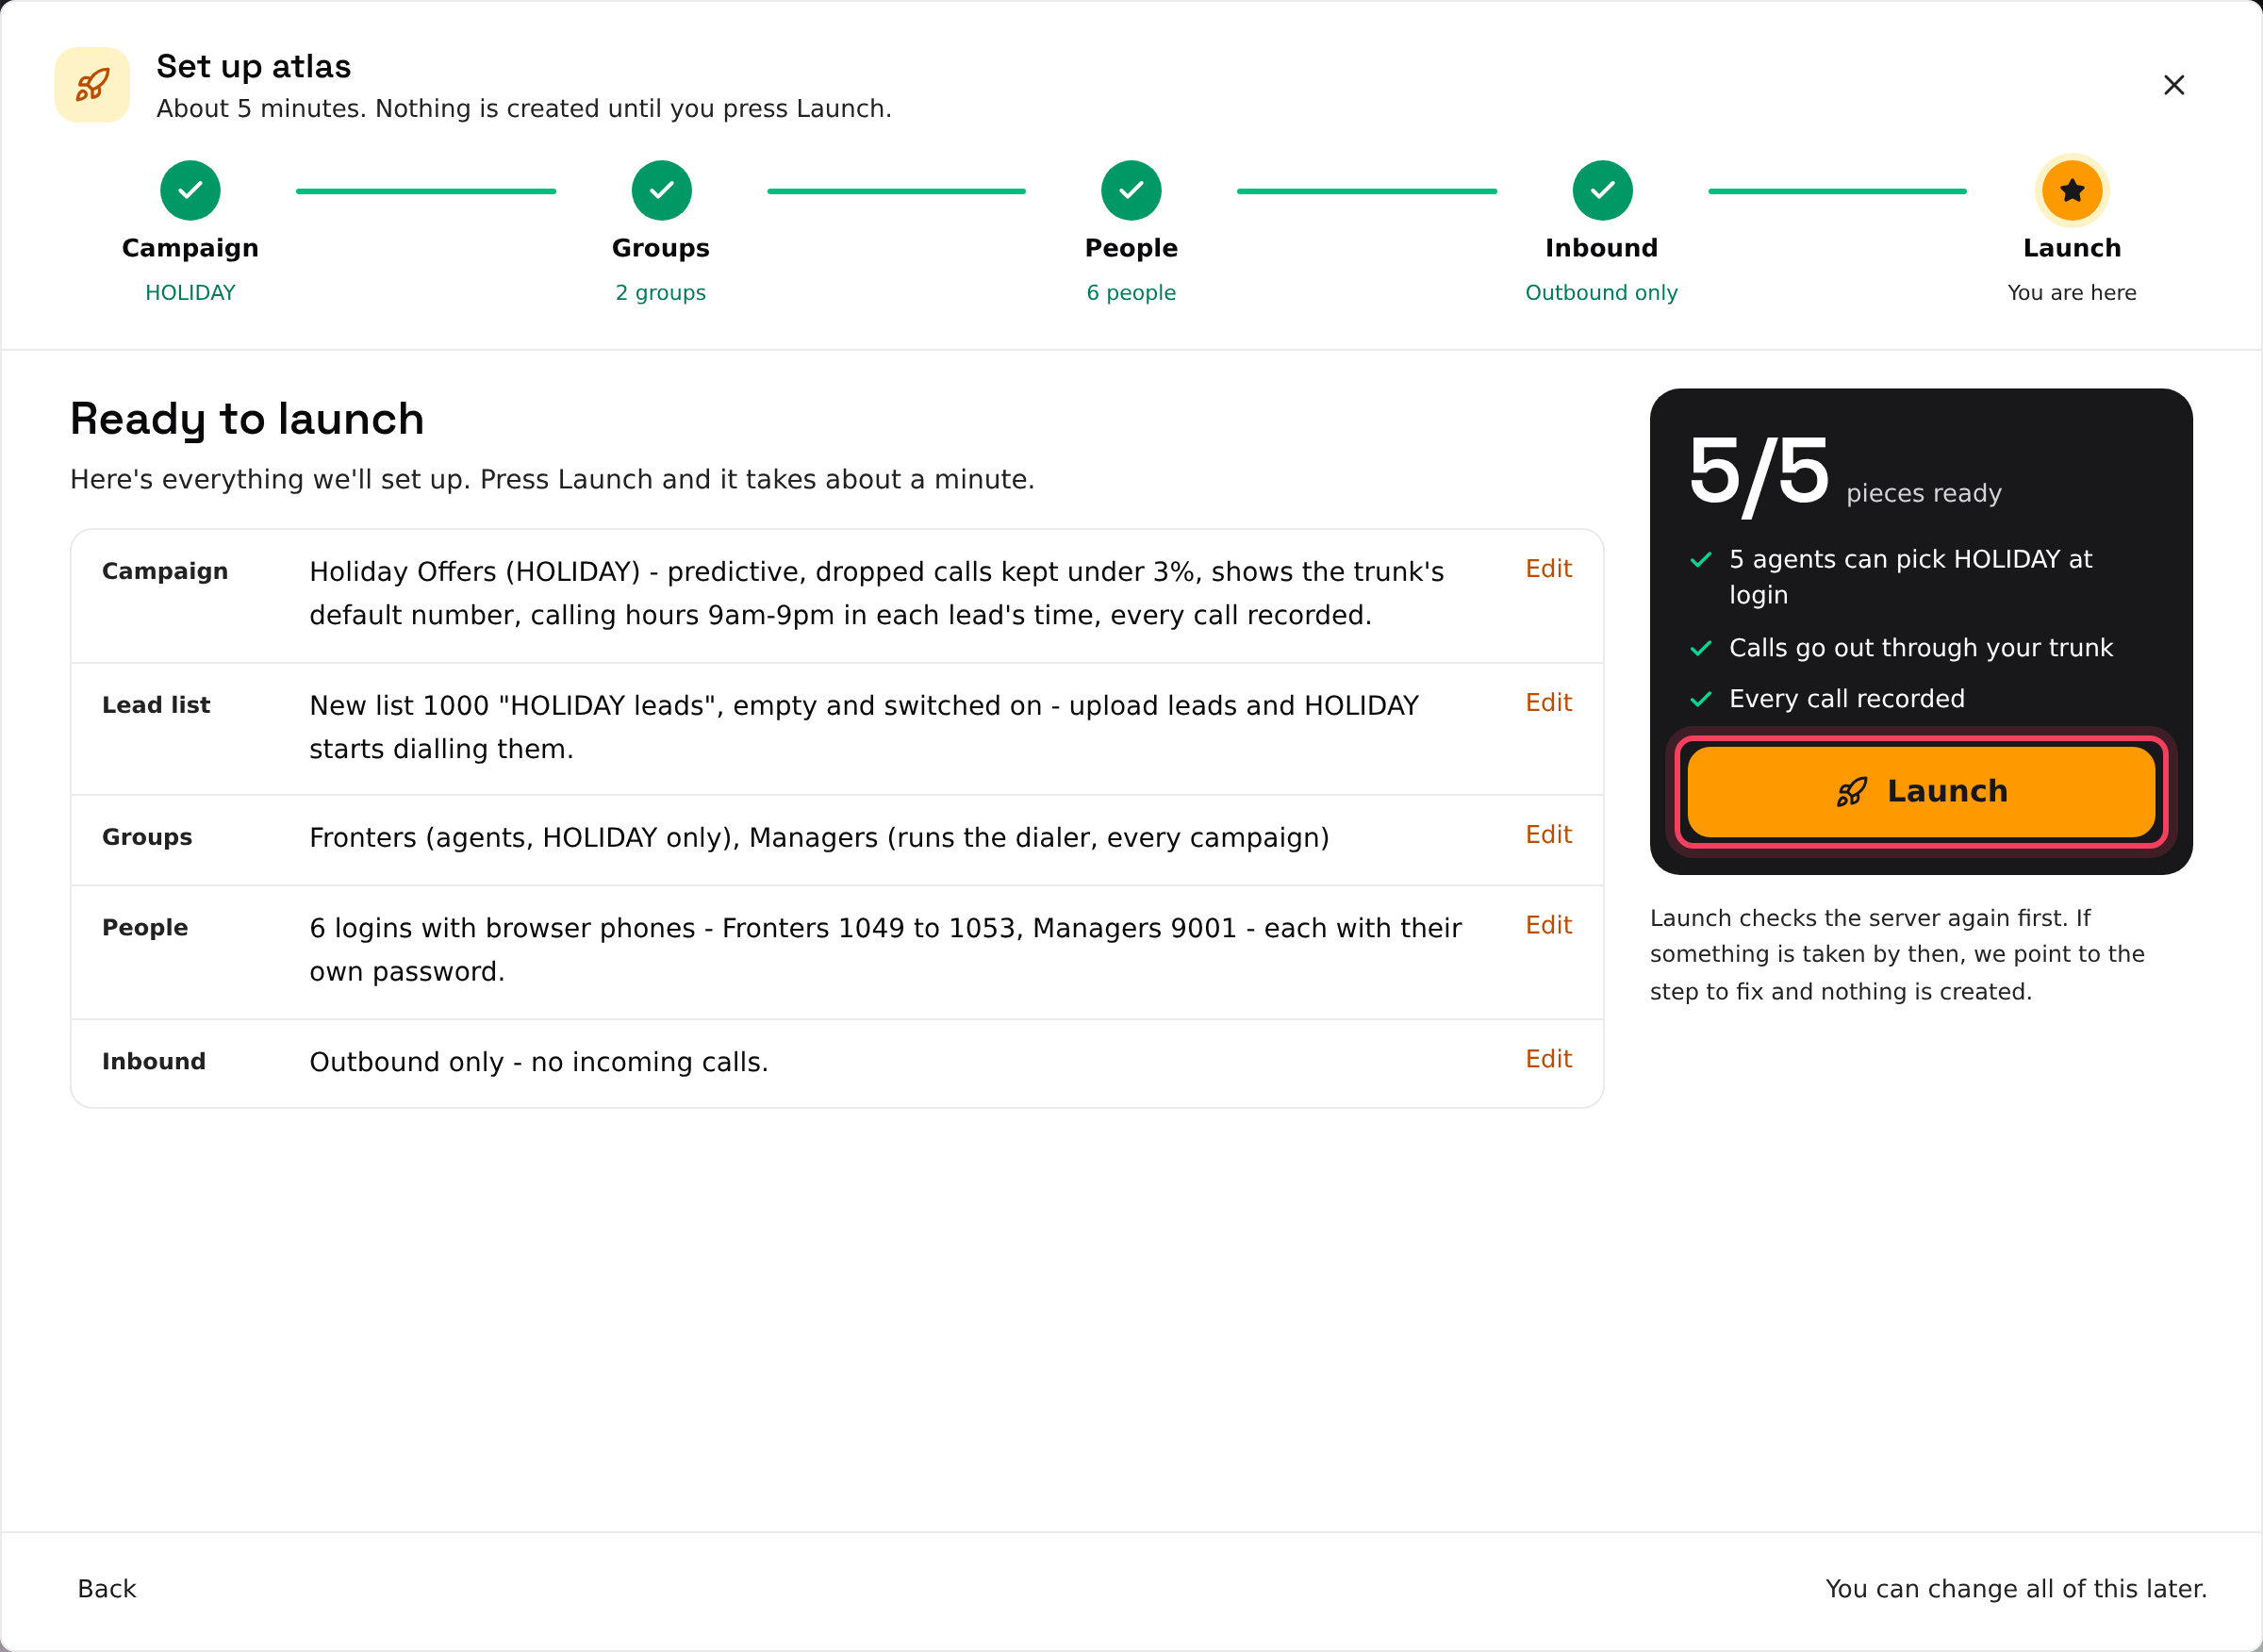
- Ready to launch lists everything that will be made. Click Edit on a row to change it.
- The dark panel counts the pieces that are ready and warns about gaps, such as no phone line. If A few things to fix first appears, click the Fix link beside each problem.
- Click Launch. The wizard checks the server again first; if something clashes, it names the step to fix and creates nothing.
Step 7: Save the logins
- Building your call center ticks off each piece. Keep the window open until it finishes. Logins appear under Logins made so far as they are made.
- When it finishes you see Your call center is ready, or Nearly there if something needs your attention.
- Click Download CSV or Copy all to save every login and password.
- Read How your team logs in and Next up, then click the close button.
If something goes wrong
Frequently asked
- The screen reads Setup stopped and names the step that failed; everything before it stays done. Click Try again to carry on from there. If you close the wizard, reopening it offers Carry on or Start over (this browser keeps the run for 14 days).
- Some of those login numbers already exist. Click Next free from … or type a different first login.
- It had no working phone line to call out through. Pick a line on the campaign's Dialing tab, then switch the campaign on in the Campaigns tab.
- Someone made a campaign, group or login while the wizard was open. Fix the items it lists and press Launch again.
- They can't be shown again. Reset them on the Users tab, or use Download or email logins under Access VICIdial Server.
- Only the account owner can run the wizard. Ask them to launch it.