Add agents and user groups
Create a login for each person who takes calls, one at a time or up to 100 at once, and put them into teams that decide which queues they answer.
Your agents · 5 min read
Every person who takes calls needs an agent login. This guide shows you how to add one agent or a whole team, keep their passwords, and group them into teams (VICIdial calls these user groups). It takes about five minutes.
What you need
- You are the account owner, or a team member with the Admin or Operator role. Deleting an agent needs the owner or an Admin.
- A running server. Each agent you add here also gets a phone built into the agent screen, so there is nothing to install.
Step 1: Open the Users tab
- In the sidebar, click My Servers, then click your server.
- Click the Users tab.
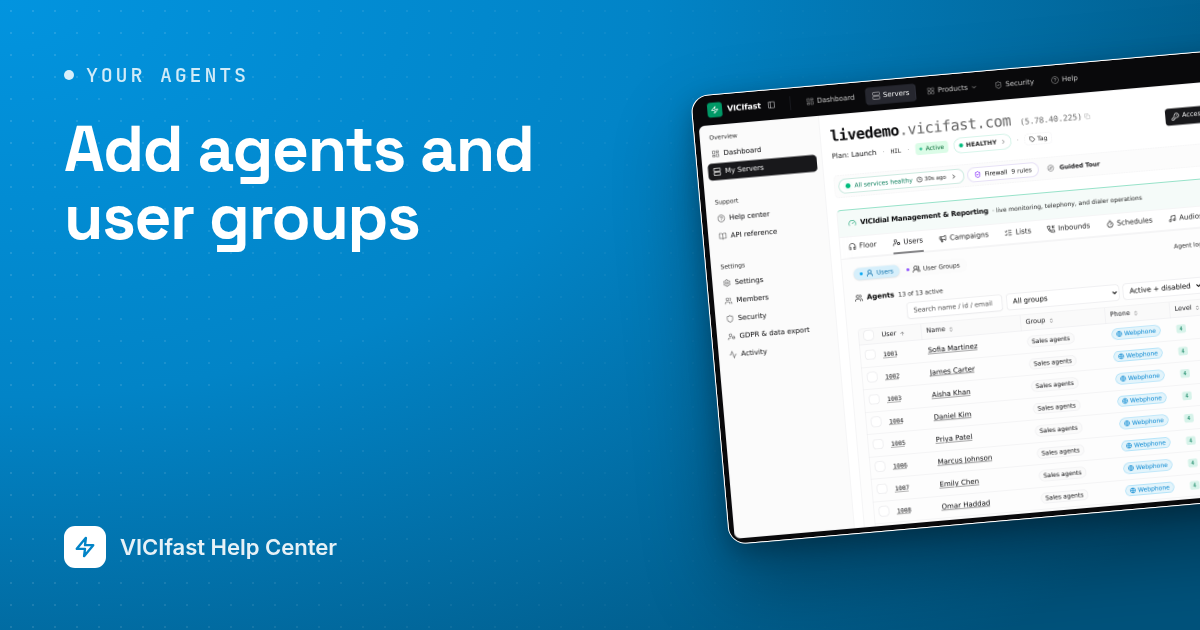
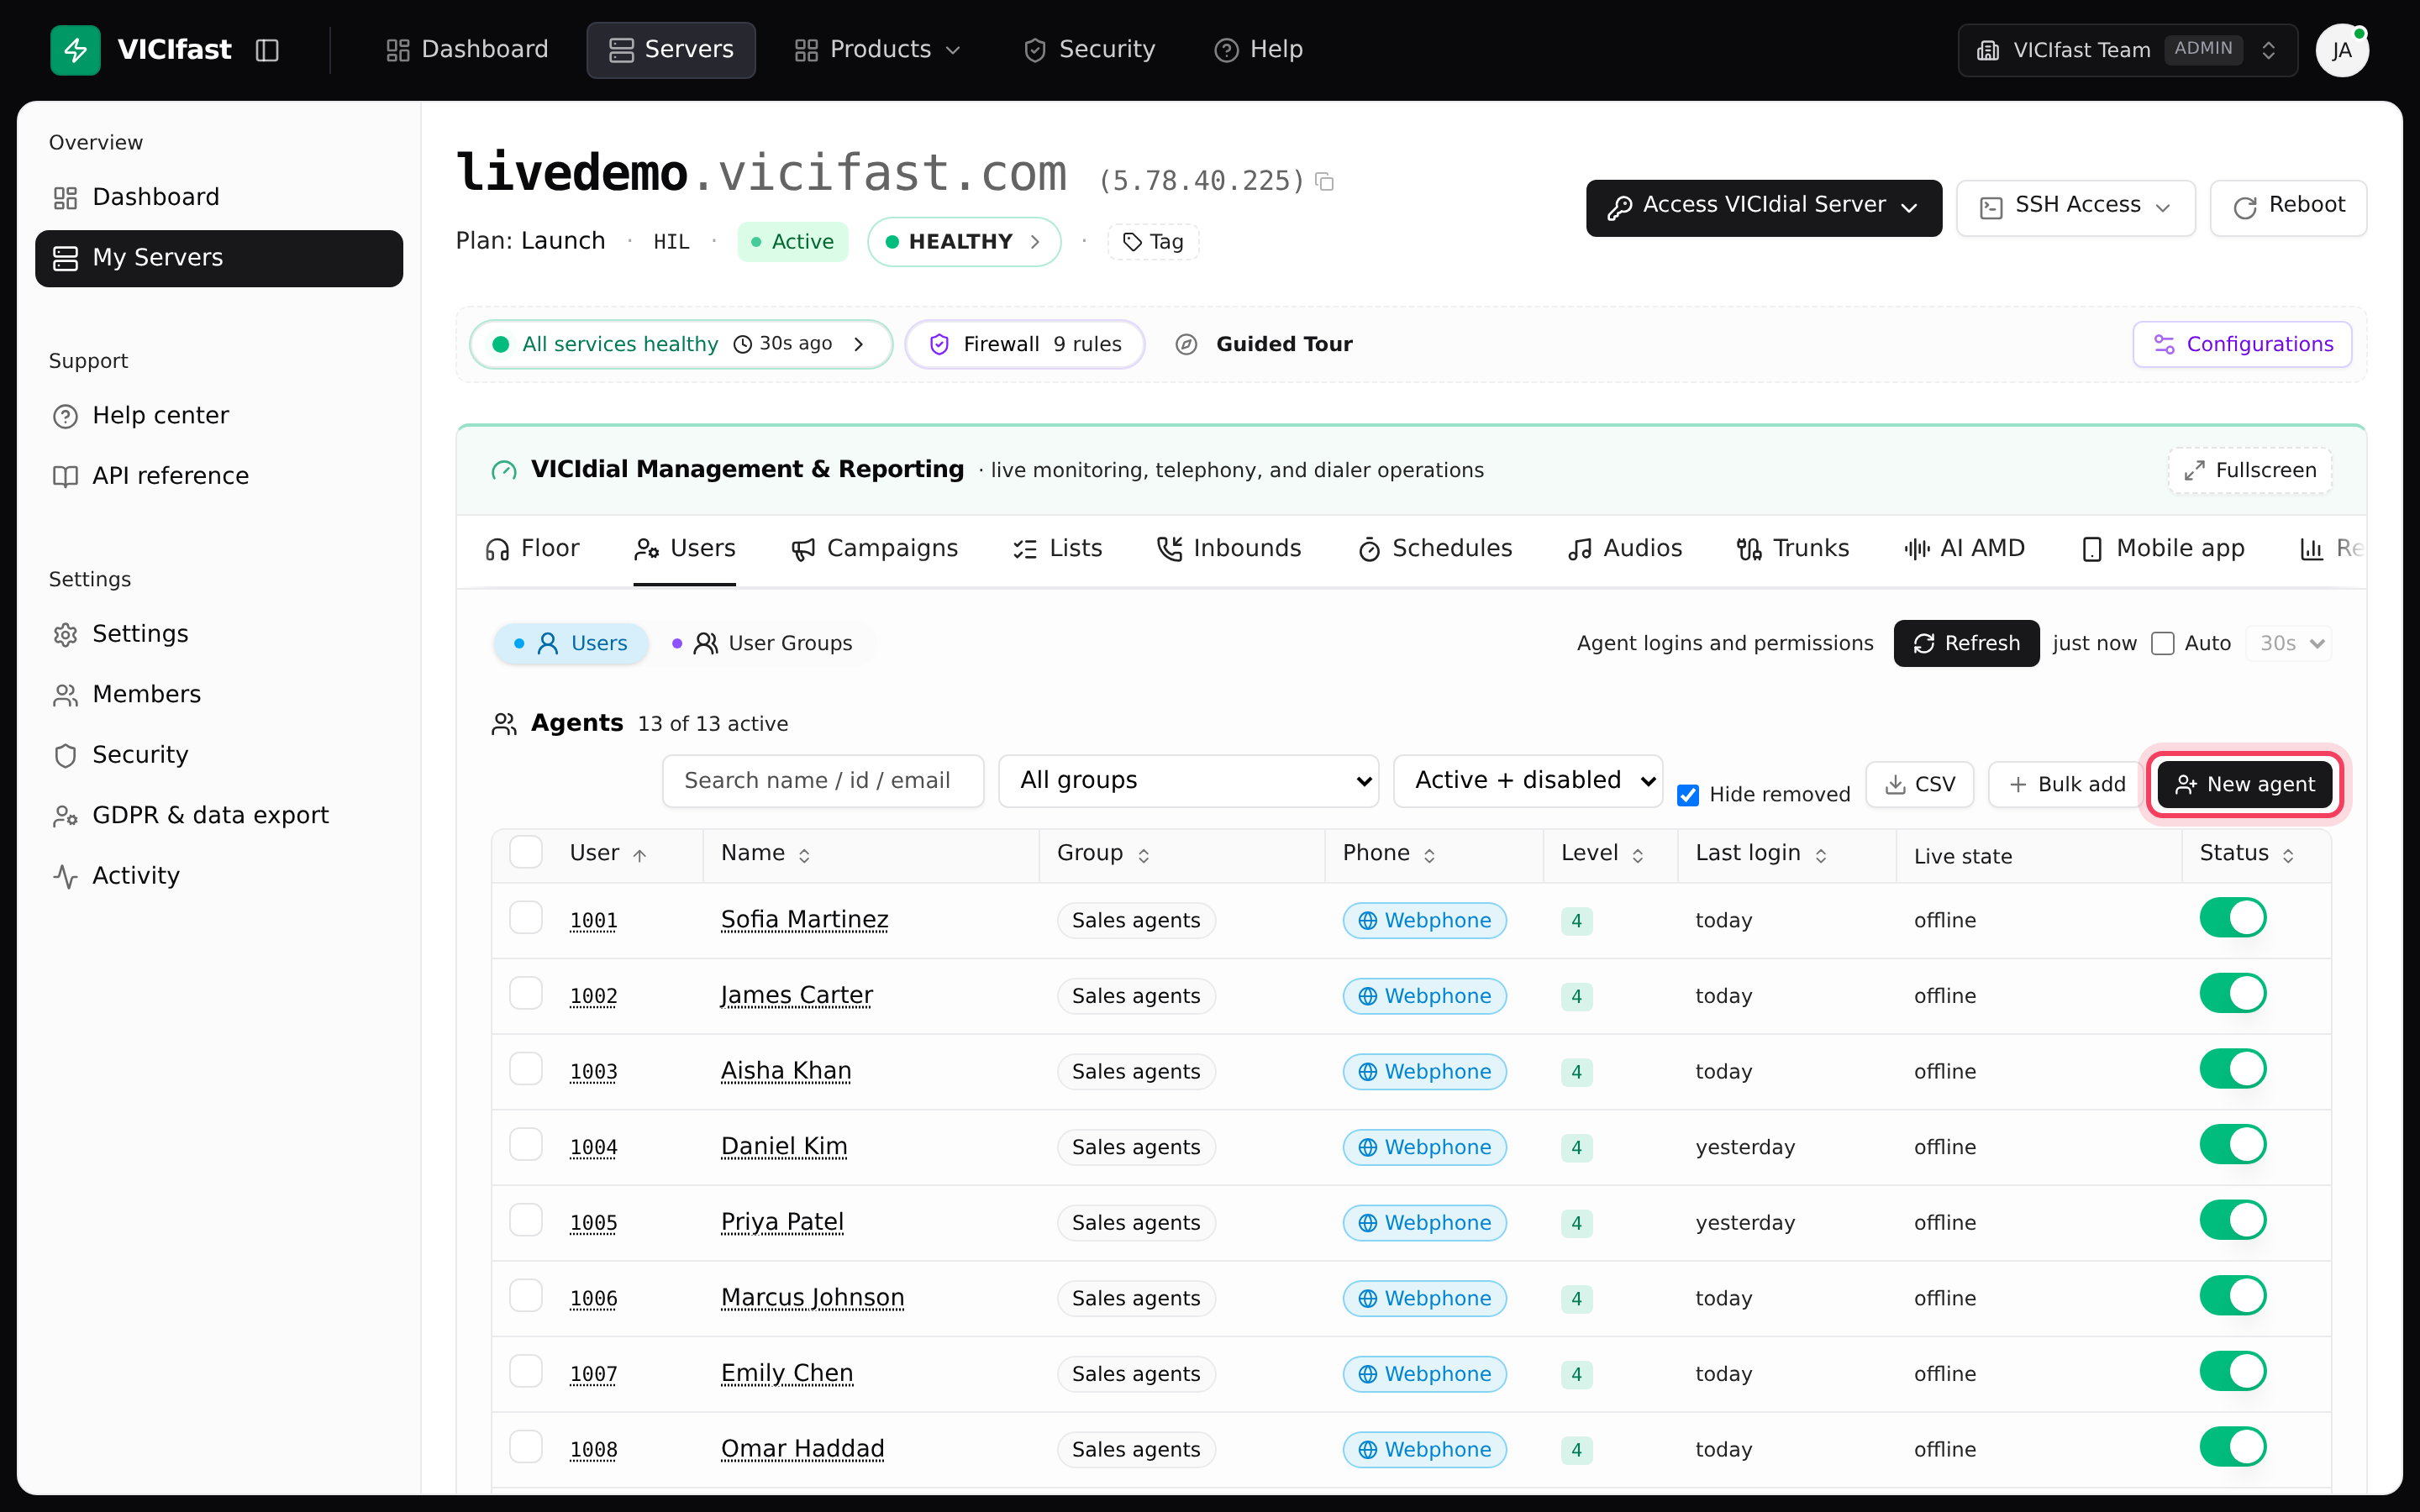
- Two buttons sit at the top: Users (your agents) and User Groups (your teams). Users is open first.
The Agents list shows each login with its group, Phone, Level, Last login, Live state (on a call, ready, paused) and a Status switch.
Step 2: Create a user group
Make your teams first, so you can drop each new agent straight into one. Most call centers start with one group for agents, one for closers and one for supervisors.
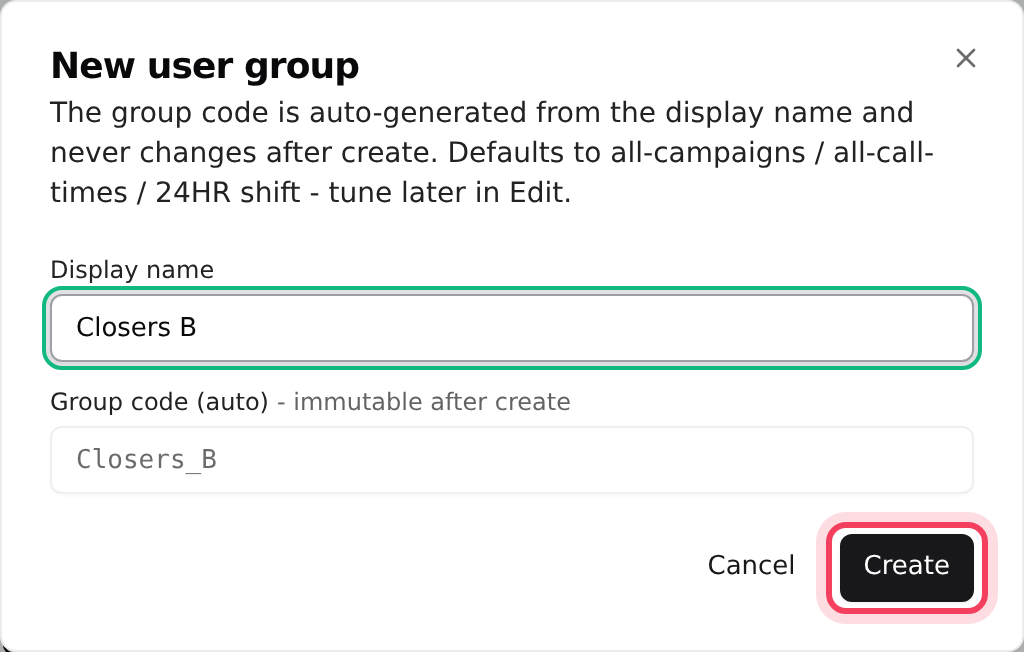
- Click User Groups, then click New group.
- Type a Display name, for example "Closers". The Group code (auto) is made from the name and can't be changed later.
- Click Create.
A new group may work every campaign, at any time of day. You can change who is in it at any time.
Step 3: Add one agent
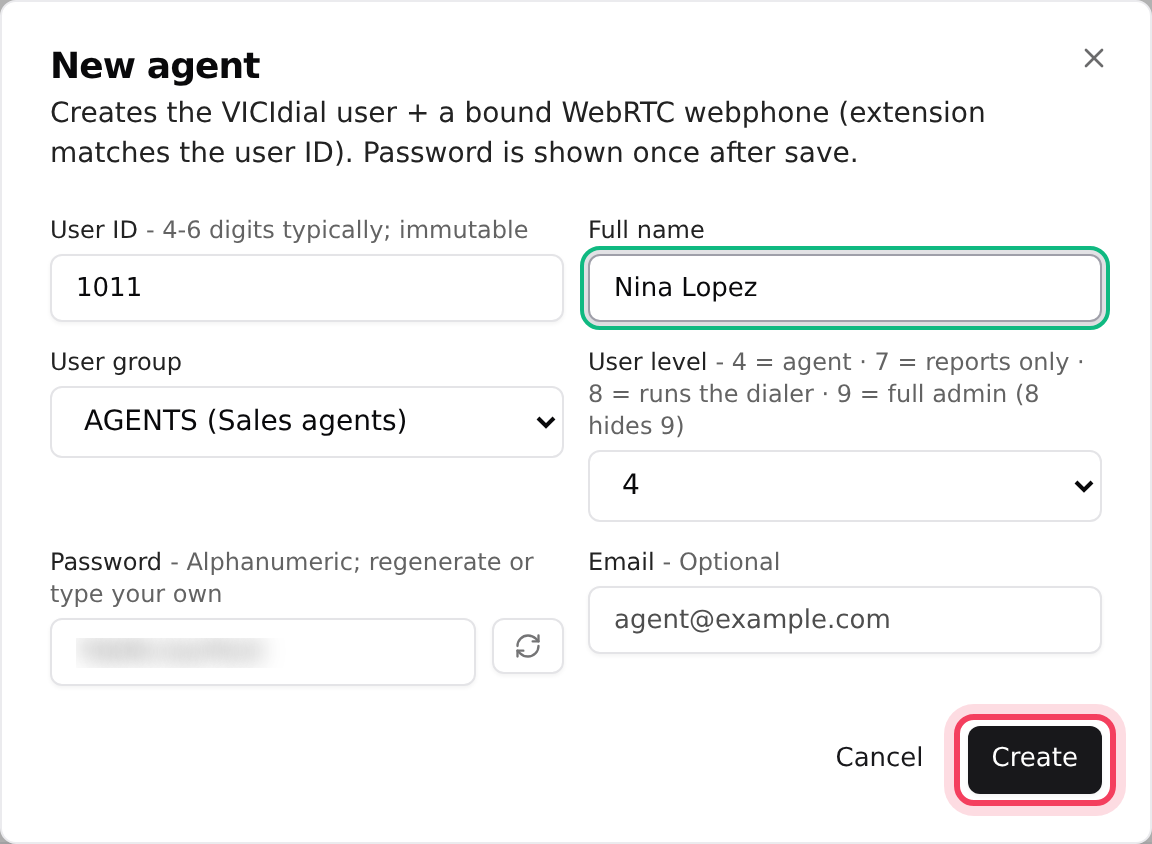
- Click Users, then click New agent.
- User ID: the number the agent types to log in, for example 1011. Use 2 to 20 letters or numbers. You can't change it later, so pick a pattern (for example 1001, 1002 and so on) and stick to it.
- Full name: the person's name, as it should appear on reports.
- User group: pick the team.
- User level: leave it on 4 for an agent. 7 is reports only, 8 runs the dialer and 9 is a full admin. Only the owner or an Admin can create level 8 or 9.
- Password: a random one is already filled in. Click the arrow button for a new one, or type your own: letters and numbers only, at least 6 characters.
- Email is optional. Click Create.
The agent and their webphone are ready at once. A Credentials - shown once window opens with the login. Copy it before you close it (see Step 5).
Step 4: Add many agents at once
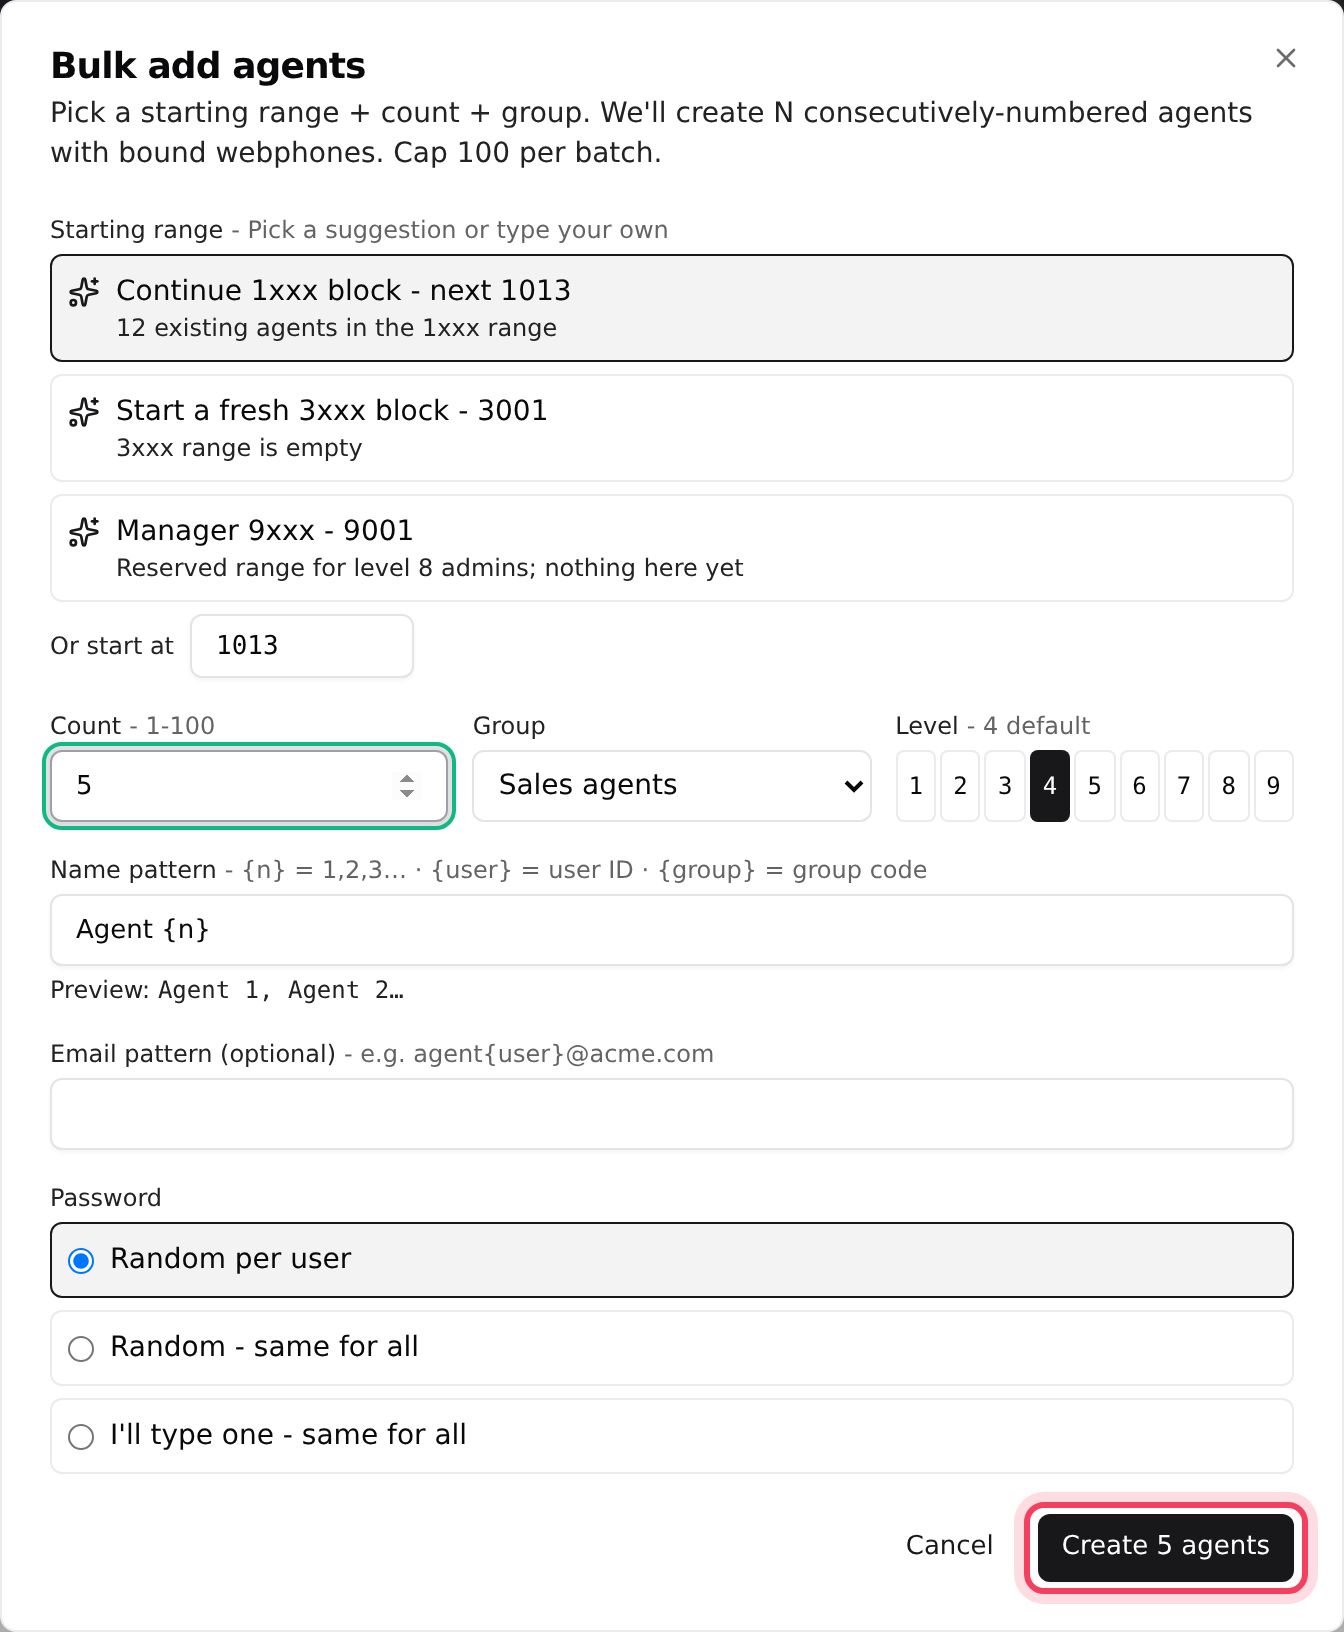
- Click Bulk add.
- Under Starting range, click one of the suggestions (they continue your numbering) or type a number in Or start at.
- Set Count (1 to 100), the Group and the Level.
- Name pattern: "Agent {n}" gives Agent 1, Agent 2 and so on. {user} puts in the user ID and {group} the group code. Check the Preview line under it. You can rename people later.
- Password: pick Random per user, Random - same for all, or I'll type one - same for all (letters and numbers, at least 8).
- Click Create 5 agents (the button shows your count).
If a user ID in the range already exists, a red note lists it. Change the start number or the count.
Step 5: Save the passwords
After every create or password reset, the Credentials - shown once window lists each user ID, name and password.
- Click Copy CSV or Download CSV.
- Click I've copied them.
Step 6: Choose the queues a team answers
- Click User Groups.
- Click the pencil (Edit) on the group's row.
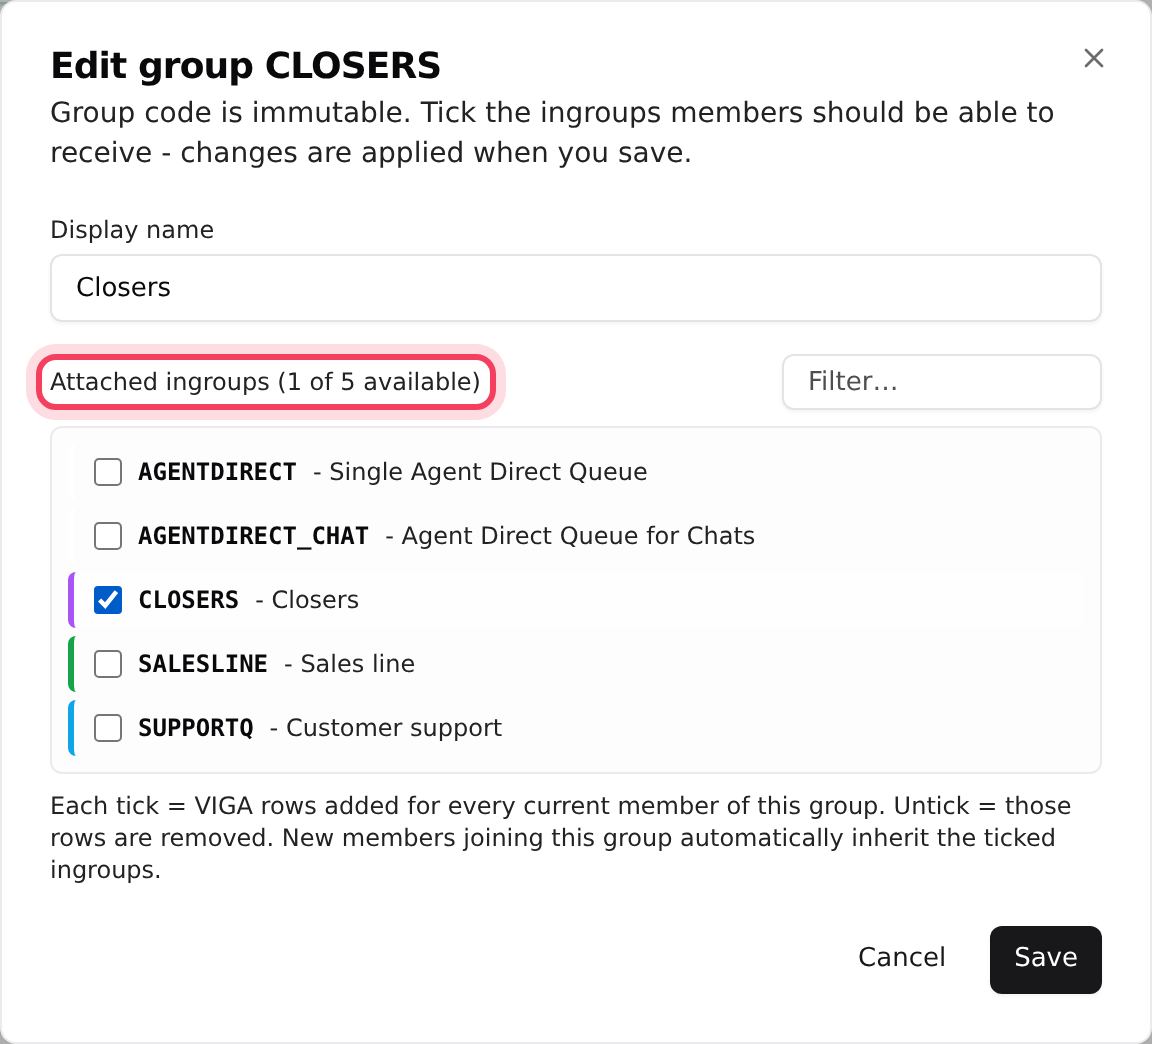
- Under Attached ingroups, tick each queue (in-group) this team should answer. Use Filter… if the list is long.
- Click Save.
Everyone in the group gets the ticked queues, and people who join later get them too. Agents still pick which queues to take when they sign in, from the queues their campaign offers.
Change, switch off or remove an agent
- Edit (pencil): change the name, group, level or email, and switch hot keys on or off. The user ID and phone extension never change.
- Reset password (circular arrows): makes a new password and shows it once.
- Status switch: off blocks the login and logs the agent out. Nothing is deleted, so this is the best choice for someone on leave.
- Tick several rows and a bar appears with Reset passwords, Copy login details, Move to group, Enable, Disable, To webphone, To SIP, Set level and Delete.
- Delete agent + webphone (bin icon): type the user ID to confirm. This removes the login and its phone for good.
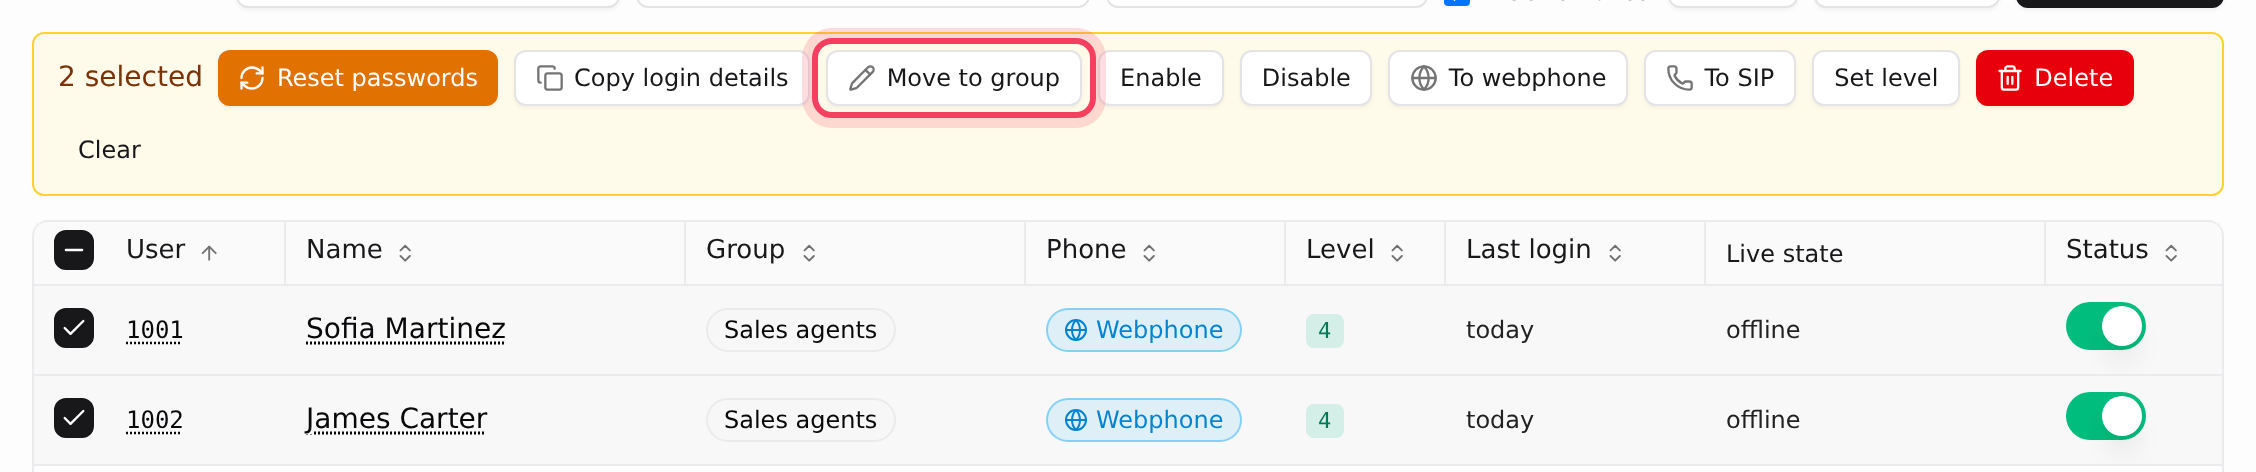
Desk phone or softphone instead? Tick the agents and click To SIP. Each one gets a SIP password to enter on their device, shown once right after. To webphone switches them back. Agents who are logged in have to log in again.
If something goes wrong
Frequently asked
- Click Reset password on the agent's row to make a new one. Or download the logins file from Access VICIdial Server, which lists every agent's current password.
- Some numbers in your range are taken. Pick another suggestion under Starting range, change the number in Or start at, or lower the Count.
- A few names belong to the system, for example the admin and API logins. Pick a different user ID.
- The bin button stays grey while the group has members. Its hint tells you how many. Move them with Move to group first, then delete the group.
- Only the account owner or a team member with the Admin role can delete agents. Ask them, or switch the agent off with the Status switch instead.
- This happens after moving from another VICIdial server. Click Fix Autologin once. Agents who are logged in are not cut off.