Custom lead fields
Add your own fields to a list so agents can see and fill in extra details, reuse them on other lists, and load them from a CSV.
Campaigns & leads · 3 min read

Custom fields store information your leads need beyond name and phone: a policy number, current provider, preferred coverage. You build them per list, and agents see them as a form for leads in that list. This guide shows how to add them, reuse them on other lists, and fill them from a CSV.
What you need
- You are the account owner, or a team member allowed to make changes on the Lists tab.
- A list. Fields belong to one list, so build them before you import leads into it.
Step 1: Open the list’s custom fields
- Open your server from My Servers and click the Lists tab.
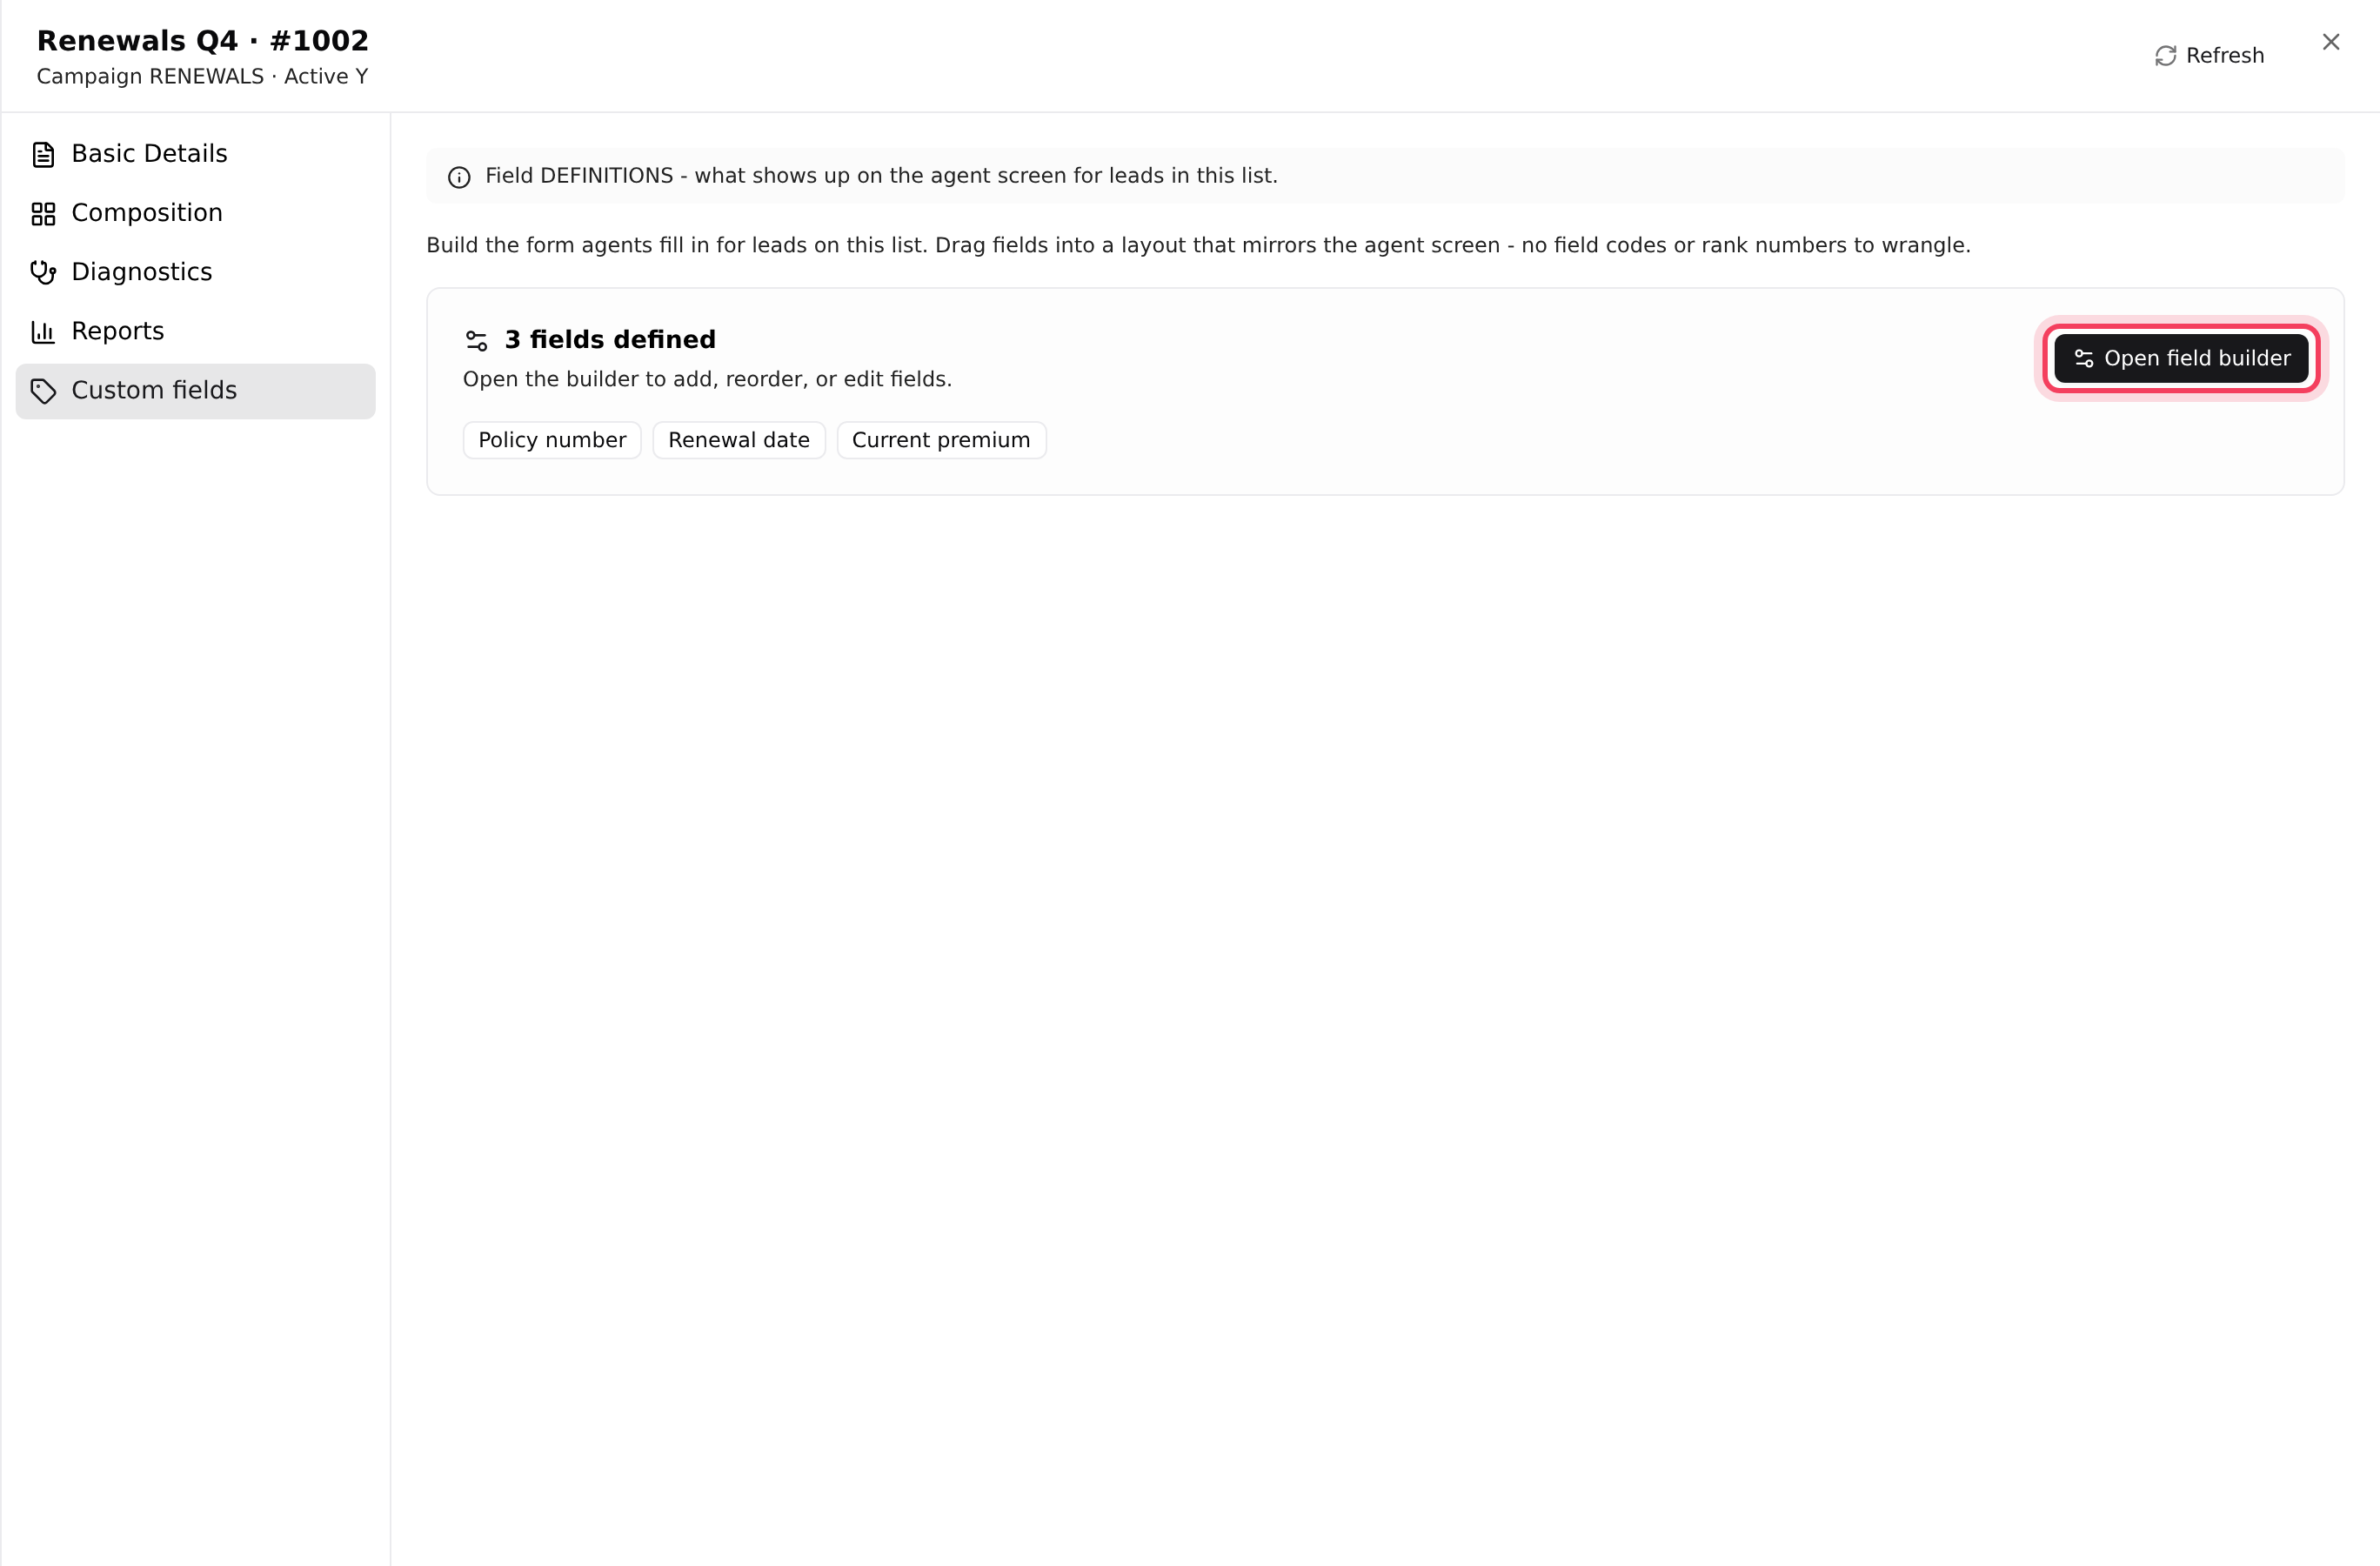
- Click the pencil (Edit list) on your list, then the Custom fields tab. If the list already has fields, you can also click the number in its Custom fields column.
- Click Open field builder.
Step 2: Add fields
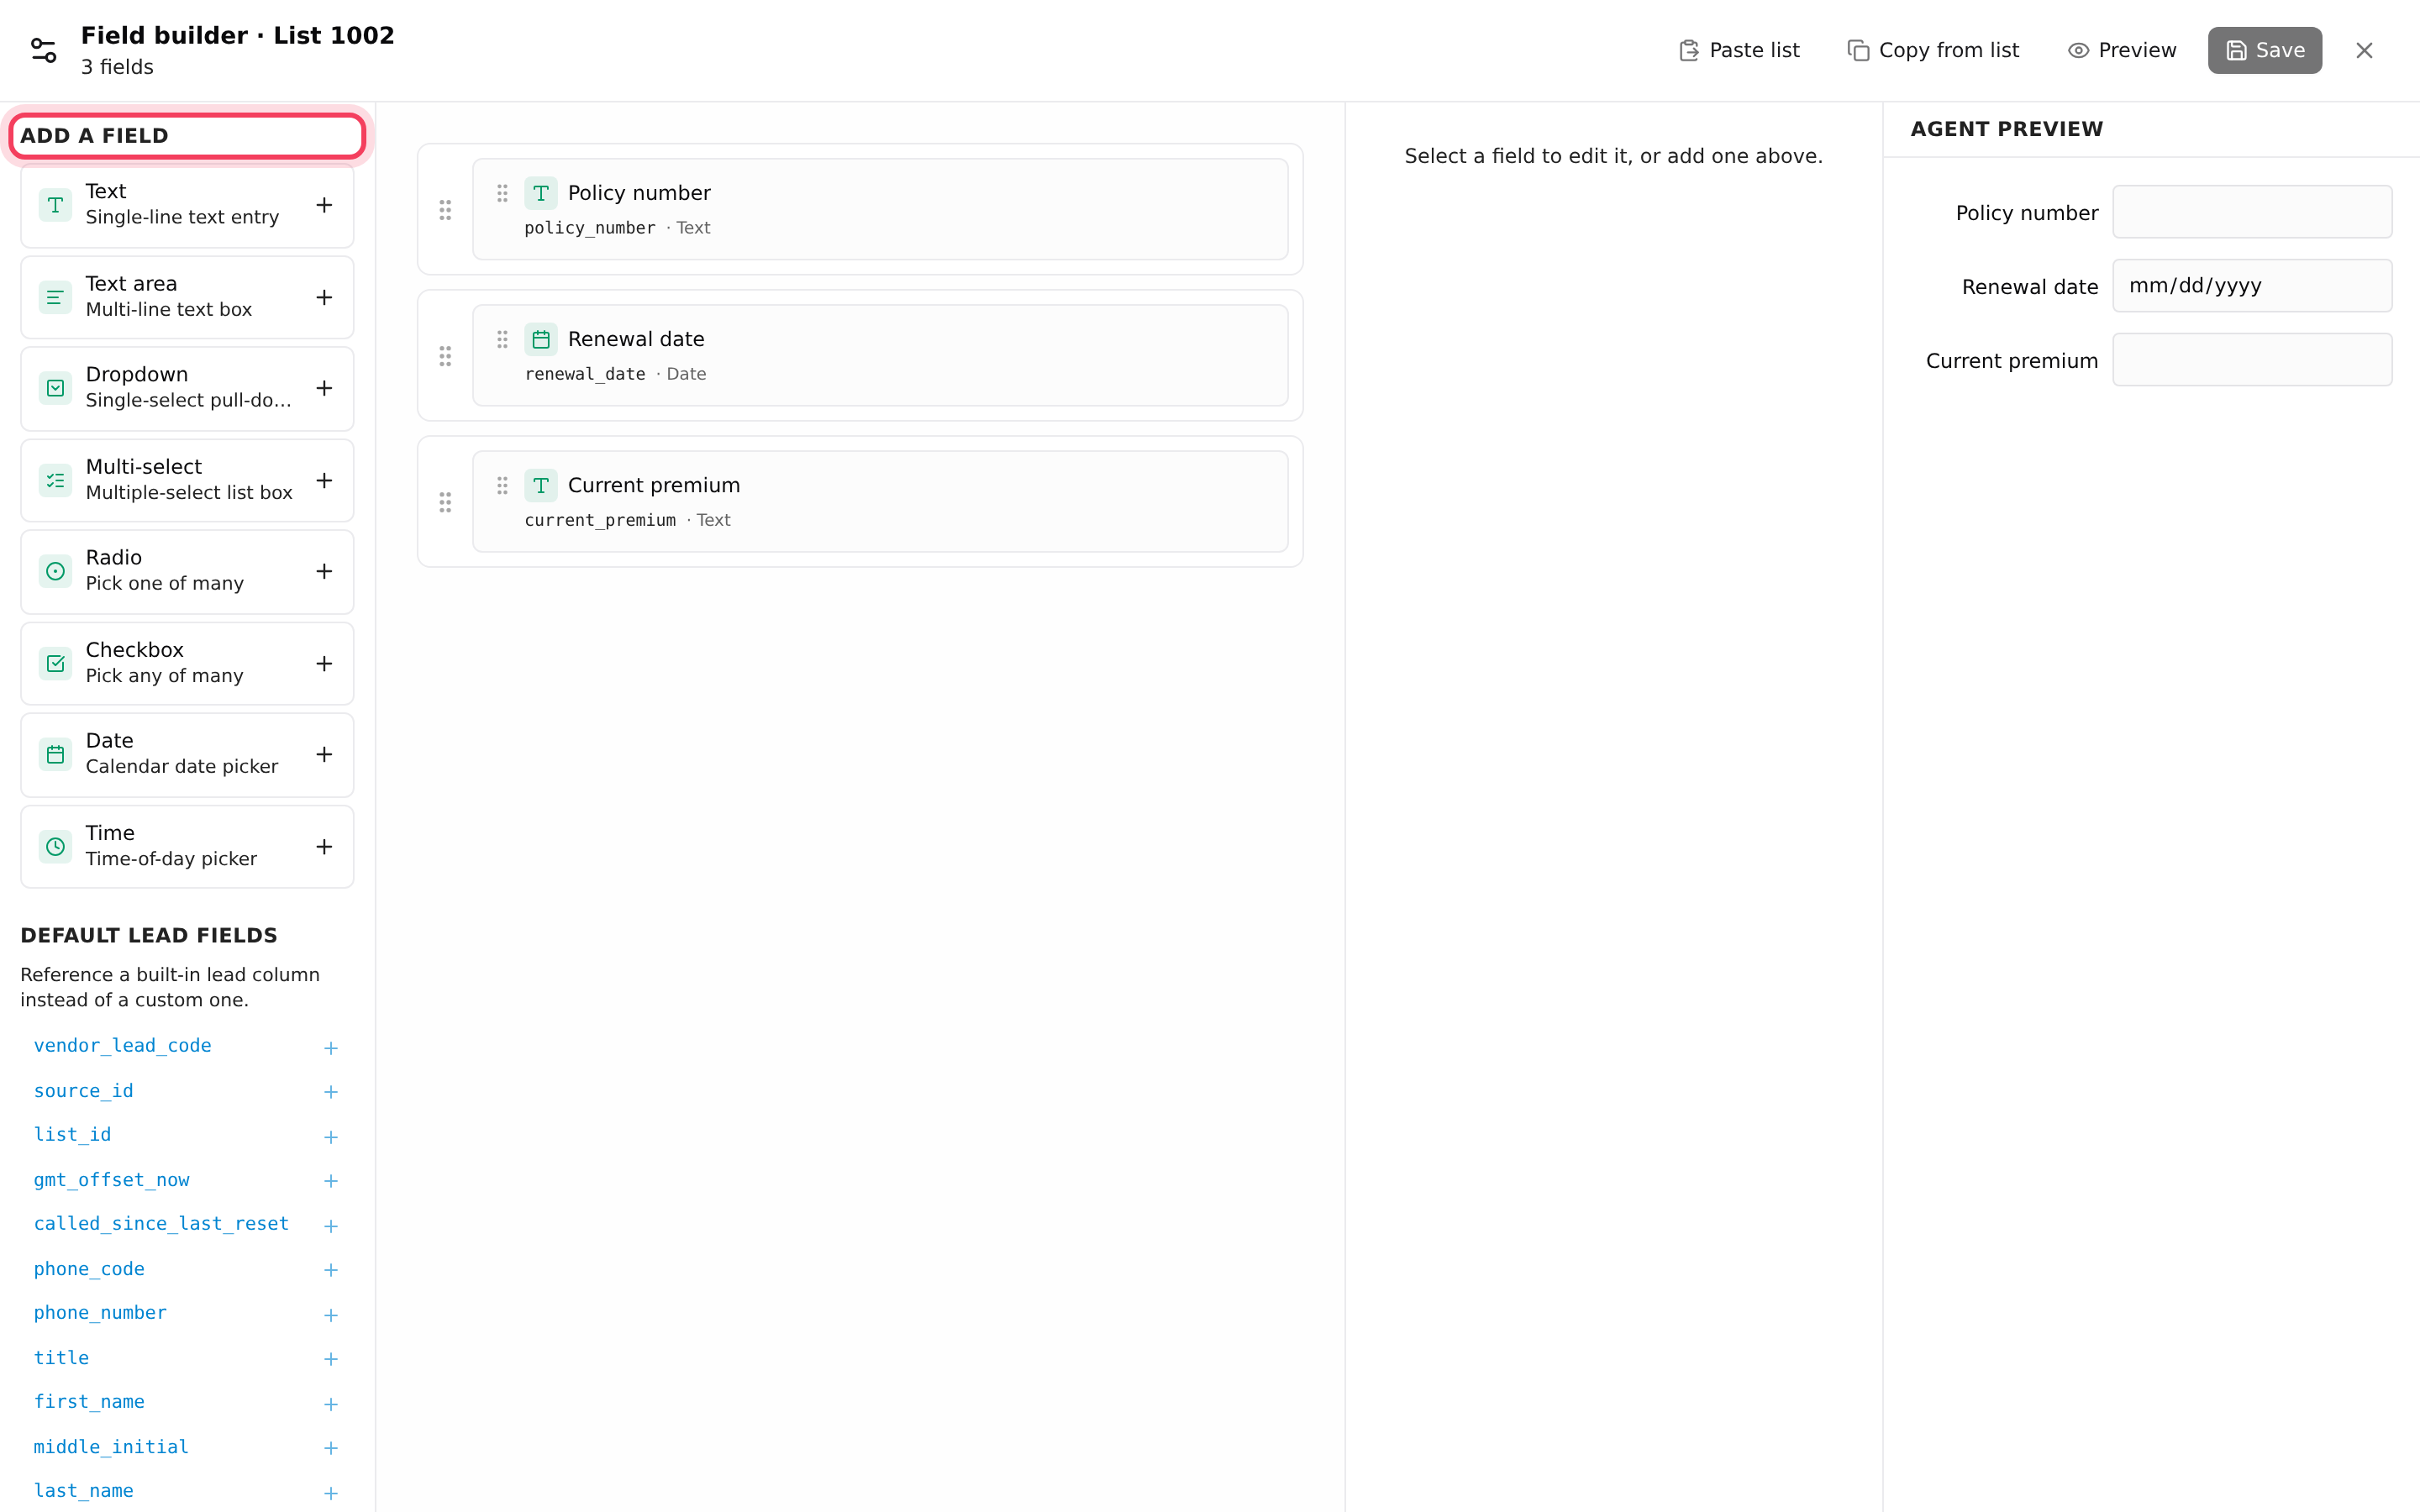
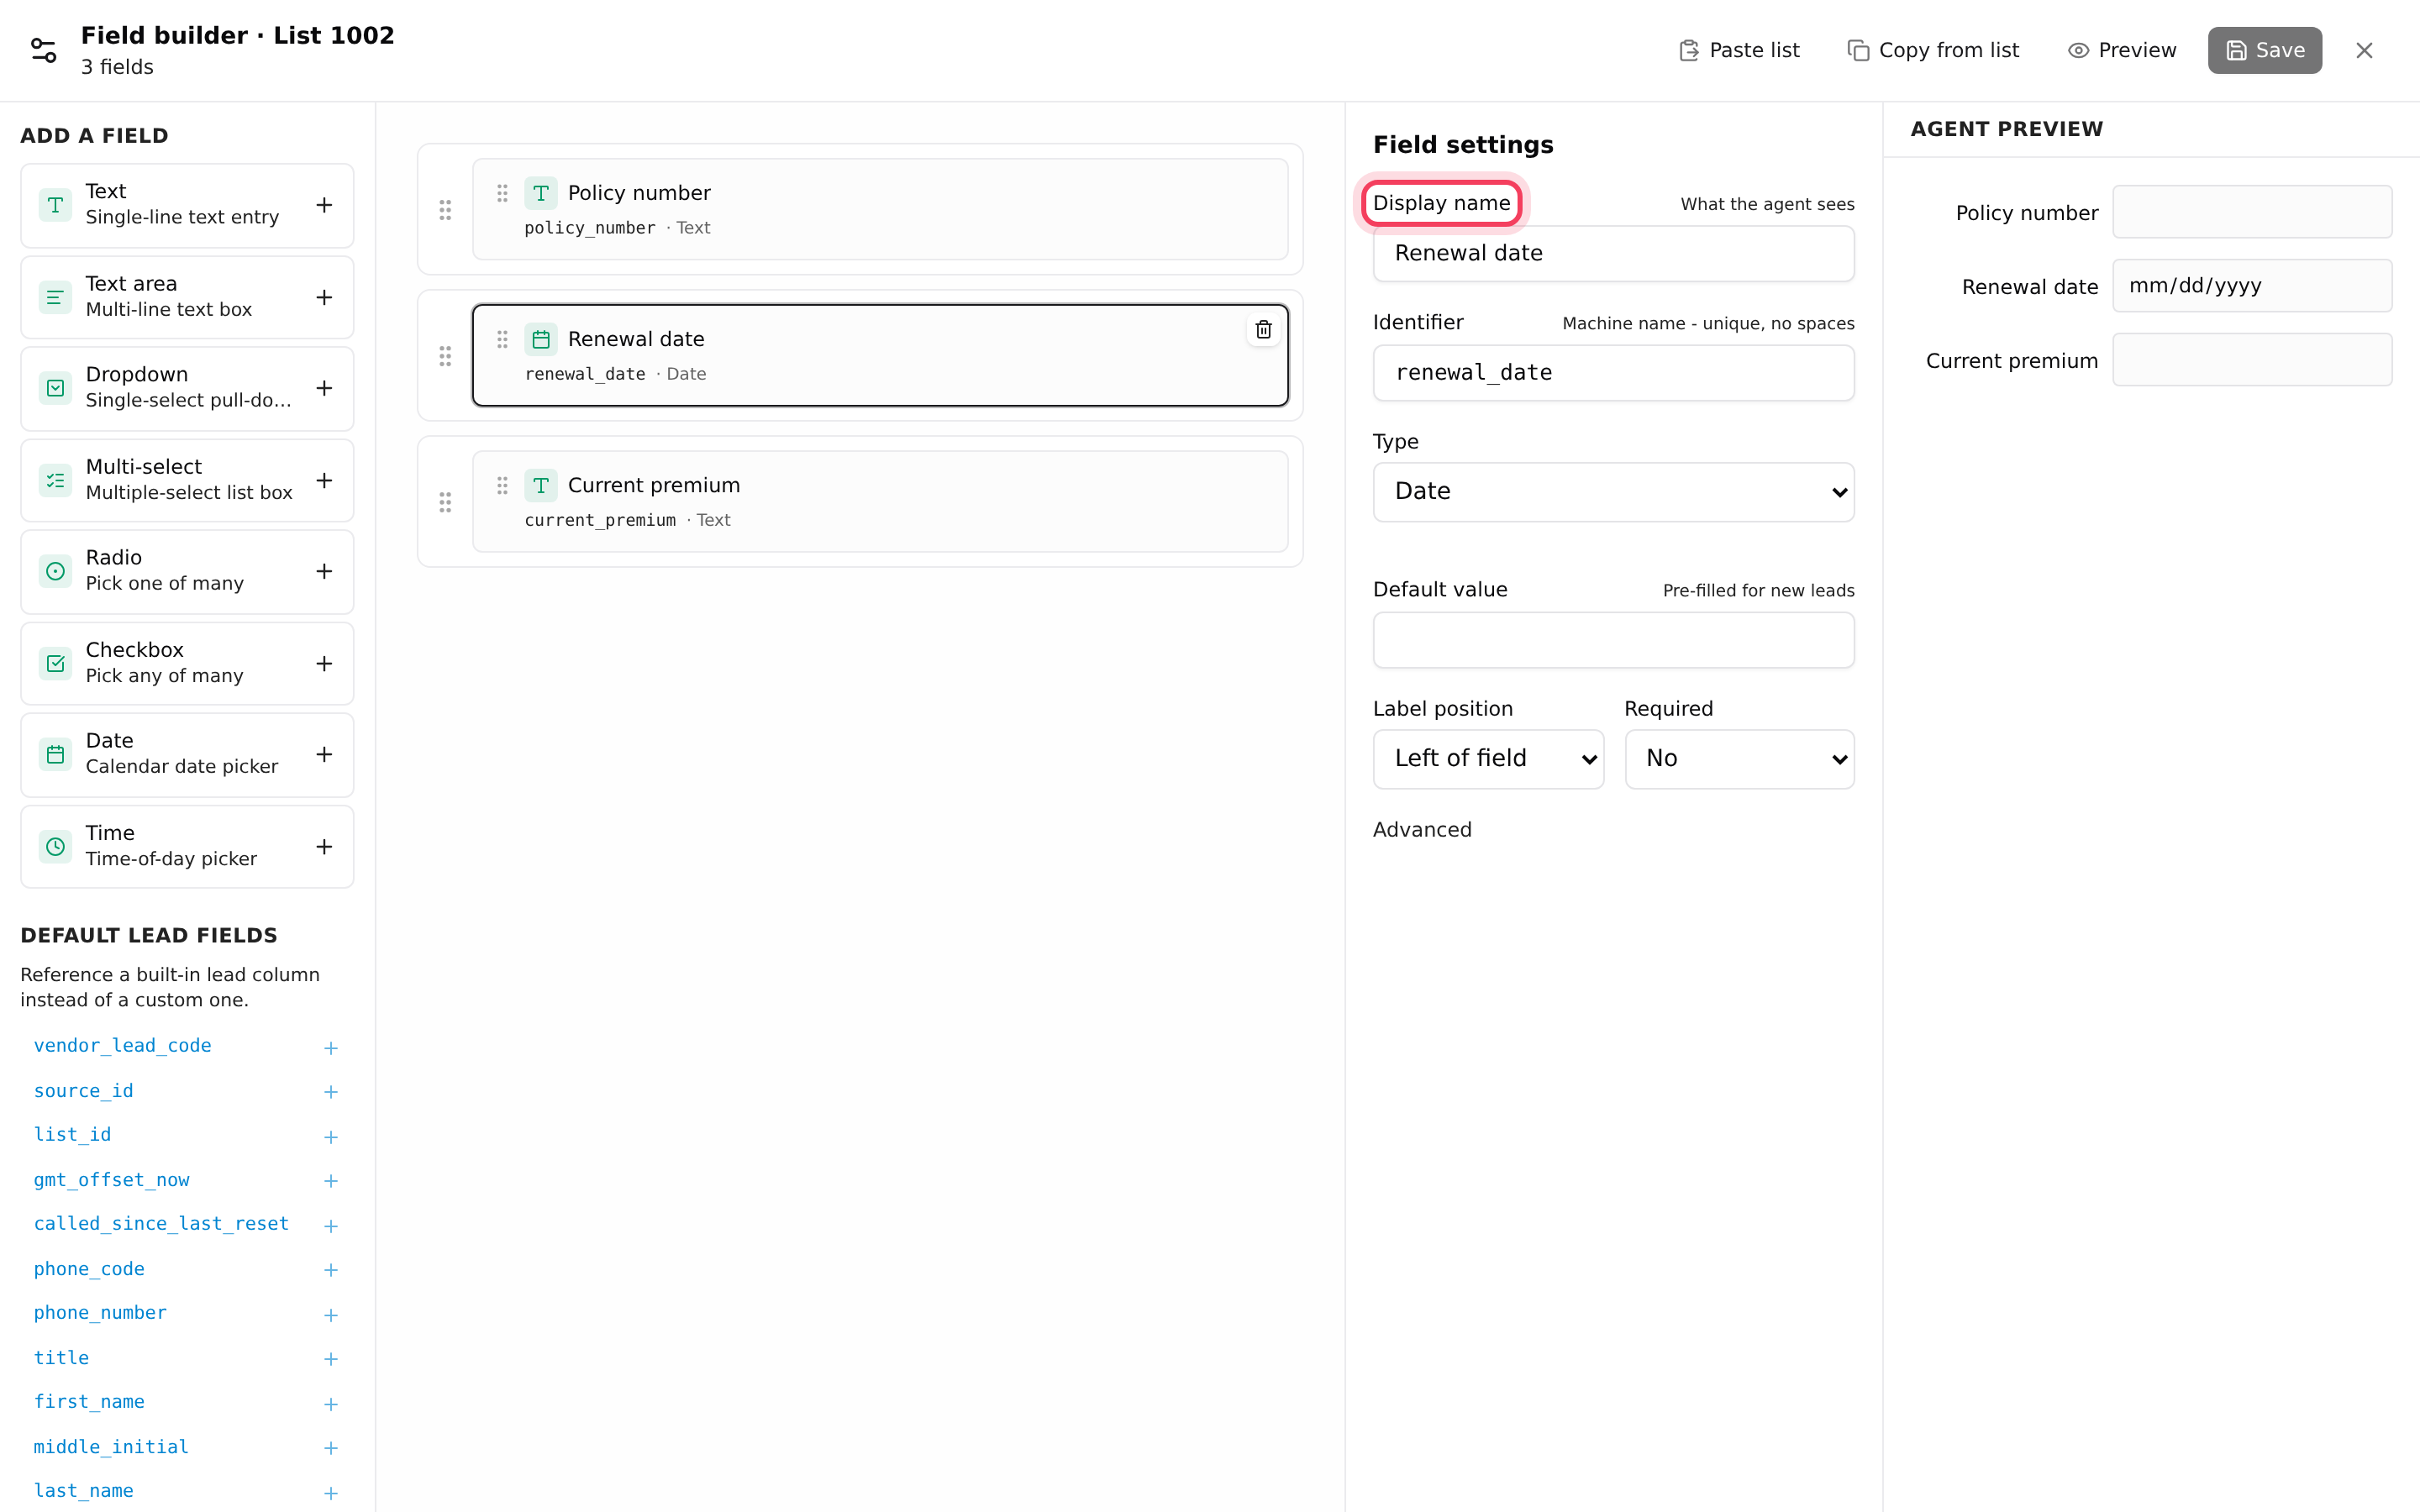
The builder opens full screen as Field builder · List followed by the list number.
- Under Add a field, click a type: Text, Text area, Dropdown, Multi-select, Radio, Checkbox, Date or Time. The field appears on the form.
- Drag fields to arrange them. Fields dropped next to each other share a row; use Move to its own row to split them.
- Under Default lead fields, you can also place a built-in field such as first_name on the form, instead of making a new one.
Step 3: Set up each field
- Click a field to select it.
- Display name: what the agent sees, for example "Account balance".
- Identifier: the field’s short name, unique and without spaces, for example account_balance. This is also how you match a CSV column to it.
- For Dropdown, Multi-select, Radio and Checkbox, add the choices under Options with Add option.
- Optional: Default value, Required, Help text (a tip shown to the agent, under Advanced).
- Check the Agent preview, then click Save. If something is missing you see "Fix N issues before saving" and the first problem field is selected.
Step 4: Paste a whole list of field names (shortcut)
Got a spreadsheet with dozens of columns? Let the builder draft the form for you. This is free.
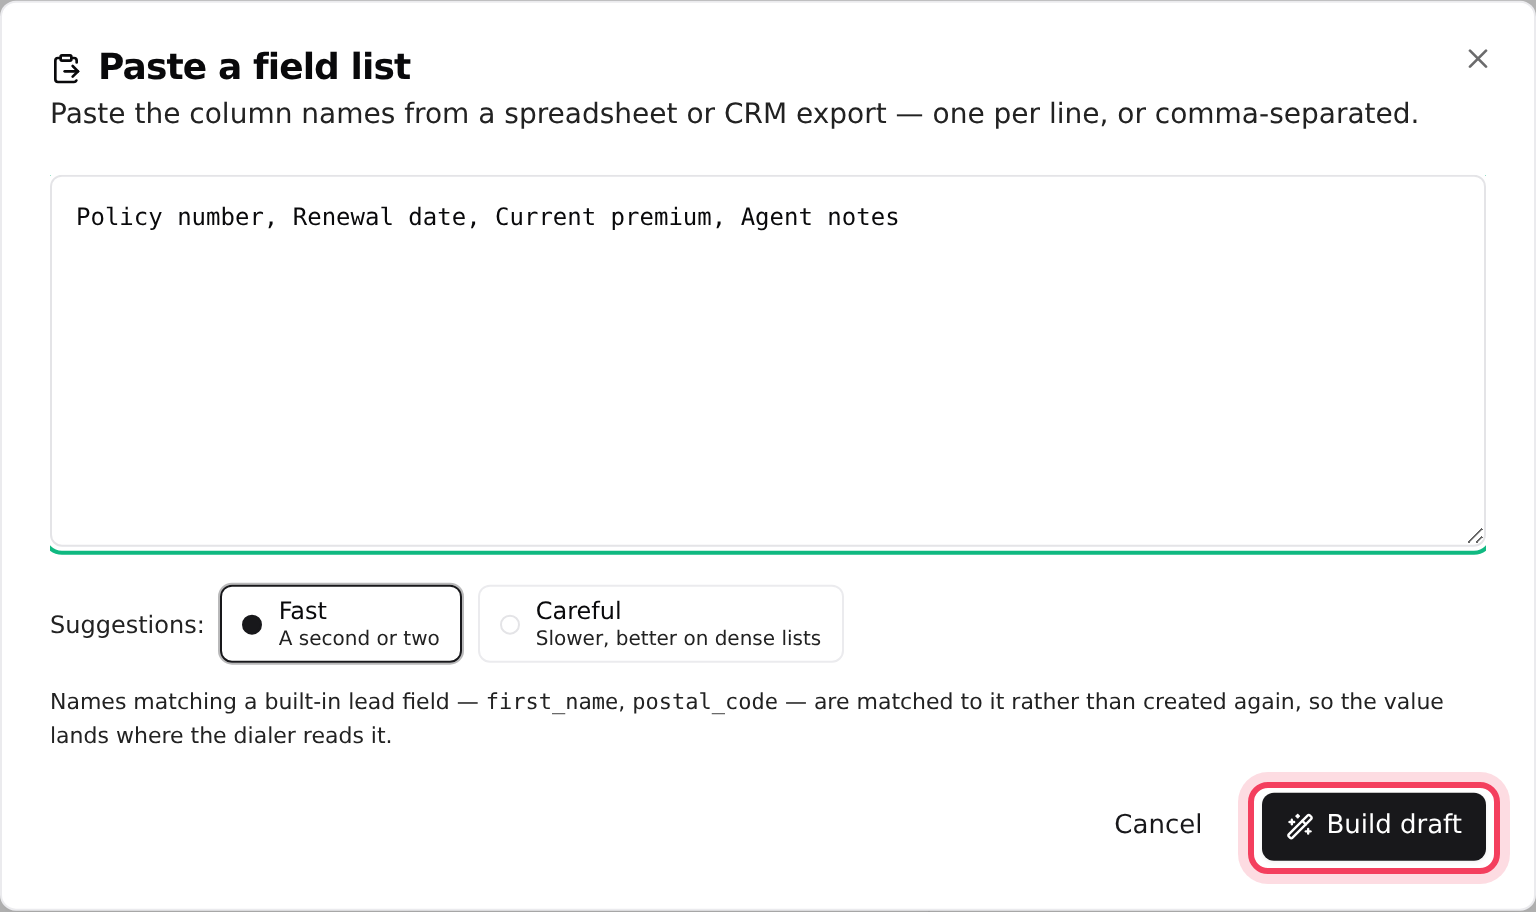
- In the builder, click Paste list.
- Paste the column names, one per line or separated by commas.
- Pick Fast or Careful (slower, better on long lists) and click Build draft.
- Check the highlighted rows. Names that match a built-in lead field, such as postal_code, are linked to it instead of being created twice. Change a type or remove a row if needed.
- Click Add N fields, then Save in the builder.
Step 5: Reuse fields on another list
Use any of these: Copy from list in the builder, the copy icon on a list’s row (Copy custom fields into this list), or Copy custom fields from when you create a new list. Then pick a Method:
- Append: adds fields the target doesn’t have. Never touches existing fields. The safe choice.
- Update: overwrites matching fields with the source’s settings.
- Replace: makes the target identical to the source, and drops fields the source doesn’t have.
Step 6: Fill the fields from a CSV
When you import leads into the list, the column-matching step shows a Custom fields on list section. Headers that match a field’s identifier or display name are matched for you. See Upload leads. To see or change one lead’s values later, open it in Lead Trace: they sit under the lead’s details. See Find, edit or add a lead.
If something goes wrong
Frequently asked
- Fields belong to one list. Check the Destination list is the list you built them on, and that you clicked Save in the builder.
- Your changes were not saved yet. Cancel, click Save, then close.
- The fields were created but cannot store values yet. Ask us in the chat and we will sort it out.
- Replace makes the target identical to the source. Use Append next time; re-add the missing fields in the builder.
- No. Use the built-in field under Default lead fields instead, so the value lands where the dialer and reports read it.