Audio files and text-to-speech
Upload greetings and prompts, or type a script and turn it into speech, then use them in menus, queues and after-hours messages.
Campaigns & leads · 3 min read
Every greeting, hold message, menu prompt and after-hours message on your dialer lives on the Audios tab. You can upload a recording, or type a script and turn it into speech. This guide covers both, and where to use the result.
What you need
- You are the account owner, or a team member allowed to make changes on the Audios tab.
- For text-to-speech: money in your wallet, unless your plan includes free characters.
Step 1: Open the Audios tab
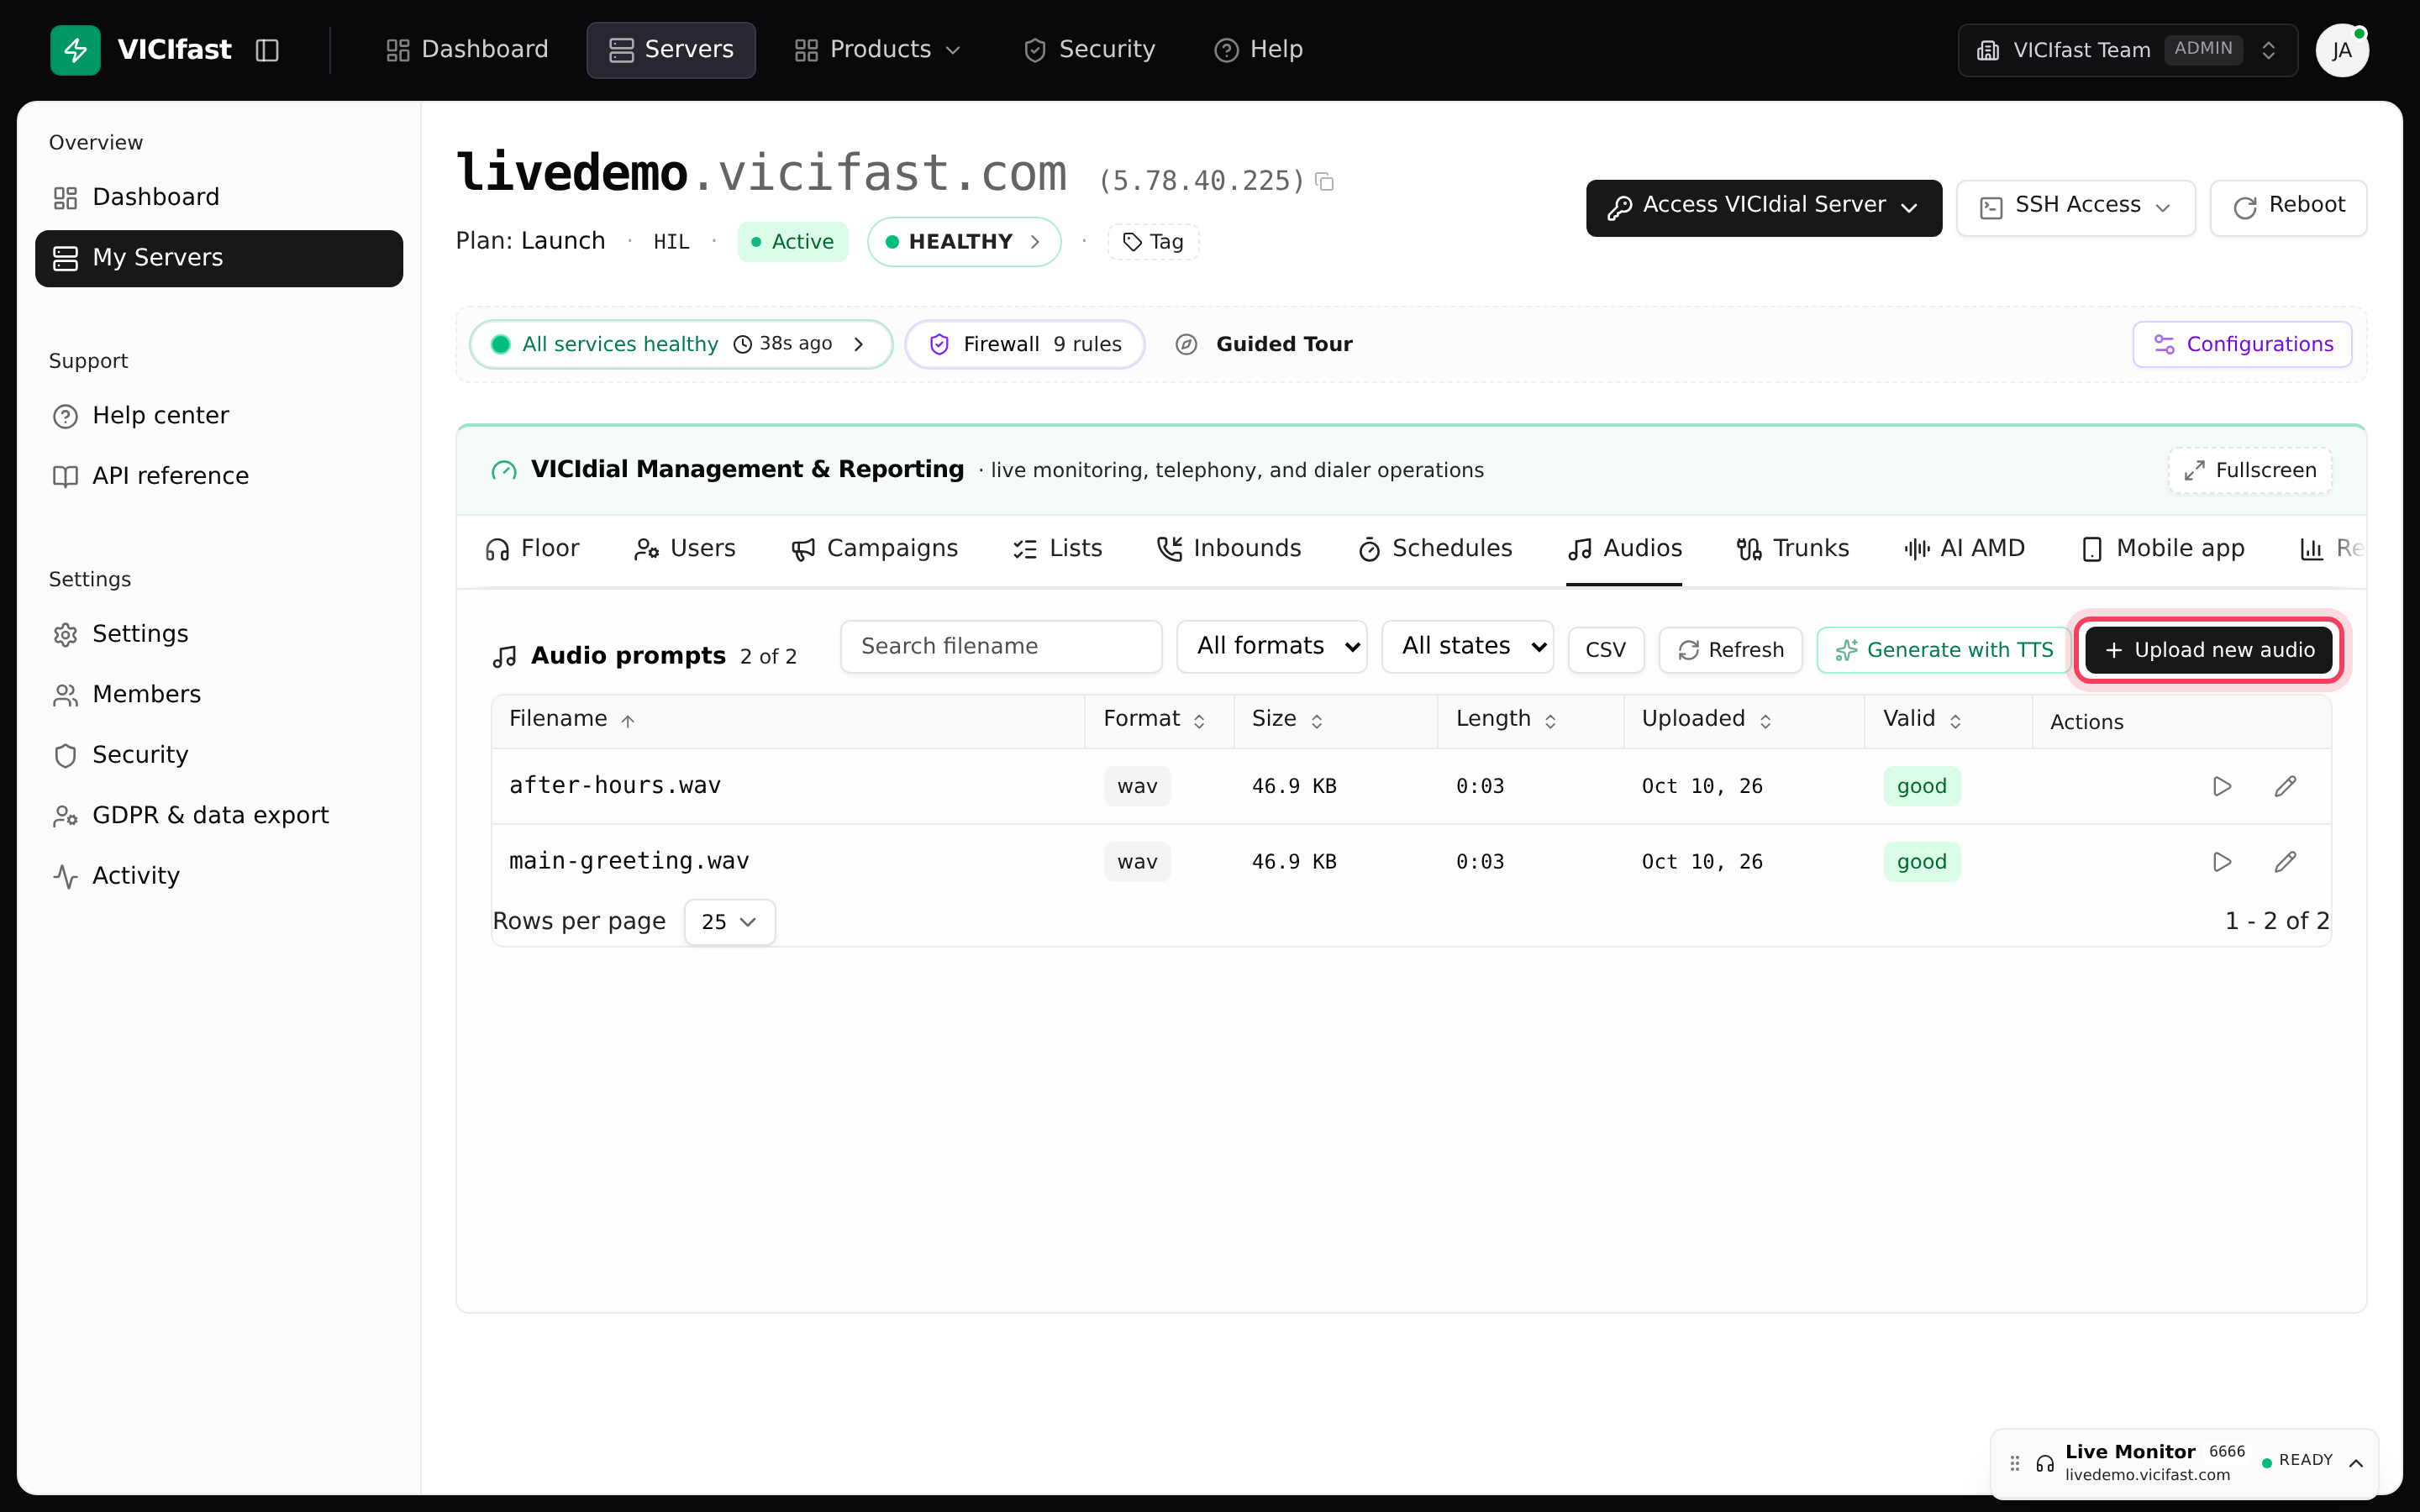
- Open your server from My Servers and click the Audios tab.
Each file shows its Filename, Format, Size, Length, when it was Uploaded, and Valid: "good" means the dialer can play it. The list refreshes itself every 30 seconds.
Step 2: Upload a recording
- Click Upload new audio.
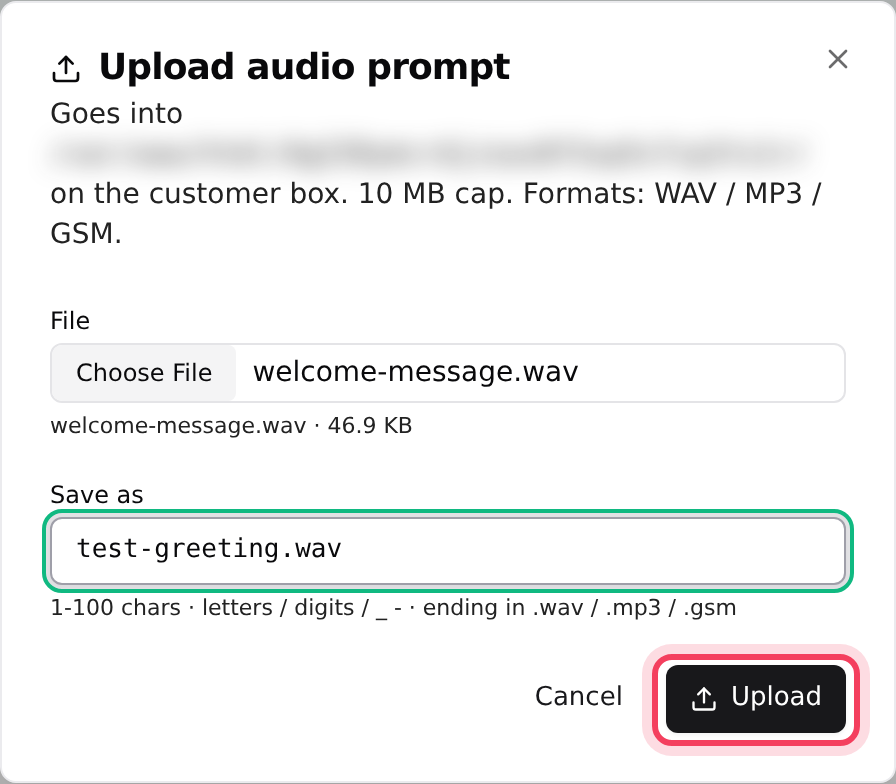
- Next to File, choose a WAV, MP3 or GSM file of up to 10 MB.
- Under Save as, type a name you will recognise, such as main-greeting.wav. Use letters, numbers, _ and - only, ending in .wav, .mp3 or .gsm.
- If that name is taken, an Overwrite existing file with this name box appears. Tick it only if you want to replace the old prompt everywhere it is used.
- Click Upload.
Whatever you upload is converted to the phone format the dialer plays and saved as a .wav file.
Step 3: Turn text into speech
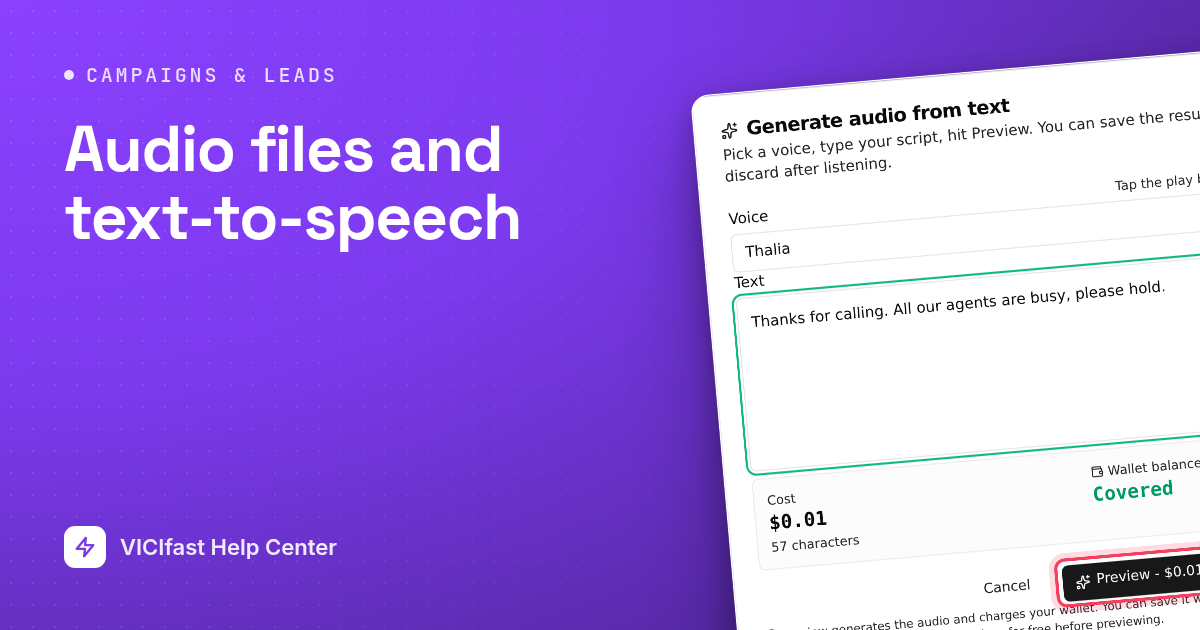
- Click Generate with TTS.
- Pick a Voice. Click the play button next to it to hear a free sample.
- Type your script in Text, exactly as it should be spoken. The counter shows how much room is left (up to 2,000 characters).
- Check the Cost and Wallet balance tiles. If your plan includes free characters, the cost says so.
- Click Preview. This creates the audio and charges your wallet.
- Listen. If you are happy, click Save audio, type a name (.wav is added for you) and click Save audio again. The prompt joins your list like an upload.
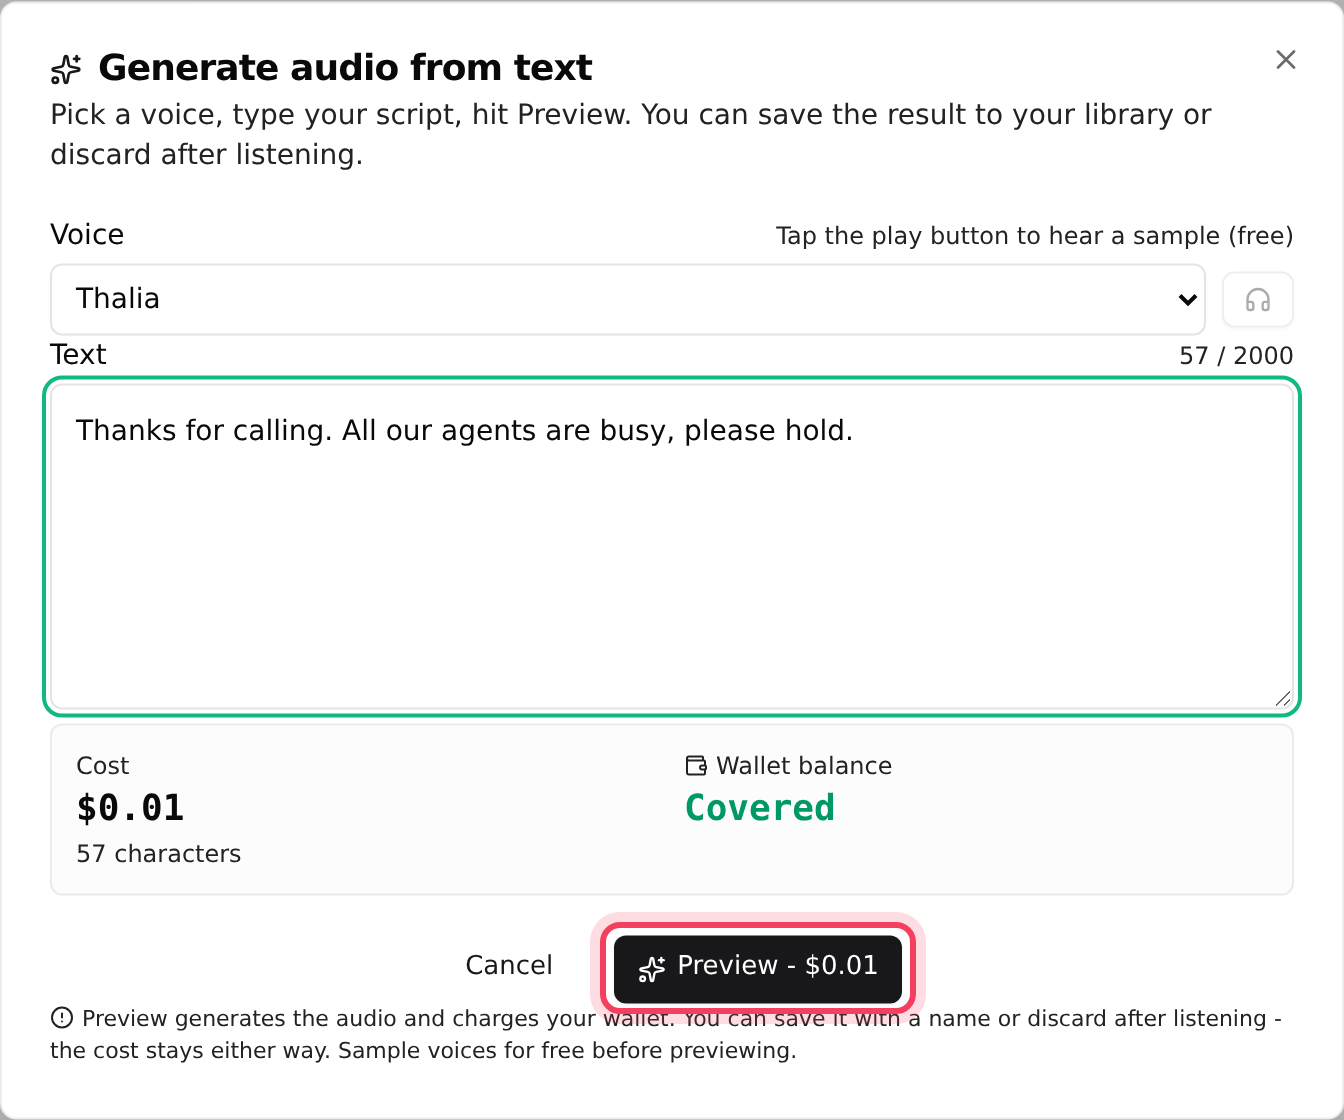
The charge happens at Preview. Discard removes the audio but keeps the charge, so use the free voice samples to choose a voice first. Save within an hour, or the preview expires.
Step 4: Listen, rename or delete
- Click play on a row to open the player. Download saves a copy to your computer.
- Rename changes the file name. Anything that used the old name stops playing it until you pick it again.
- Delete (account owner only) asks you to type the exact filename. Any queue, menu or schedule still using it stops playing that prompt.
Step 5: Use the prompt
A prompt does nothing until something uses it:
- Call menus: Inbounds tab, Call Menus pill, open the menu. On Basic Details, pick the Greeting prompt, Timeout prompt and Invalid prompt.
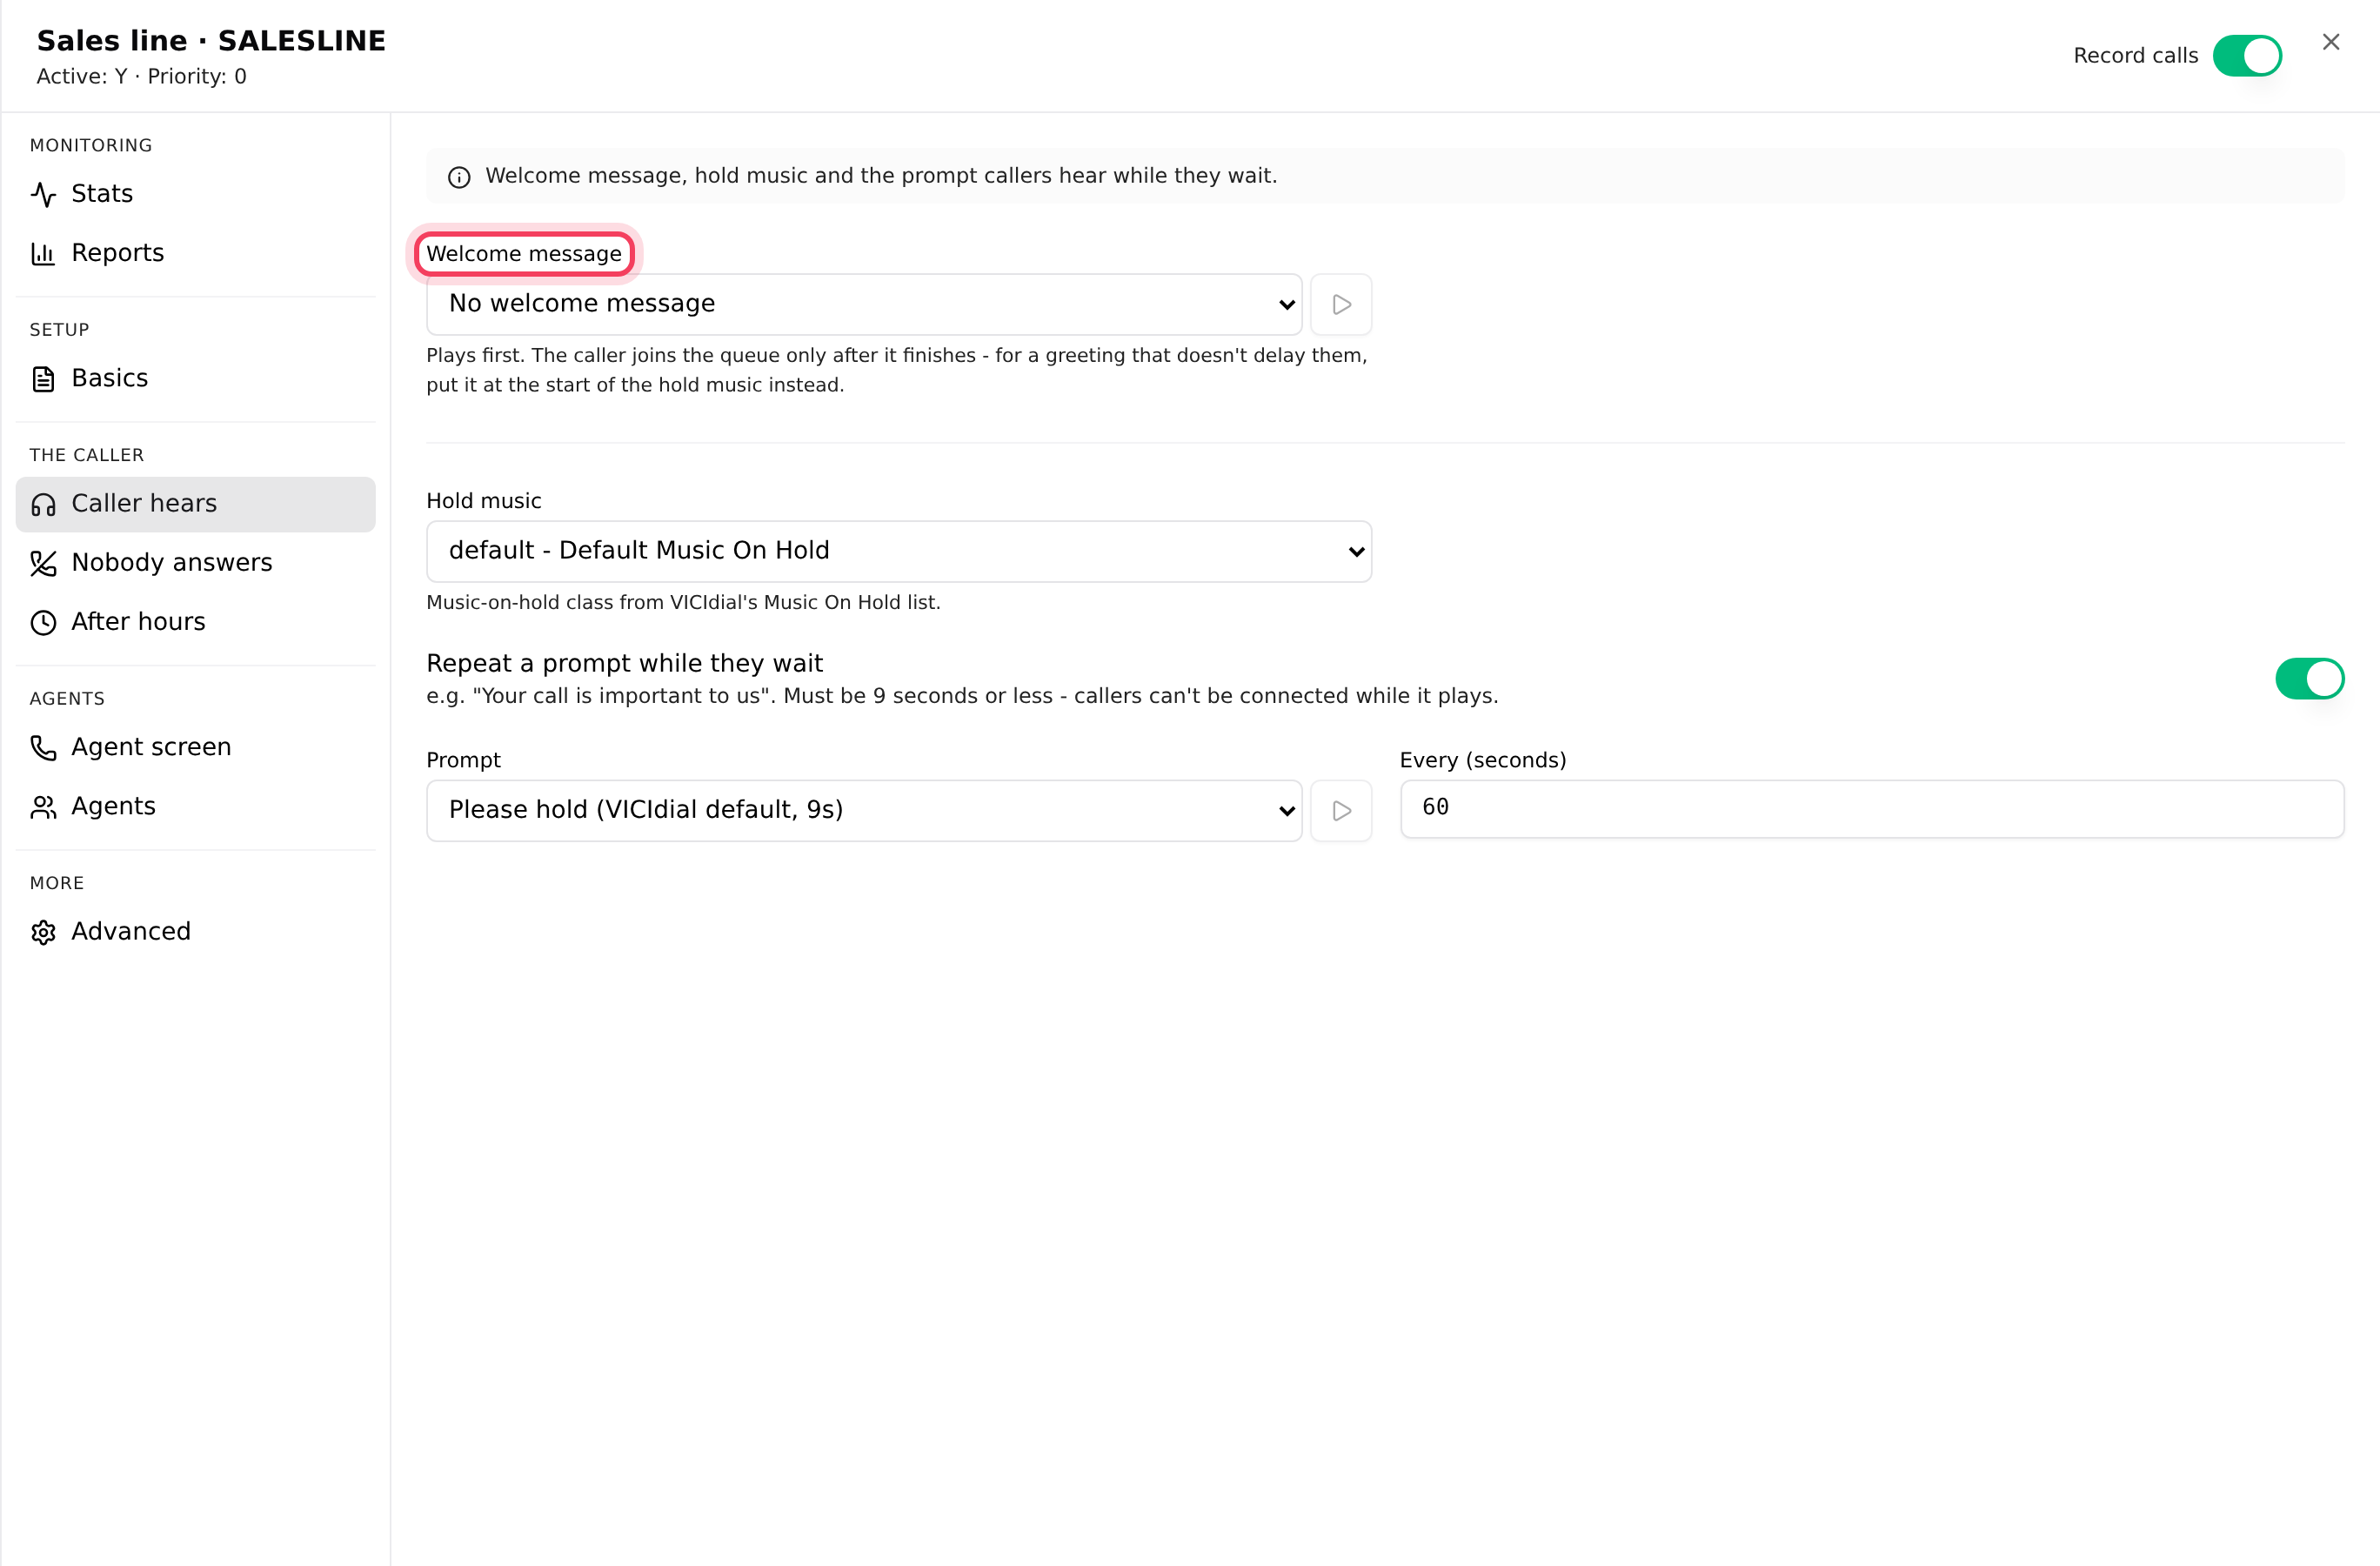
- Queues (in-groups): Inbounds tab, In-groups pill, open the queue. On Caller hears, pick the Welcome message, or turn on Repeat a prompt while they wait and pick the Prompt.
- After hours: on the Schedules tab, pick an after-hours audio in a call time or holiday. See Calling hours, shifts and holidays.
- During a call: agents can play clips from a soundboard.
If something goes wrong
Frequently asked
- The dialer can’t play that file. Upload it again through the Audios tab, or generate it again with text-to-speech.
- Pick a file and check the Save as name. If the name is already taken, tick Overwrite existing file with this name or choose another name.
- Previews last about an hour. Generate the audio again (this is charged again) and save it straight away.
- Click Add funds to wallet in the dialog and top up, then try again. See "How wallet billing works".
- Menus and queues use the file name. Open the menu or queue and pick the new name.