Invite your team and choose what they see
Give each person their own login with a role, the servers they can reach, and what they can do there. Also how to change or remove access.
Billing & account · 4 min read
Never share your own password. Give every person their own login instead: a role, the servers they can reach, and what they can do there. If you run servers for your own clients, this is also how you give each client only their servers.
What you need
- You are the account owner, or an Admin who was given Manage members. Admins can invite and manage people below Admin.
Step 1: Open Members
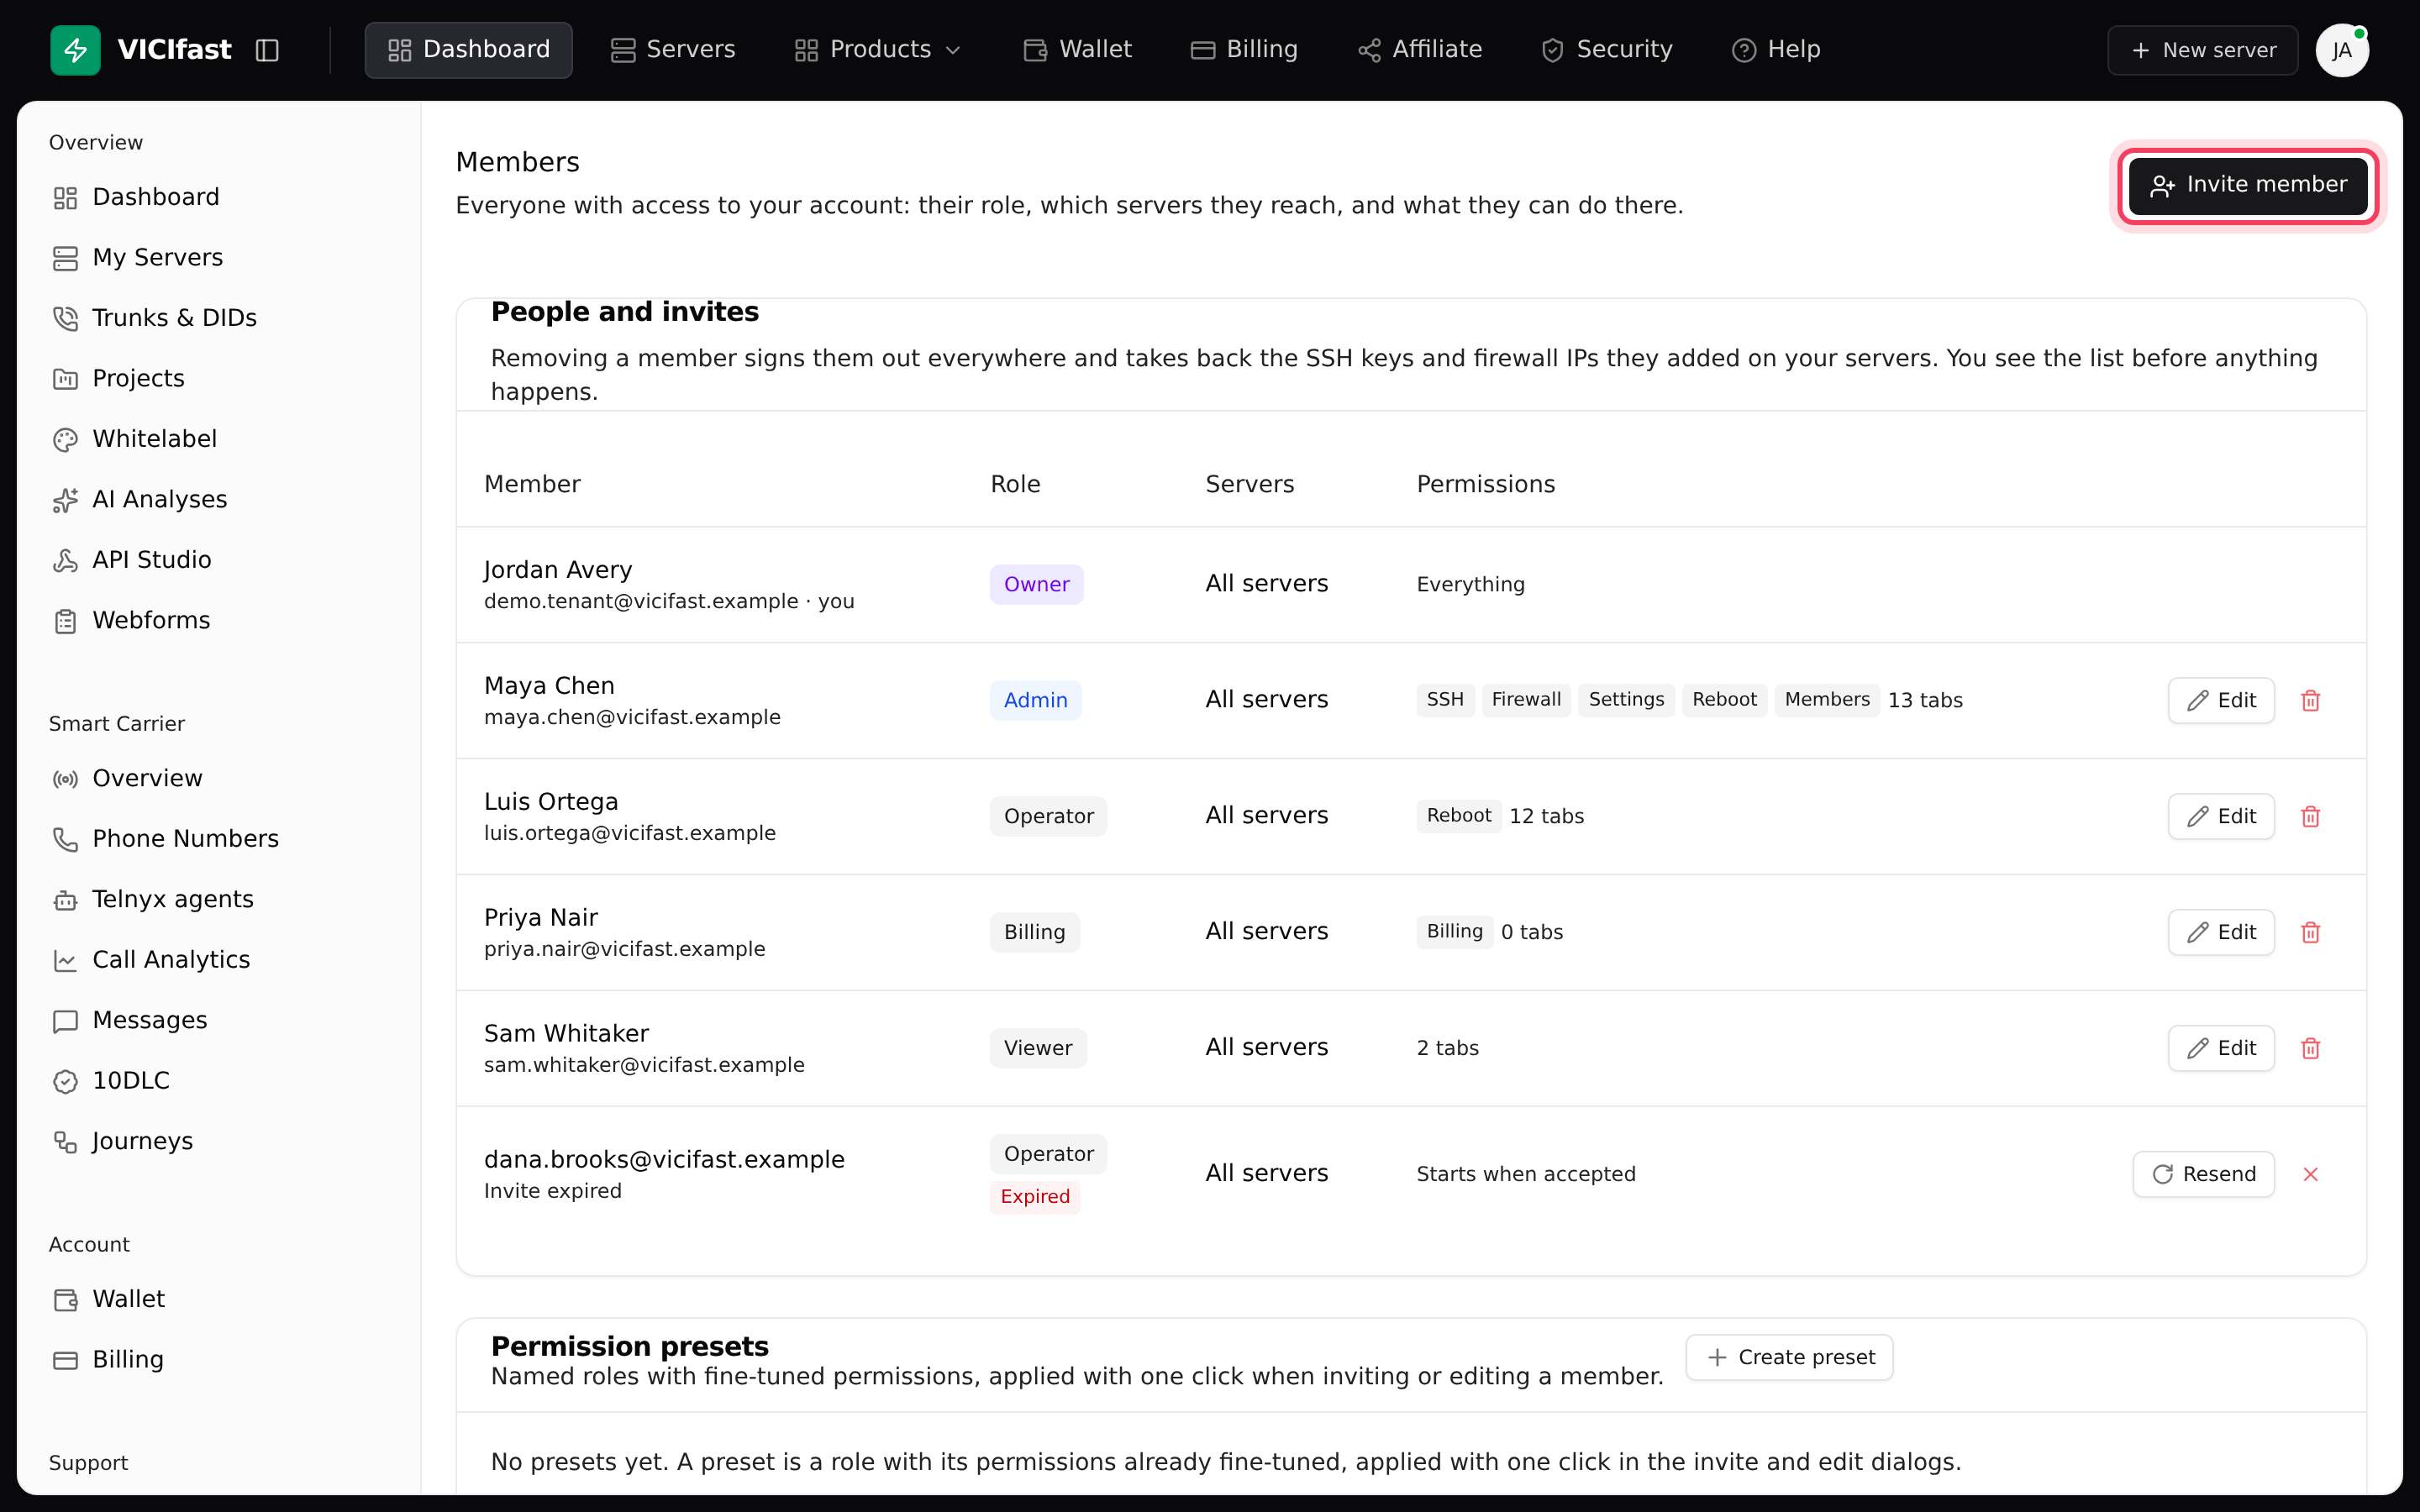
- In the left sidebar, under Settings, click Members.
- People and invites lists everyone with access to your account: their Role, the Servers they reach and their Permissions. Pending invites are listed too.
Step 2: Invite someone
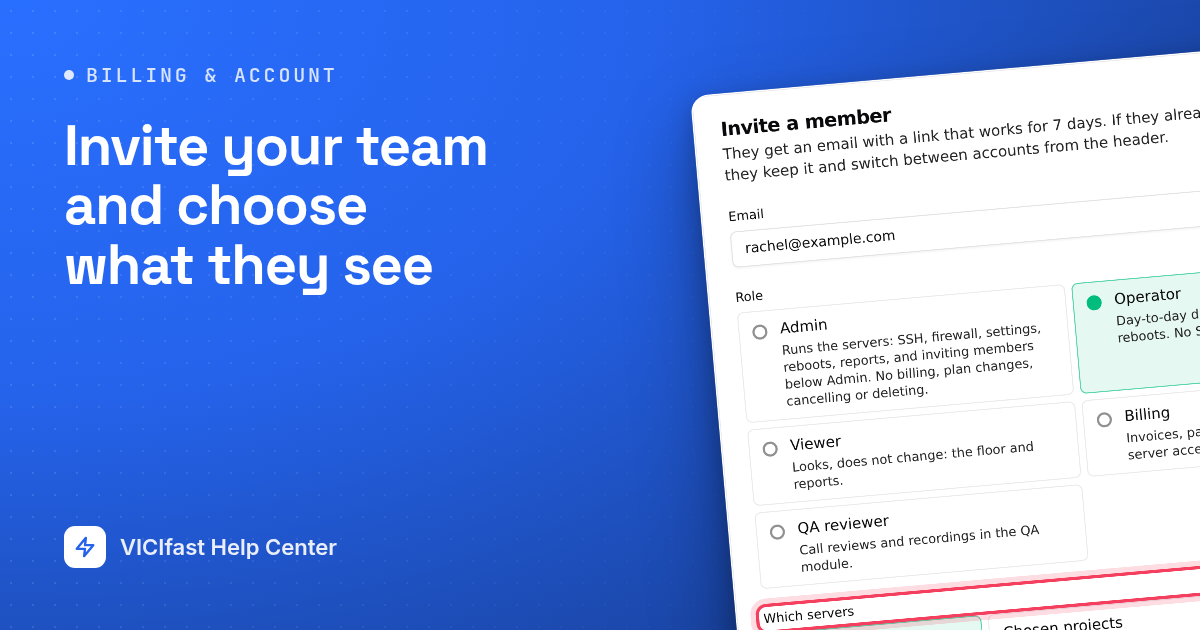
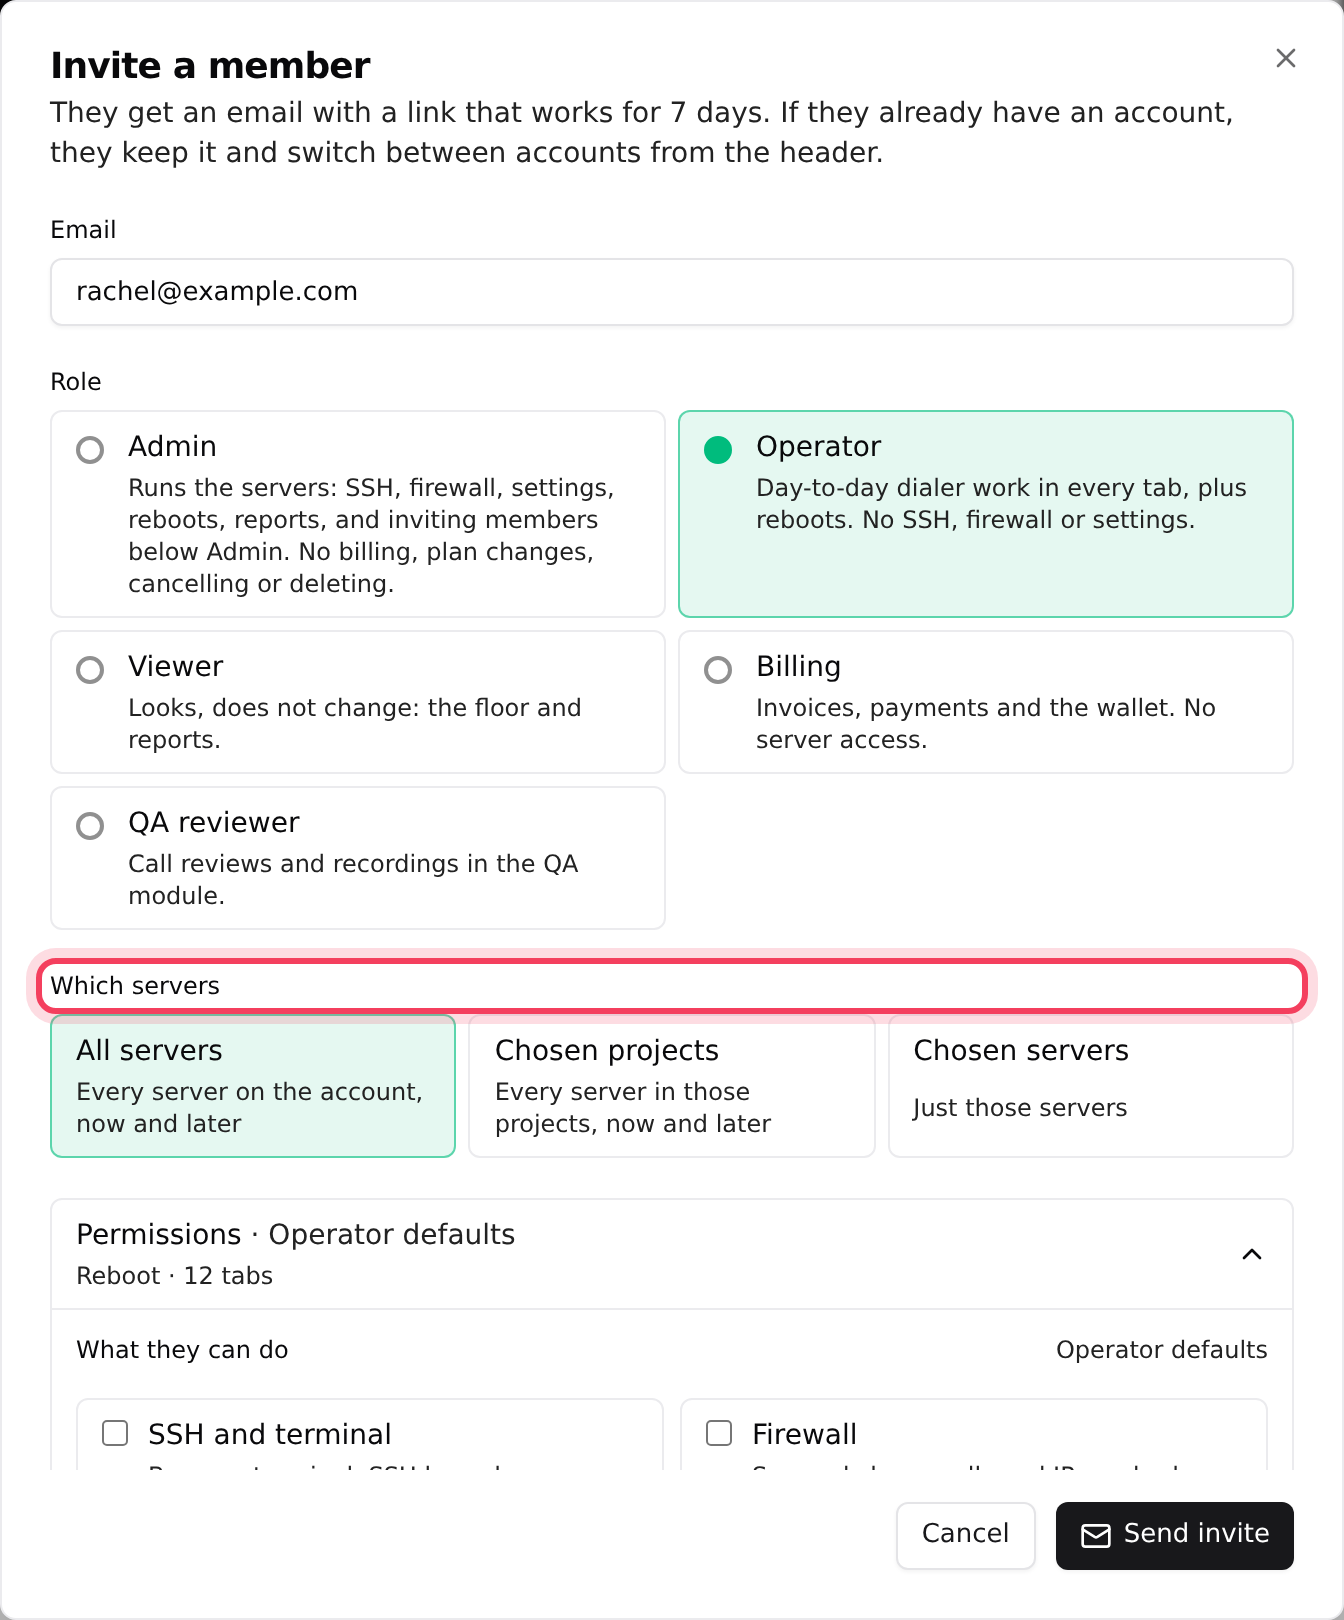
- Click Invite member. The Invite a member window opens.
- Type their Email. The invite only works for that address.
- Pick a Role (see the list below).
- Under Which servers, choose All servers (every server, now and later), Chosen projects (every server in those projects, now and later) or Chosen servers (just the ones you tick).
- Optional: open Permissions to fine-tune. The role fills in the boxes under What they can do and Server tabs they can open; tick or untick any of them.
- Click Send invite. They get an email with a link that works for 7 days.
The five roles
- Admin: runs the servers. SSH, firewall, settings, reboots, reports, and inviting members below Admin. No billing, plan changes, cancelling or deleting.
- Operator: day-to-day dialer work in every tab, plus reboots. No SSH, firewall or settings.
- Viewer: looks, does not change. The floor and reports.
- Billing: invoices, payments and the wallet. No server access.
- QA reviewer: call reviews and recordings in the QA module, which comes with Managed Floor Enterprise.
Some things always stay with you, the owner: changing a plan or add-ons, cancelling or deleting a server, hard reset and factory reset. Only you can make someone an Admin.
Step 3: What your member does
- They open the email and click the link.
- New to VICIfast? They create an account with the invited email. Already have one? They sign in and keep it.
- They click Accept invitation and land on your servers, with the access you chose.
Someone who also has their own VICIfast account switches between the two from the account button in the top bar (Switch account).
Their own VICIdial login
Members who work in VICIdial get their own VICIdial login, at a level that matches their role and tabs. They find it on the server page behind Access VICIdial Server, in the VICIdial admin card; it is created the first time they reveal it. The shared admin login (6666) is shown only to you and your Admins.
Step 4: Change access or remove someone
- To change a role, servers or permissions, click Edit on their row. The Edit access window opens; make your changes and click Save. If you take servers away, what they added there comes back to you.
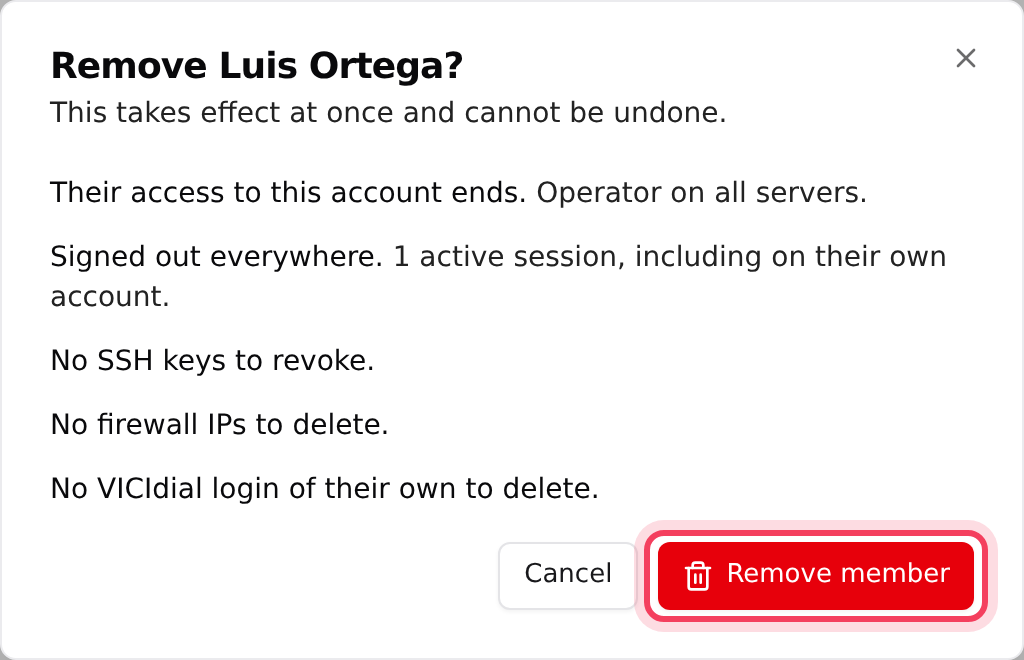
- To remove someone, click the bin icon on their row. The window lists exactly what will be taken back: their sessions, the SSH keys and firewall entries they added, and their VICIdial logins. Click Remove member to confirm.
- For a pending invite, click Resend to send the link again, or the cross to withdraw it. An expired invite reads Invite expired.
See who signed in
At the bottom of the Members page, Sign-in activity shows recent sign-ins for you and your members, with location, IP and device. Click Force logout to end a session straight away.
Give each client only their own servers
Put each client's servers in a project, then invite that client with Chosen projects. They see only that project's servers, and never your other clients, your billing or the rest of your account. See Group servers into projects.
If something goes wrong
Frequently asked
- Ask them to check spam, then click Resend on the invite. If you saw the message that the invite was saved but the email did not send, Resend fixes it.
- They are signed in with another account. Sign out and sign in (or sign up) with the invited email, then open the link again.
- Links work for 7 days. Click Resend on the invite to send a fresh one.
- Only the owner and Admins who can manage members see it. Ask the account owner.
- Only the account owner can add Admins. Billing access is normally given by the owner too.
- Give them the Billing role, or tick Billing under Permissions. Only the Billing role can pay or change the card.