Inbound Seller: set up a flow
Build a flow in four short steps: pick the server and numbers, add your buyers, choose how calls spread, then build it and place a free test call.
Inbound calls · 6 min read
A flow is one set of phone numbers plus the buyers those calls are shared between. This guide builds one, tests it and shows where to change it later. New to Inbound Seller? Start with what Inbound Seller does.
What you need
- You are the account owner, and Inbound Seller is switched on (Products, then Inbound Seller, then Unlock Inbound Seller).
- An active server to receive the calls (the master), with your numbers already pointed at it.
- For each buyer server: another active server on your account. If the calls should land in an existing queue (in-group), that queue must exist on the buyer server, with agents in it.
- Money in your wallet. Calls are paid per minute from it.
Step 1: Start a new flow
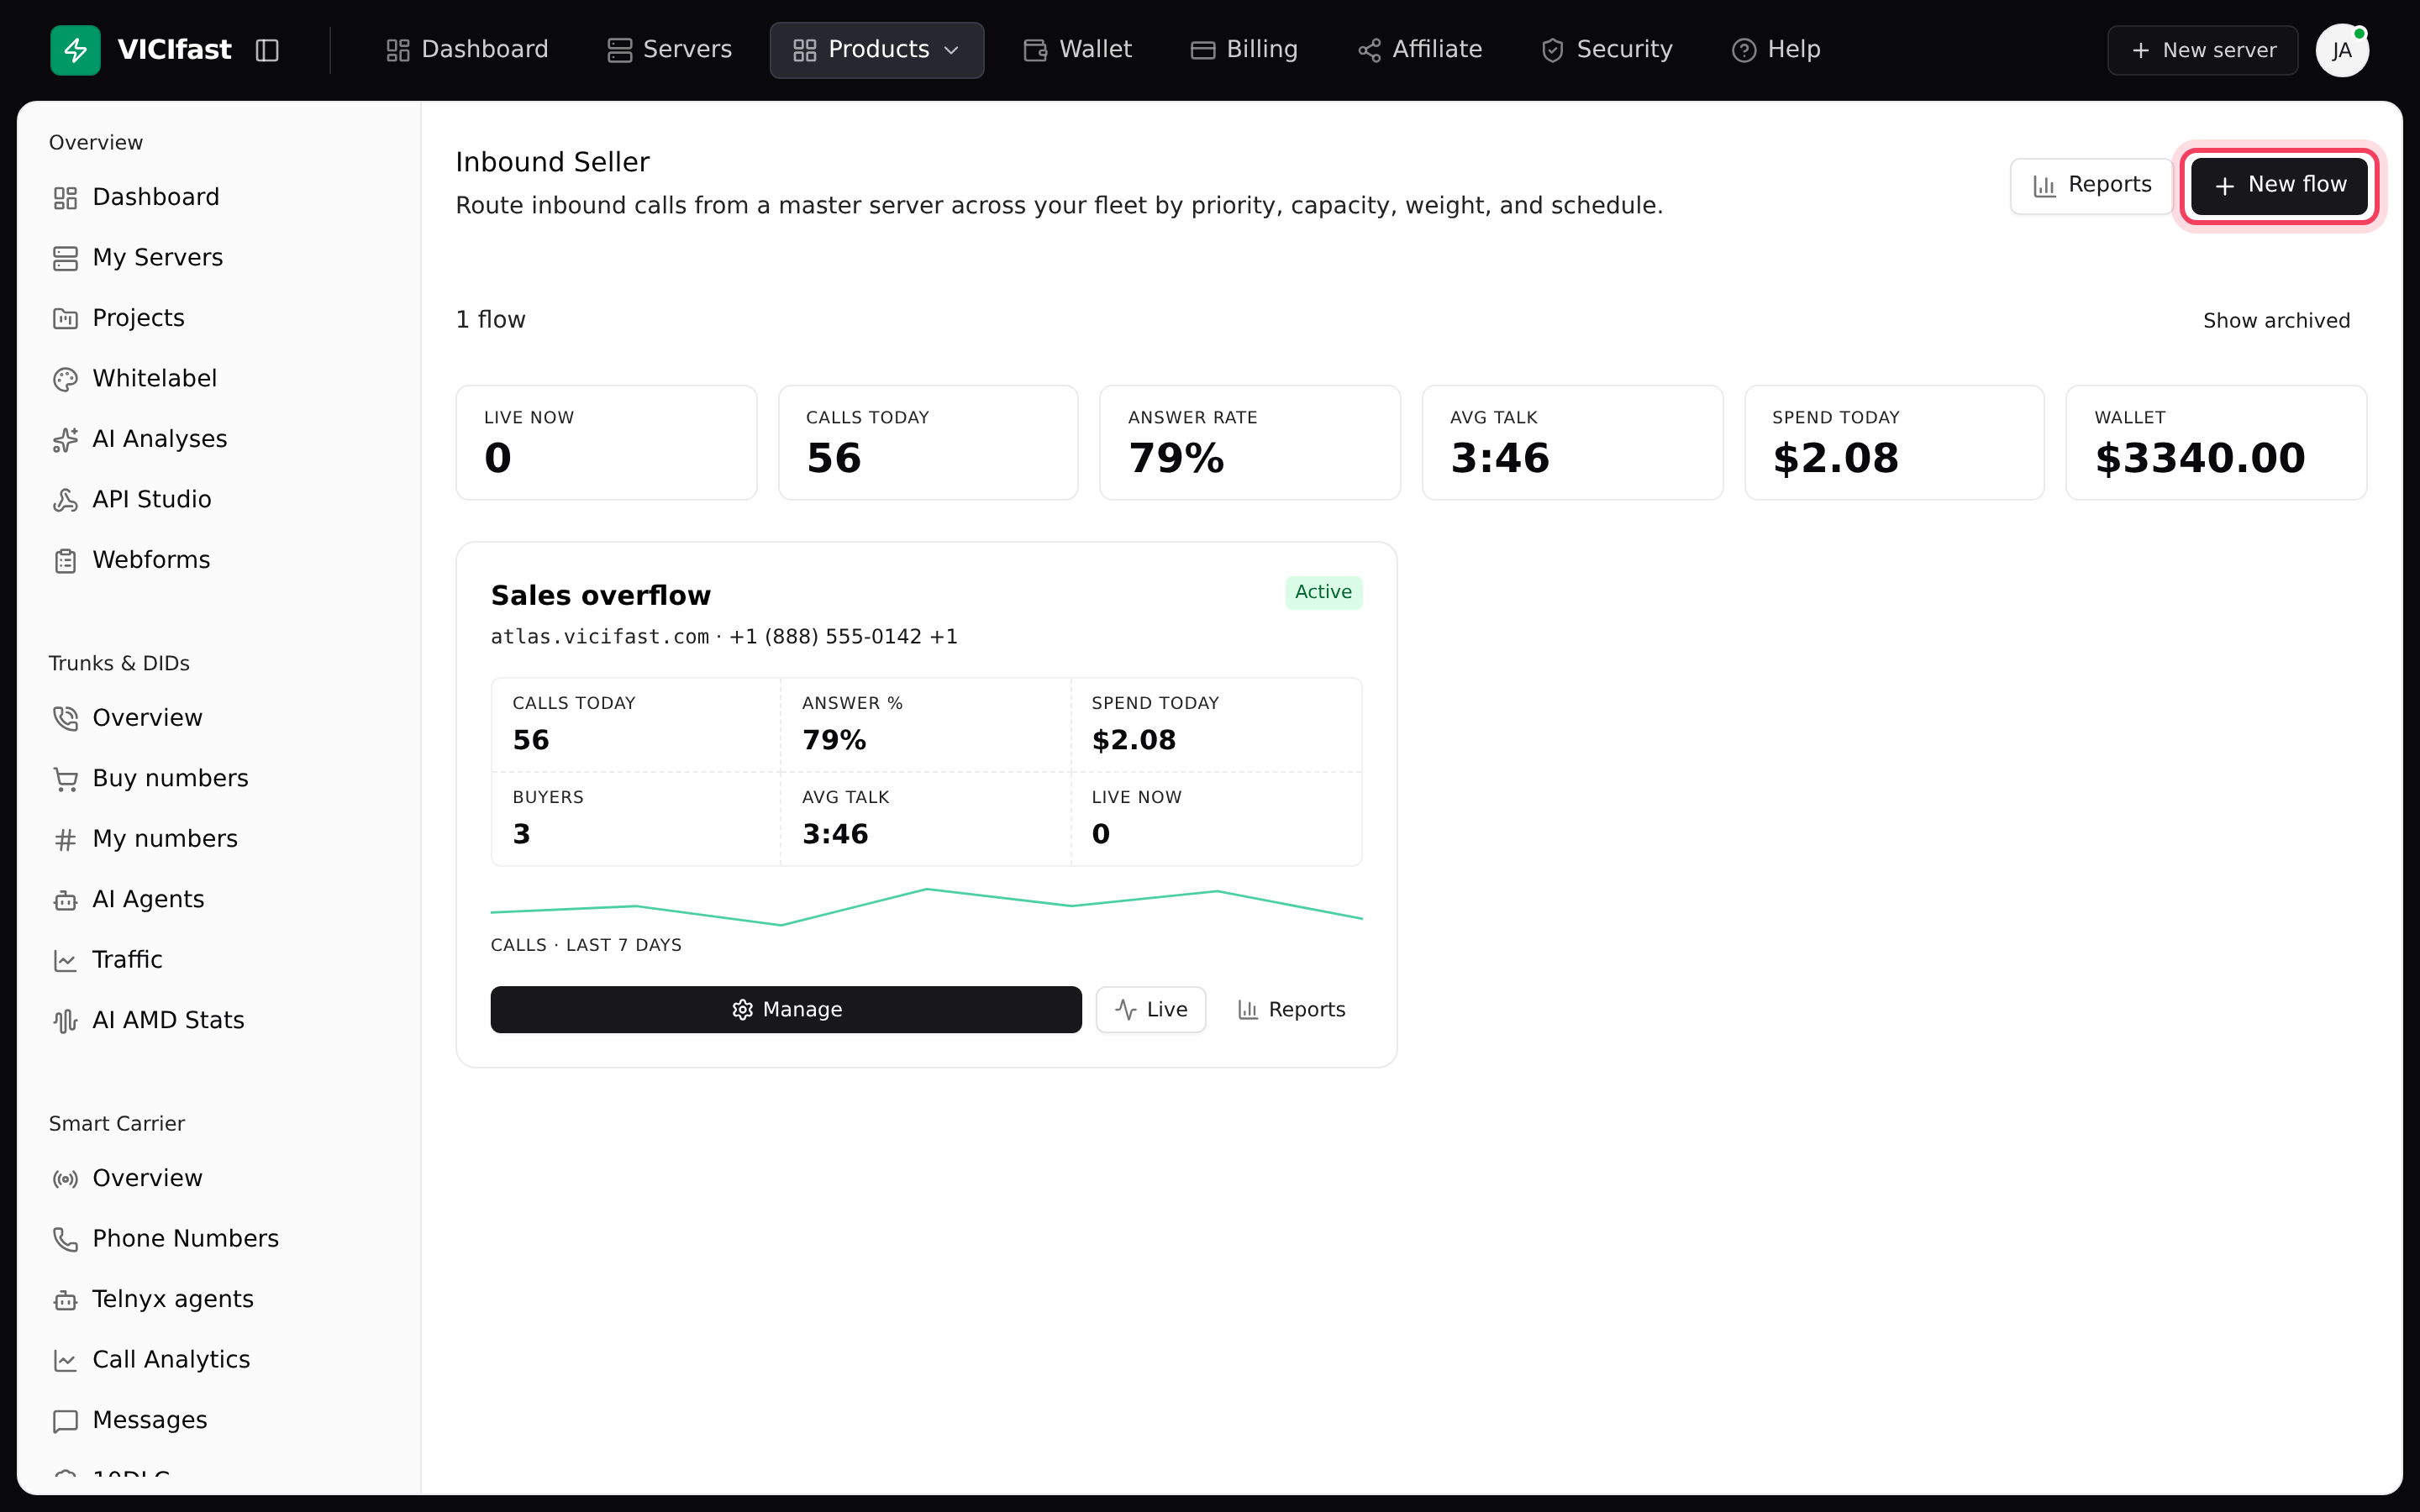
- In the top bar, click Products, then Inbound Seller.
- Click New flow at the top right. If you have no flows yet, you can also click Create your first flow.
Step 2: Choose the server and numbers
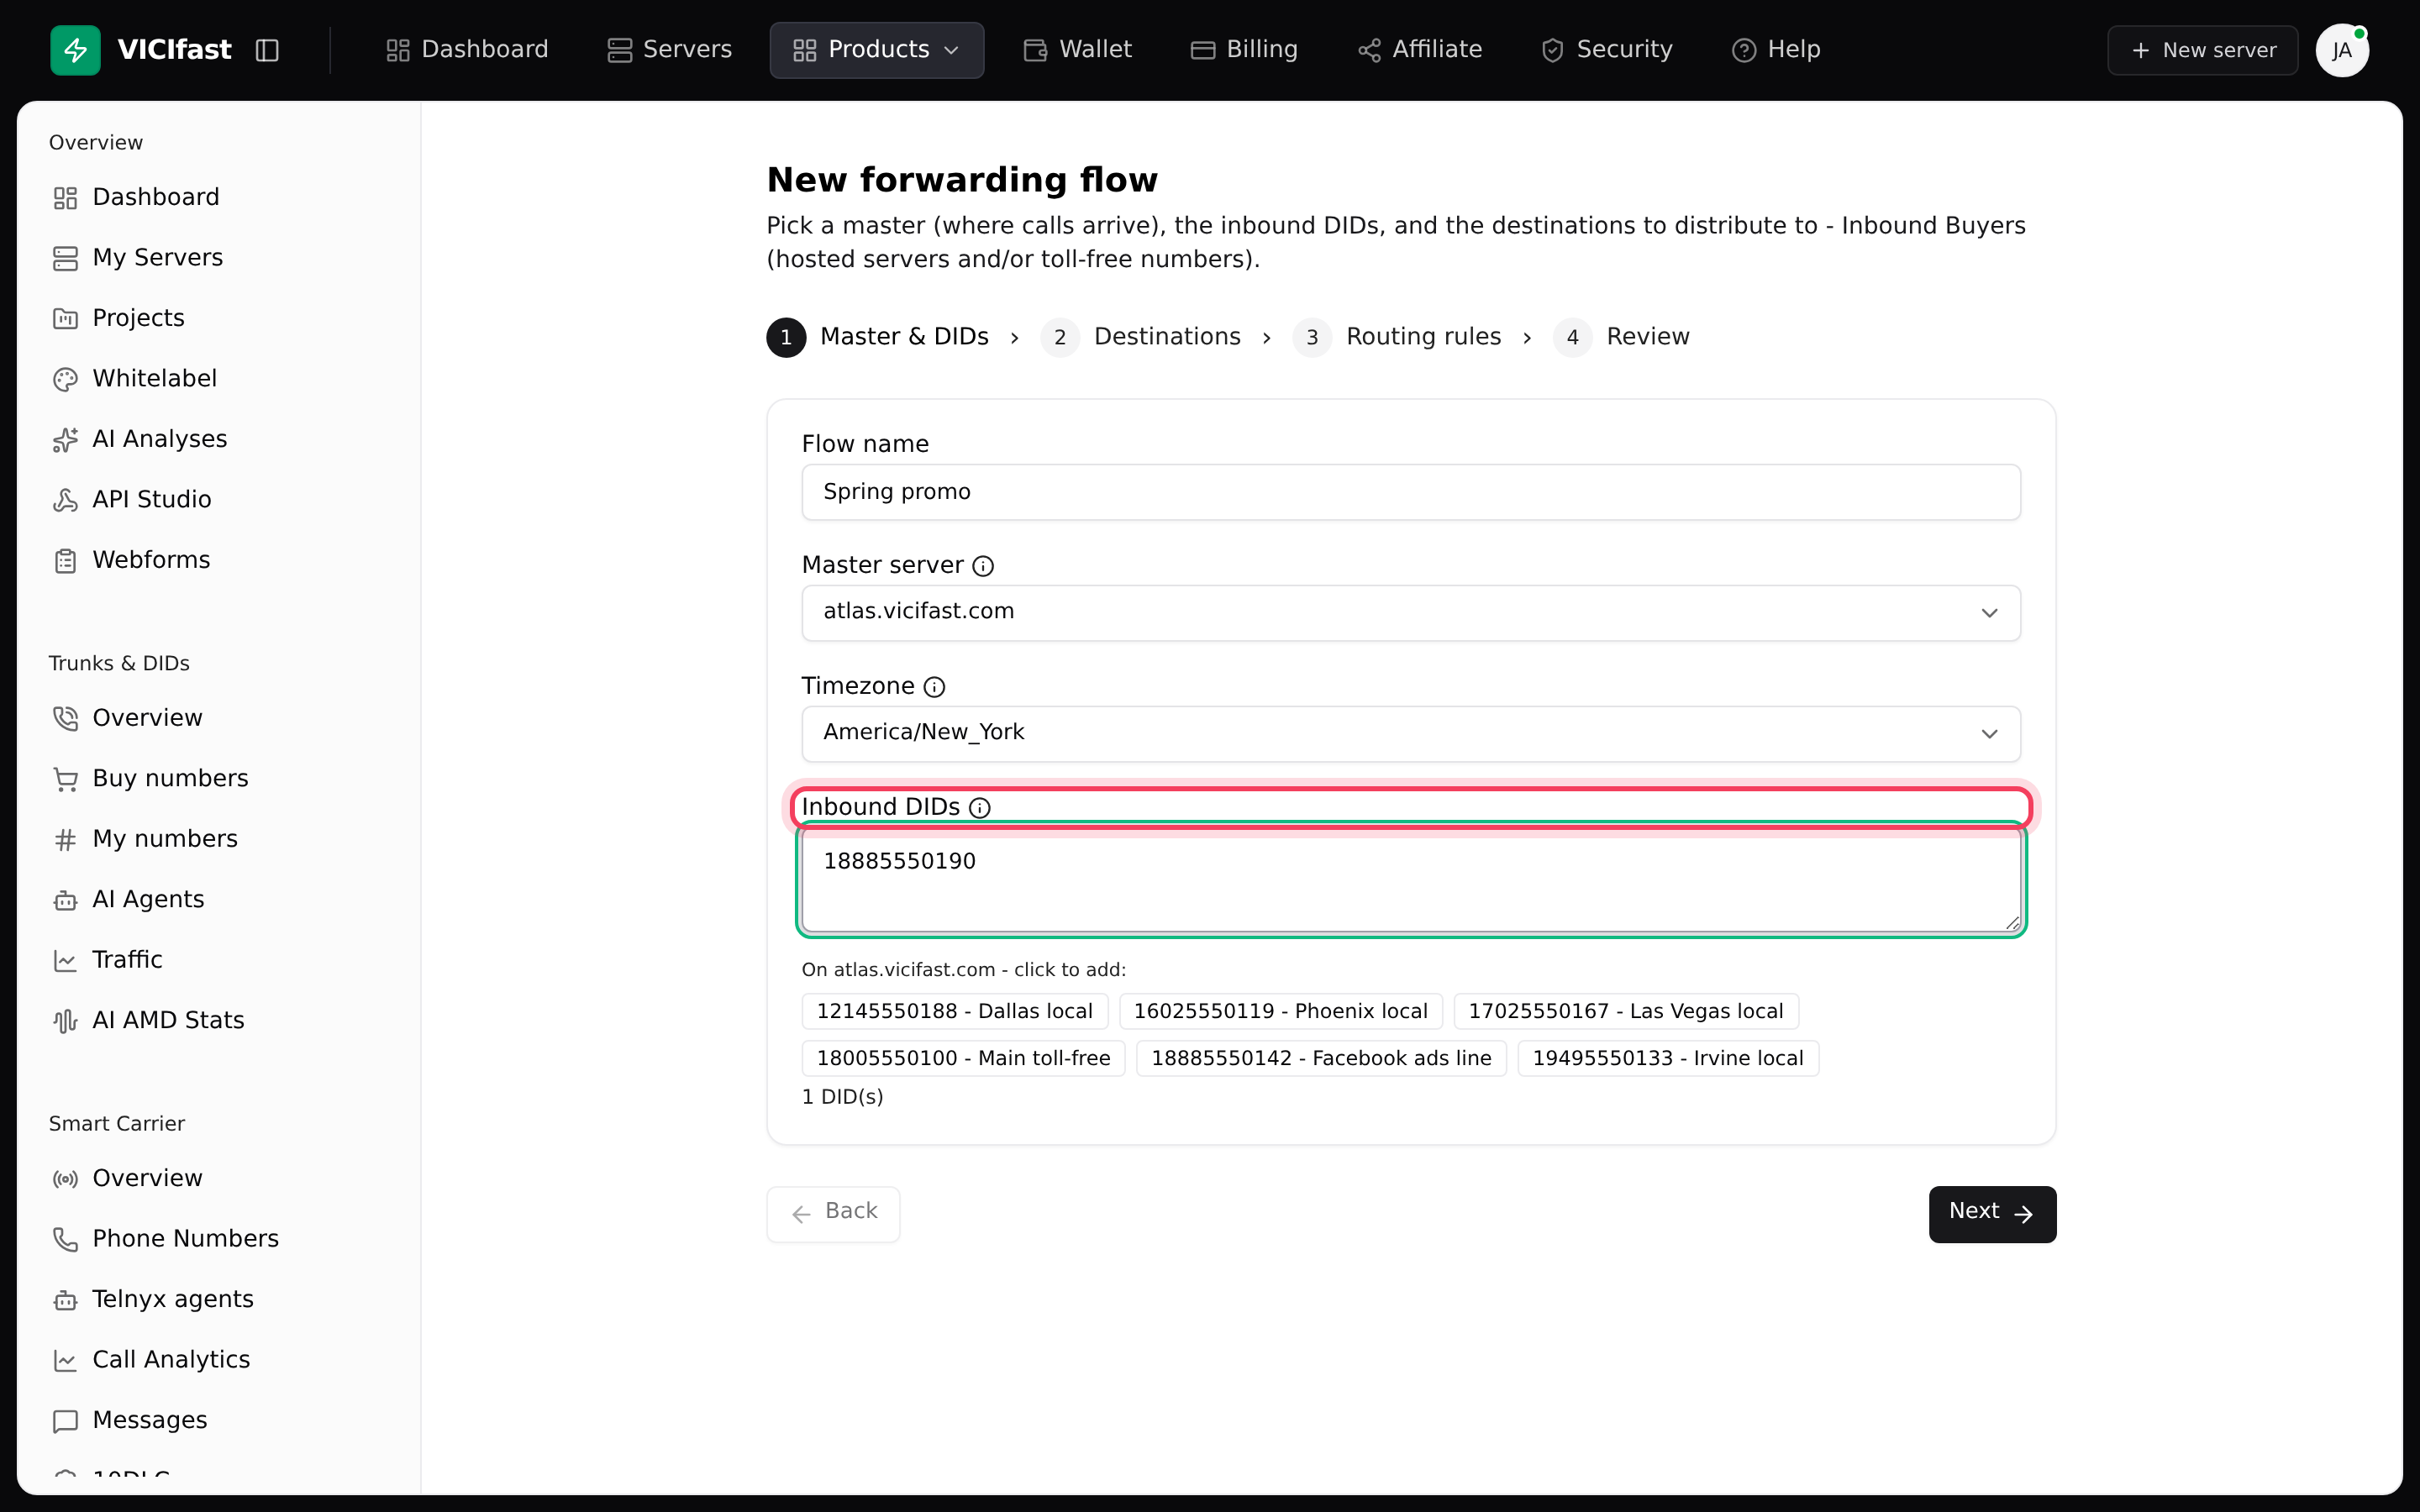
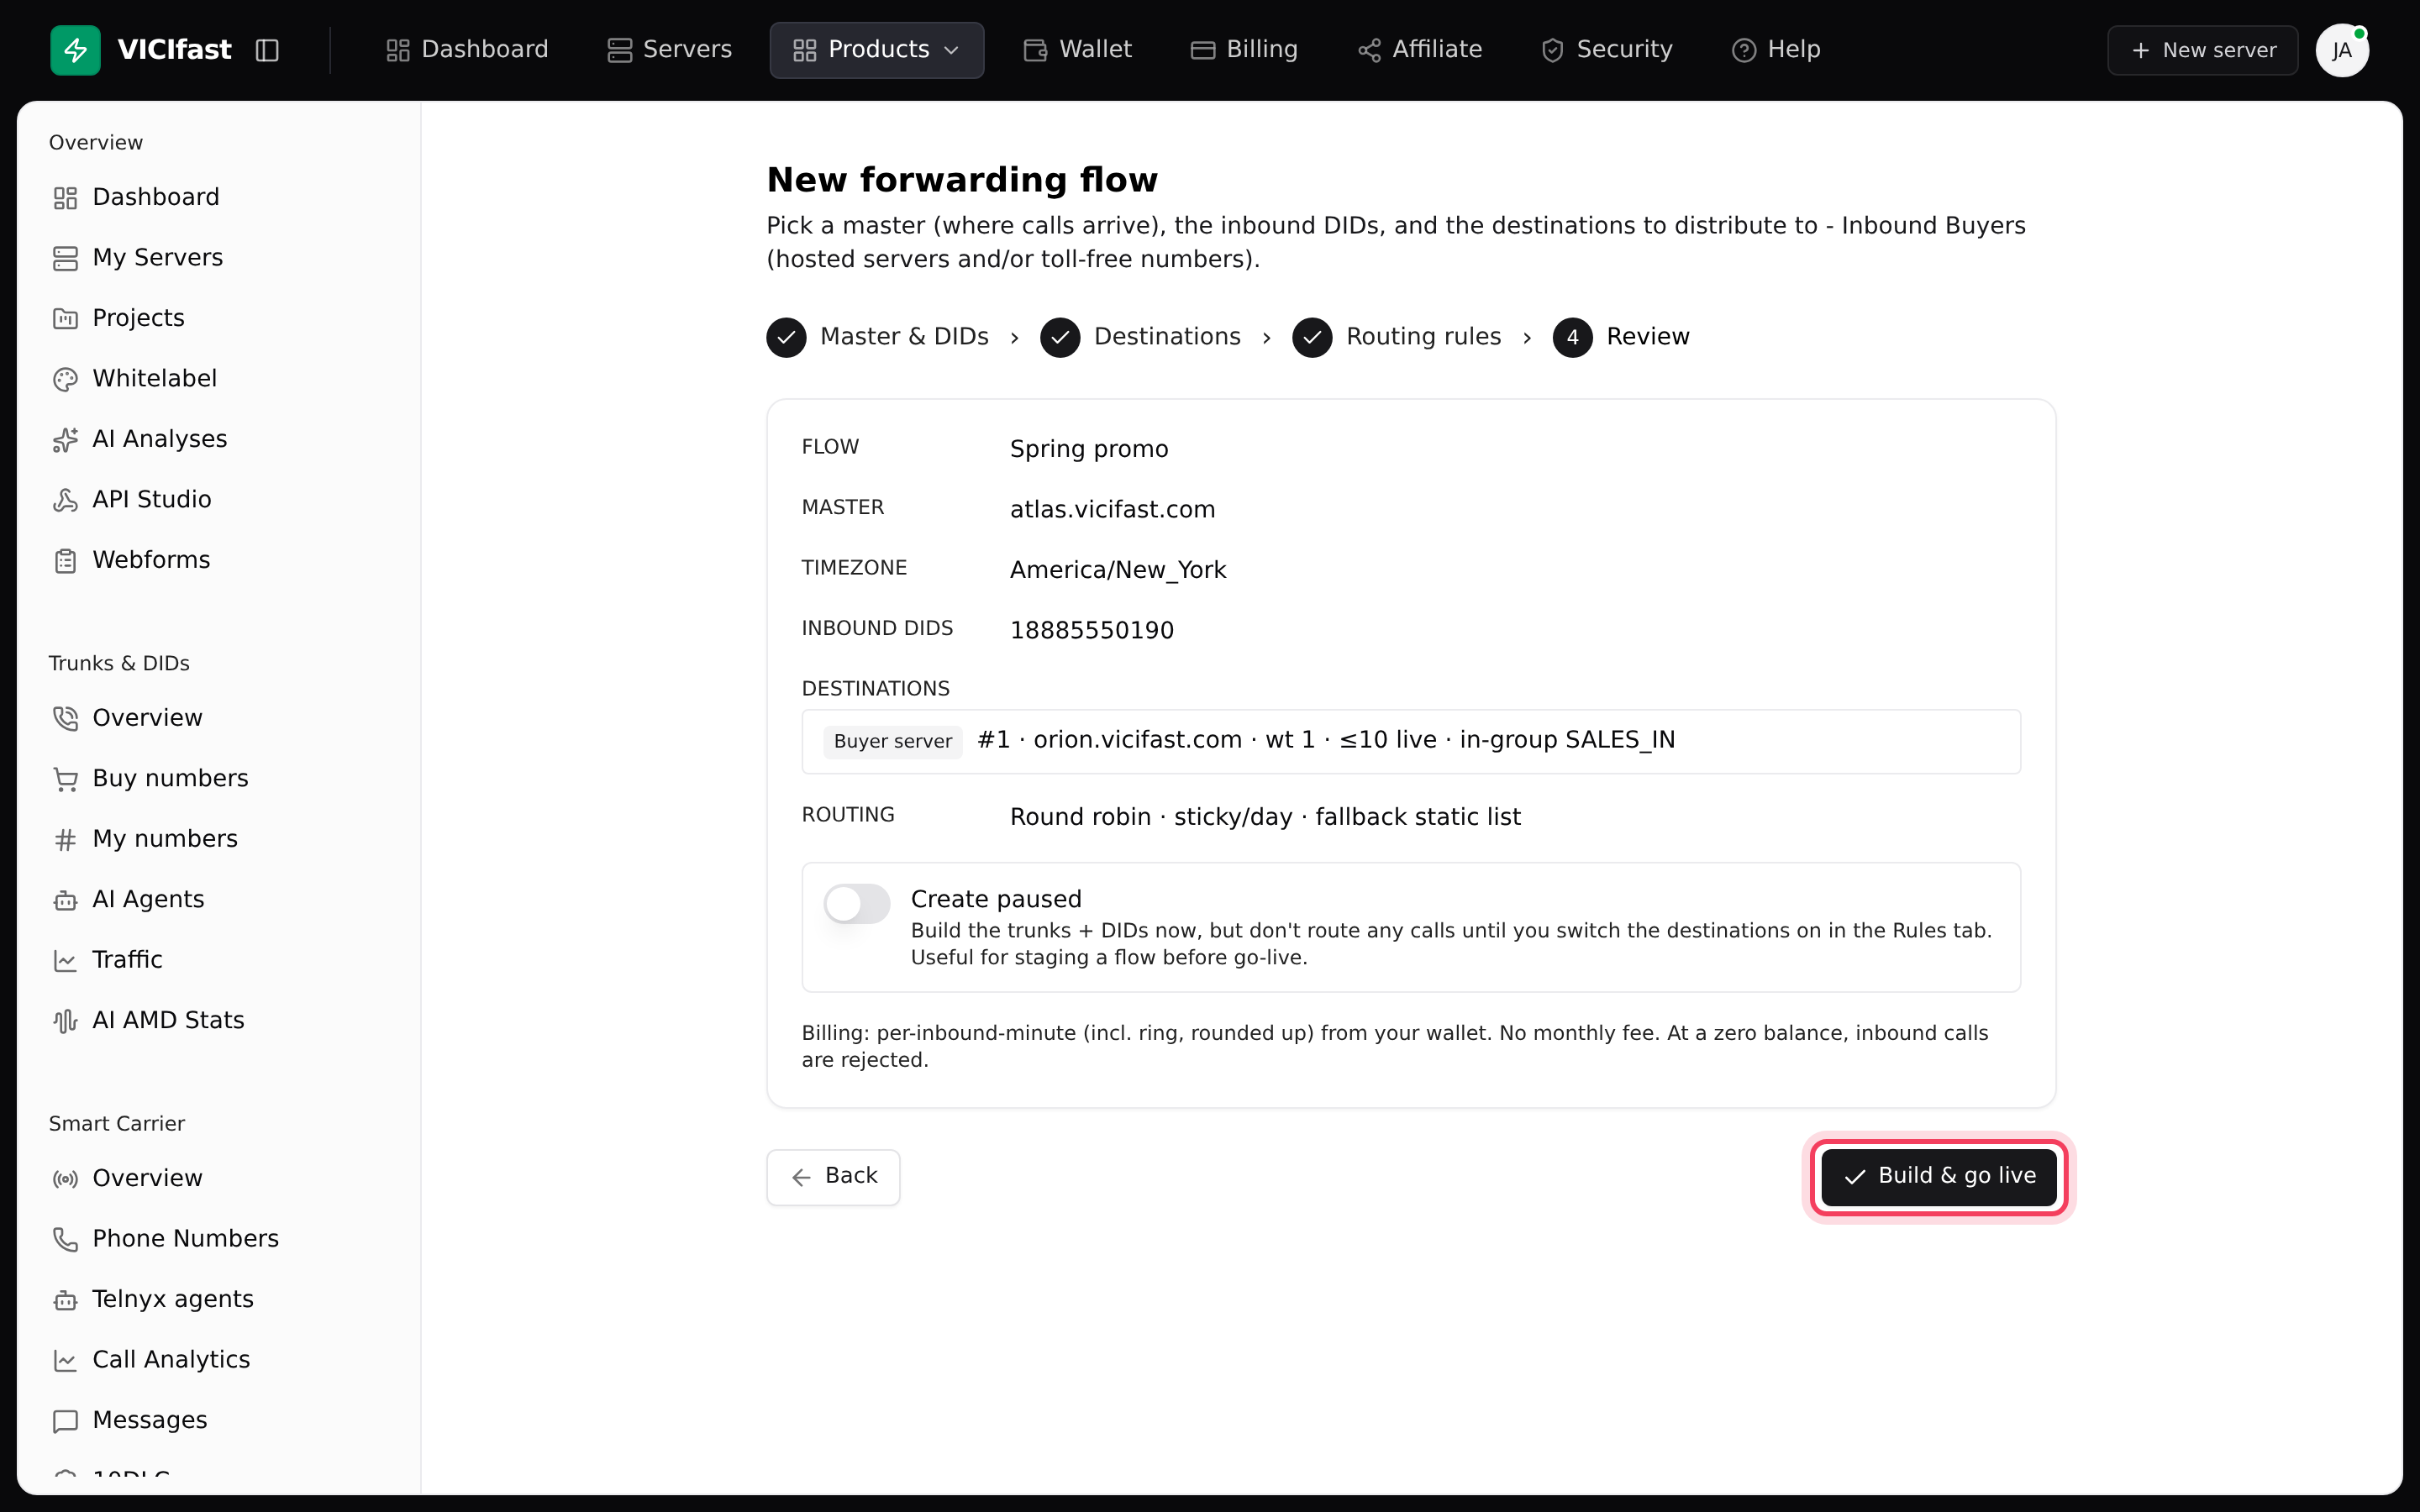
The setup has four steps, shown across the top: Master & DIDs, Destinations, Routing rules and Review.
- In Flow name, type a name your team will recognise, like "Sales overflow".
- In Master server, pick the server your calls arrive on. Only active servers are listed.
- Check the Timezone. It is used for buyer opening hours and daily limits. It starts on US Eastern.
- In Inbound DIDs, type the numbers that belong to this flow, separated by commas or new lines. Type them exactly as your phone provider sends them. Numbers already on the master server appear underneath: click one to add it.
- Click Next.
Step 3: Add your buyers
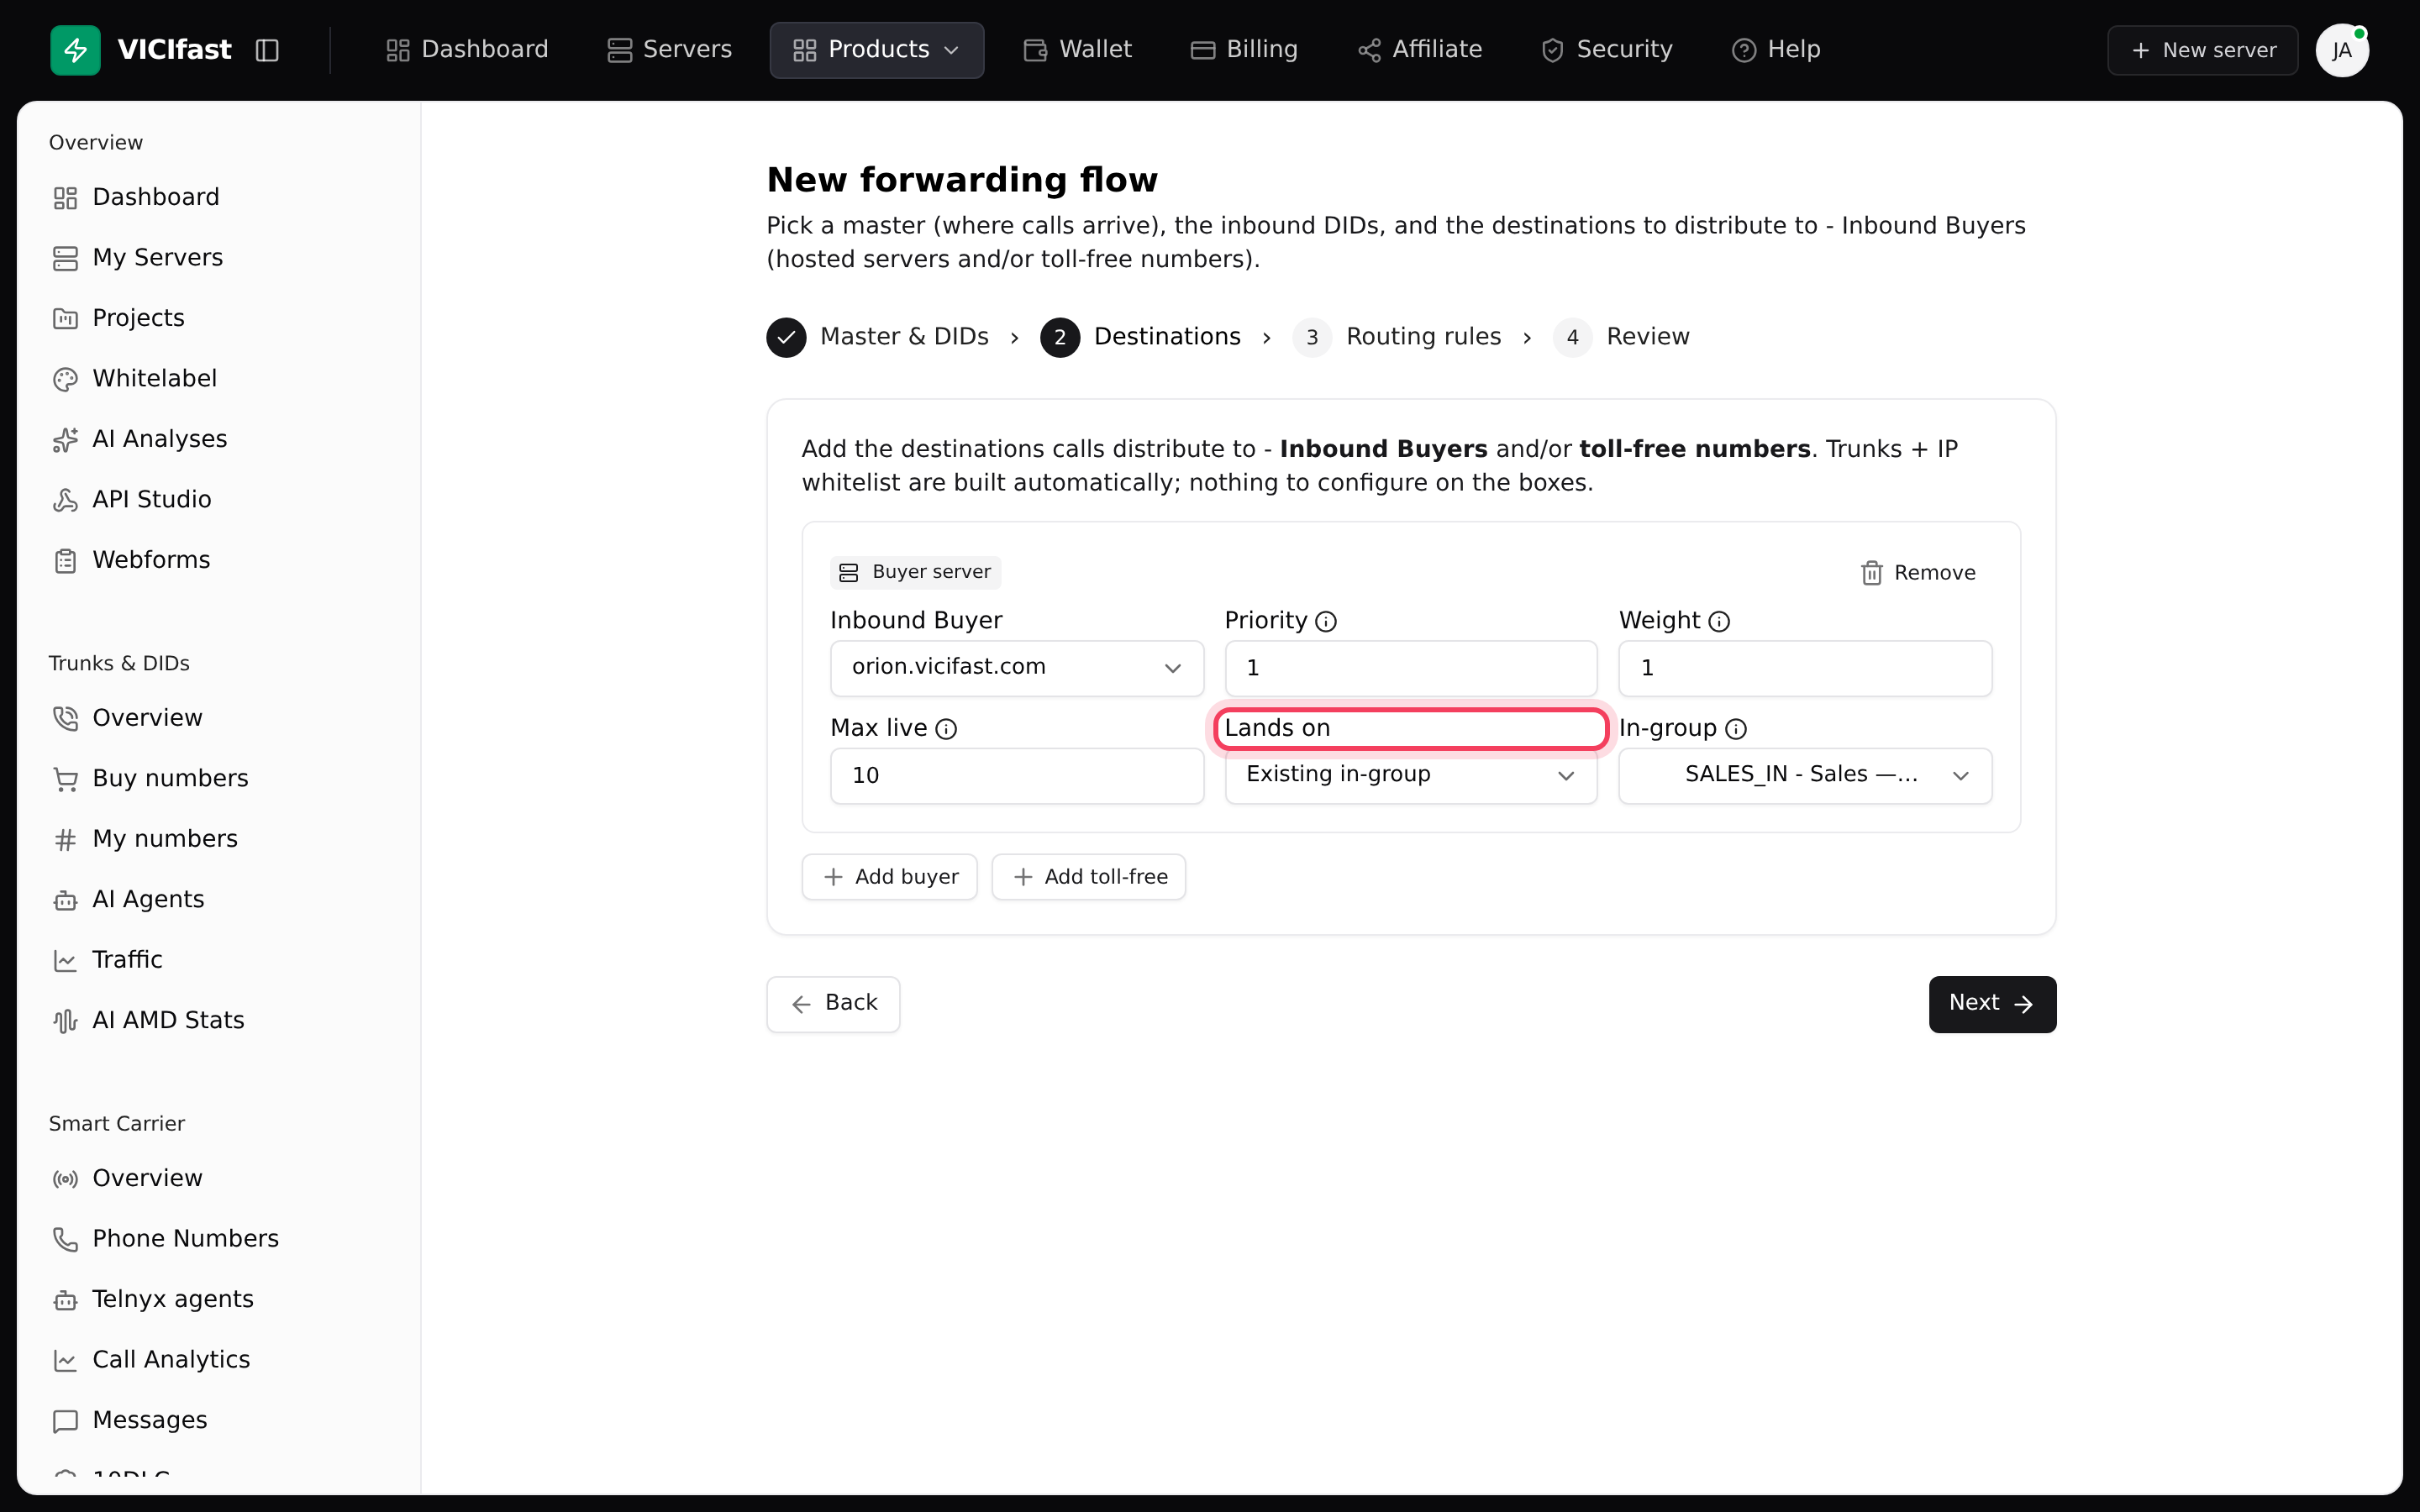
Add at least one destination. You can mix buyer servers and toll-free numbers.
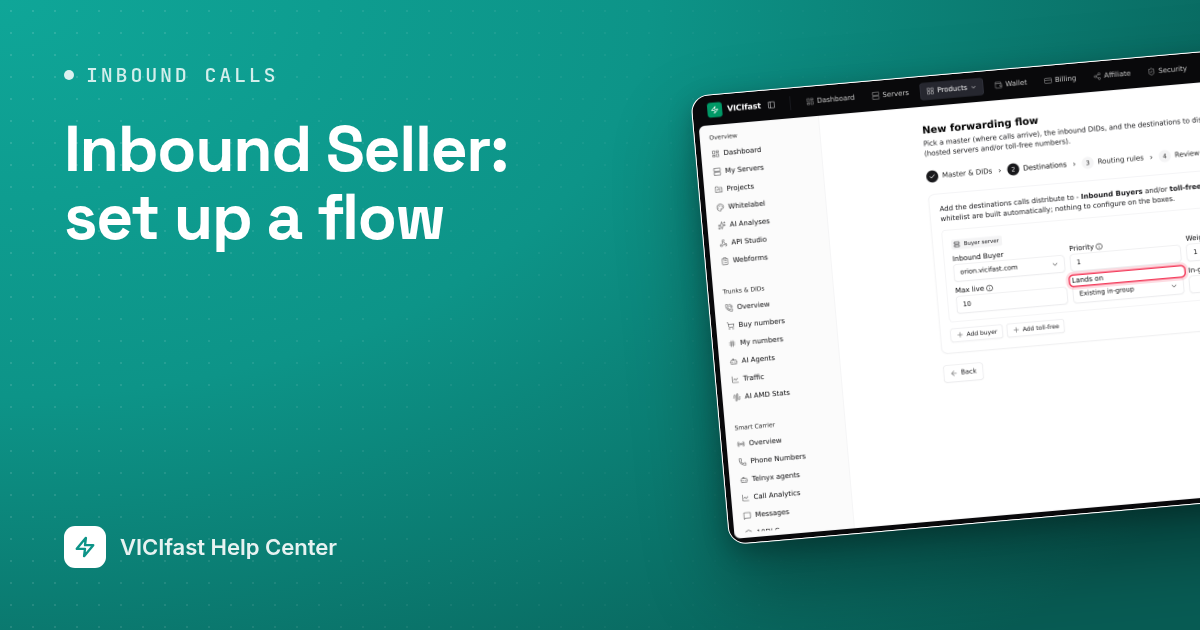
- The first buyer card is already there: pick the server in Inbound Buyer. For each extra buyer, click Add buyer.
- Set Priority: lower numbers are tried first. Destinations with the same priority share the calls.
- Set Weight: the share of calls this destination gets within its priority. 0 means it takes no new calls.
- Set Max live: the most live calls at once. With an in-group it counts that queue's calls; with Existing DID, all the server's calls. When it is full, the next destination gets the call.
- In Lands on, choose where the call arrives on the buyer server: Existing in-group (pick the queue), Auto-create in-group (we create a new, empty queue for you) or Existing DID (a number already set up on that server).
- To send calls to a toll-free number instead, click Add toll-free and fill in Toll-free number, Priority, Weight and Max live. The caller's number and name are passed through.
- Click Next.
Step 4: Choose how calls spread
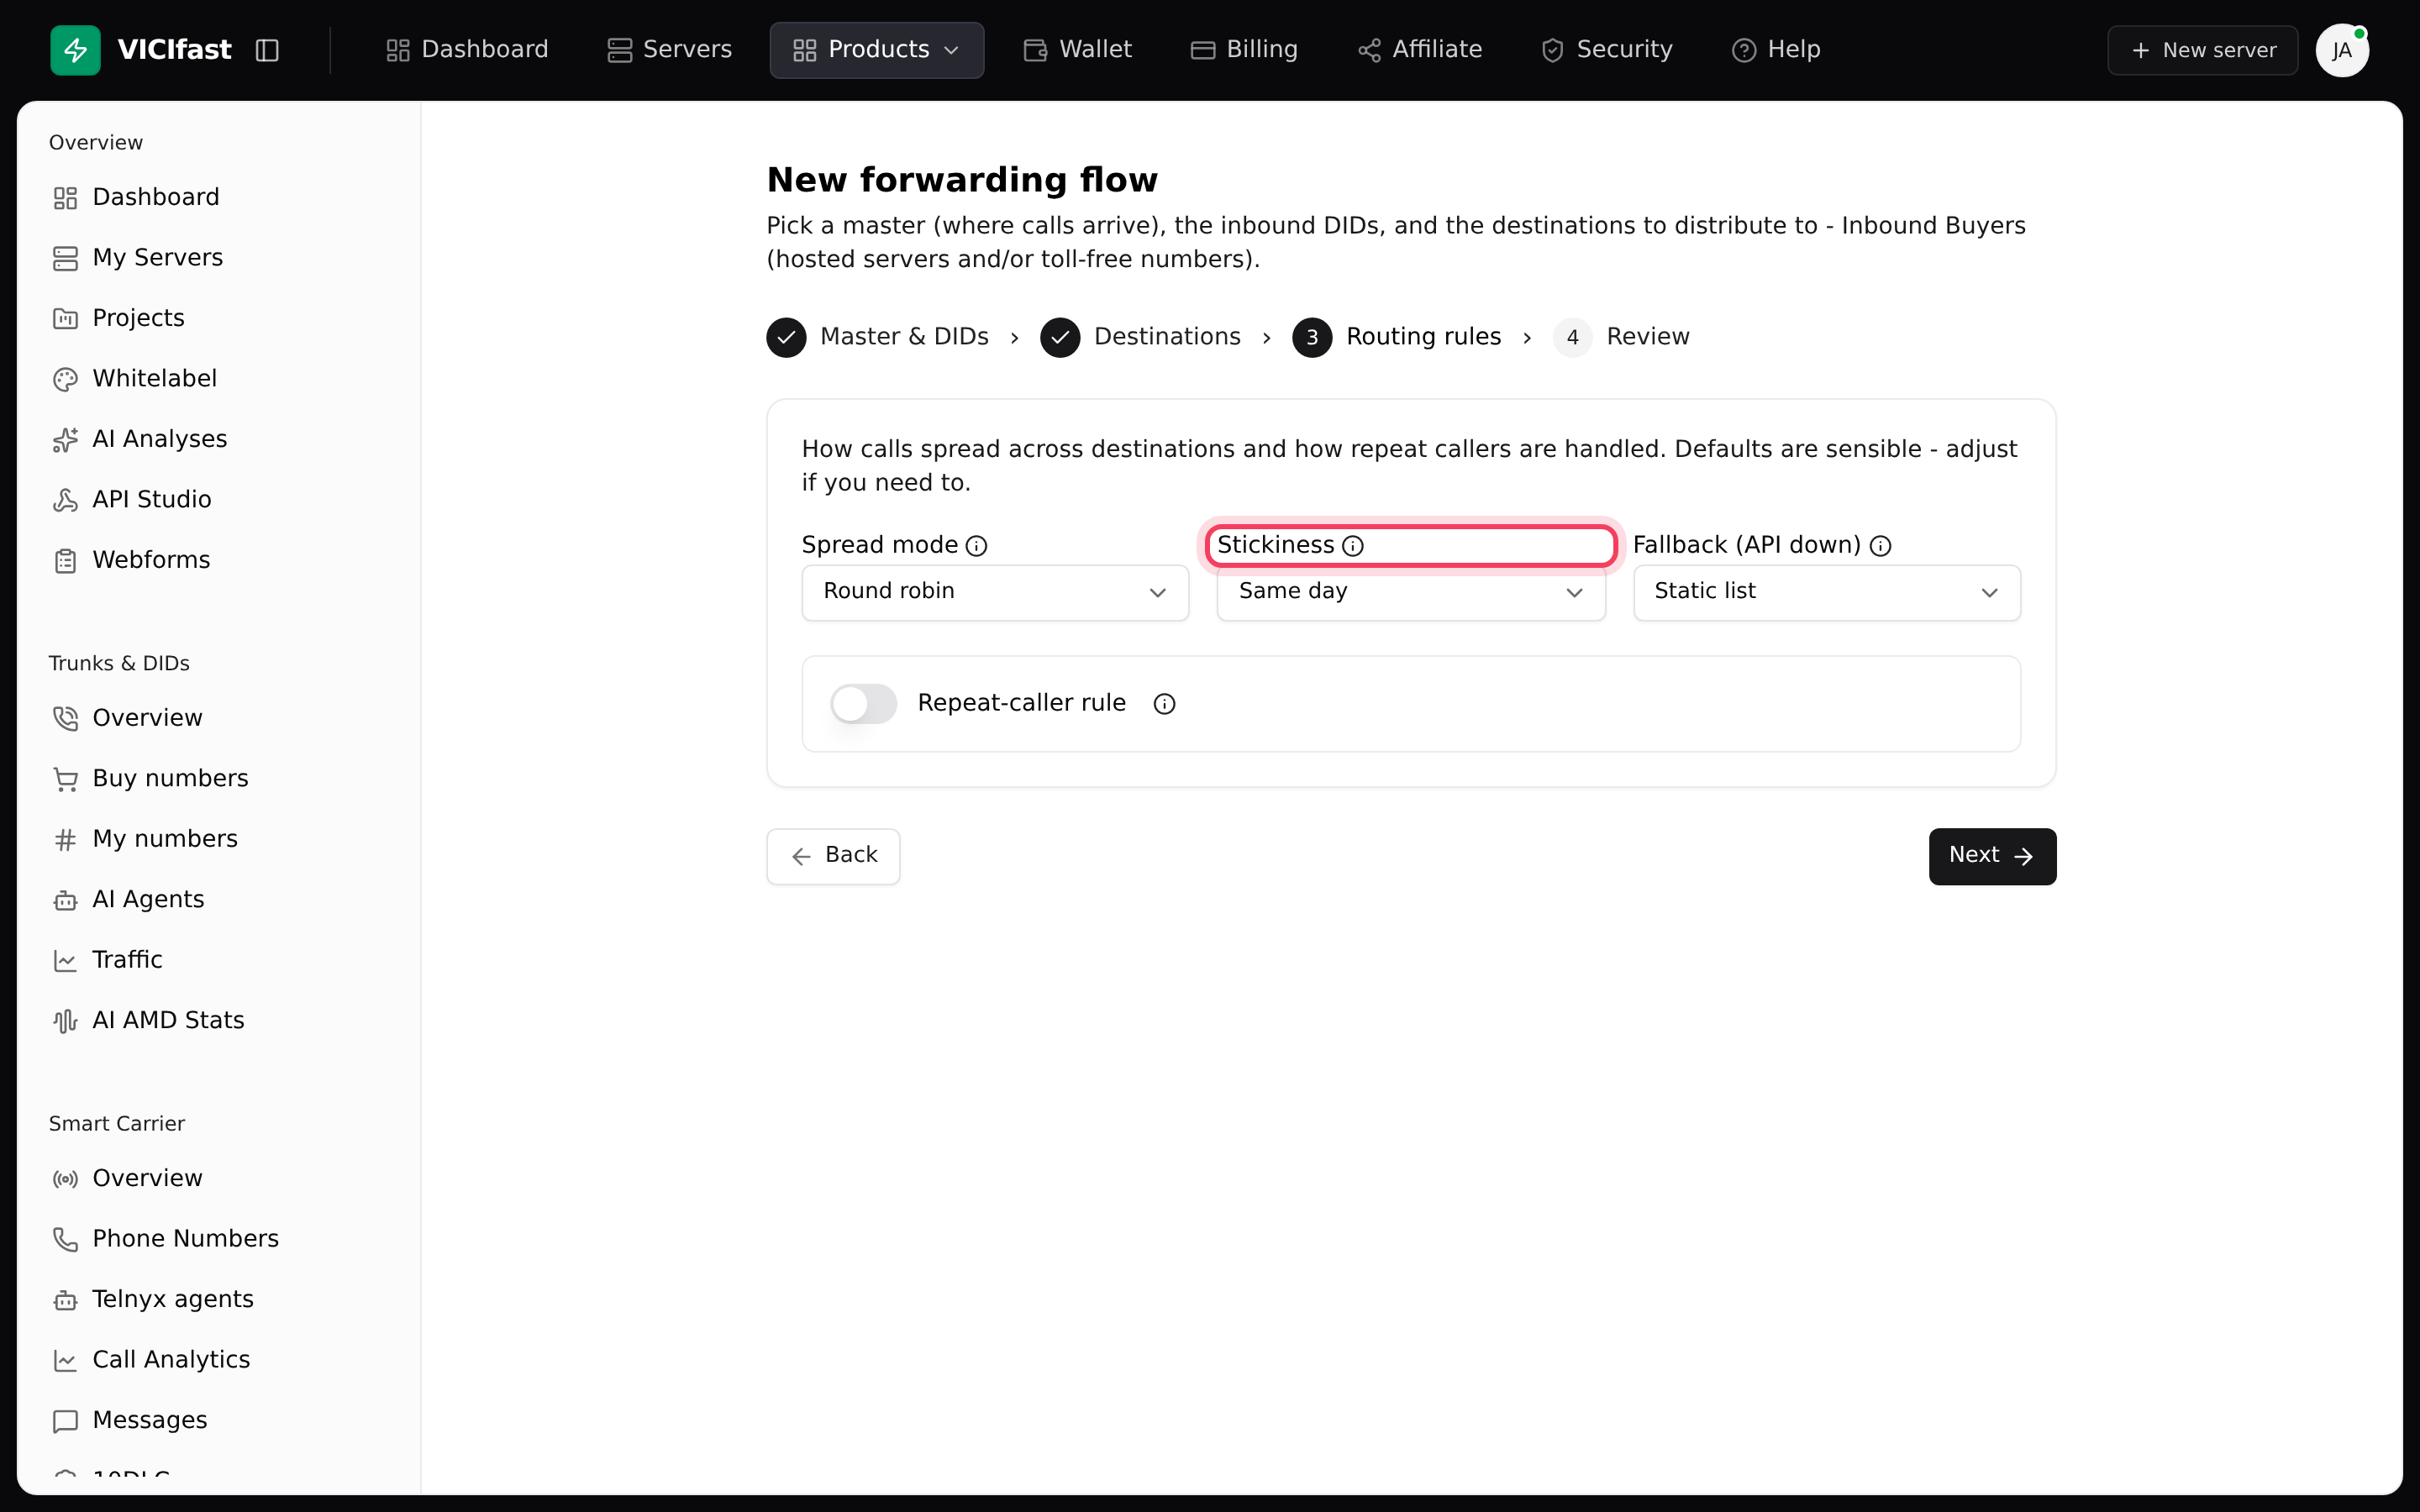
The defaults suit most flows. You can change the spread, stickiness and repeat-caller rule later on the flow's Caller rules tab. The fallback can't be changed after the build.
- Spread mode: Round robin takes turns in order, and a weight of 2 gets two turns. Weighted picks at random, in proportion to each destination's weight.
- Stickiness: whether a caller who rings again goes back to the same buyer. Choose None, Same day or Rolling window (then set the minutes).
- Fallback (API down): what happens if your server briefly can't reach our routing service. Static list uses a backup copy of your destinations kept on the server, Default route sends calls to your first destination, and Reject turns them away. Leave it on Static list unless you have a reason.
- Repeat-caller rule (optional): switch it on and choose Reject to turn away callers who rang within the last Within (minutes). To send them back to the same buyer, use Stickiness instead.
- Click Next.
Step 5: Review and build
- Check the summary. Each destination shows its priority, weight and live-call limit.
- If you want to build everything now but not take calls yet, switch on Create paused. You then switch each destination on in the Rules tab when you are ready.
- Click Build & go live (or Build (paused)).
You land on the flow's page. Its status shows PROVISIONING while the connections are built, then ACTIVE.
Step 6: Place a test call
- When the flow is ACTIVE, click Test call at the top of the flow's page. It places a real call into the flow from a dummy number. It is never billed and never counted in your reports.
- Watch the Live tab. The call shows under Live calls as Ringing, then Talking. Each buyer card shows its status, and Next up marks the one that gets the next call.
- Open the Call Log tab and switch on Show test calls. Your test call has a Test badge. Click the arrow on its row to see each step: call received, sent to a buyer, answered, ended.

Step 7: Change the flow later
Open the flow from the Inbound Seller page. The tabs along the top are where you manage it.
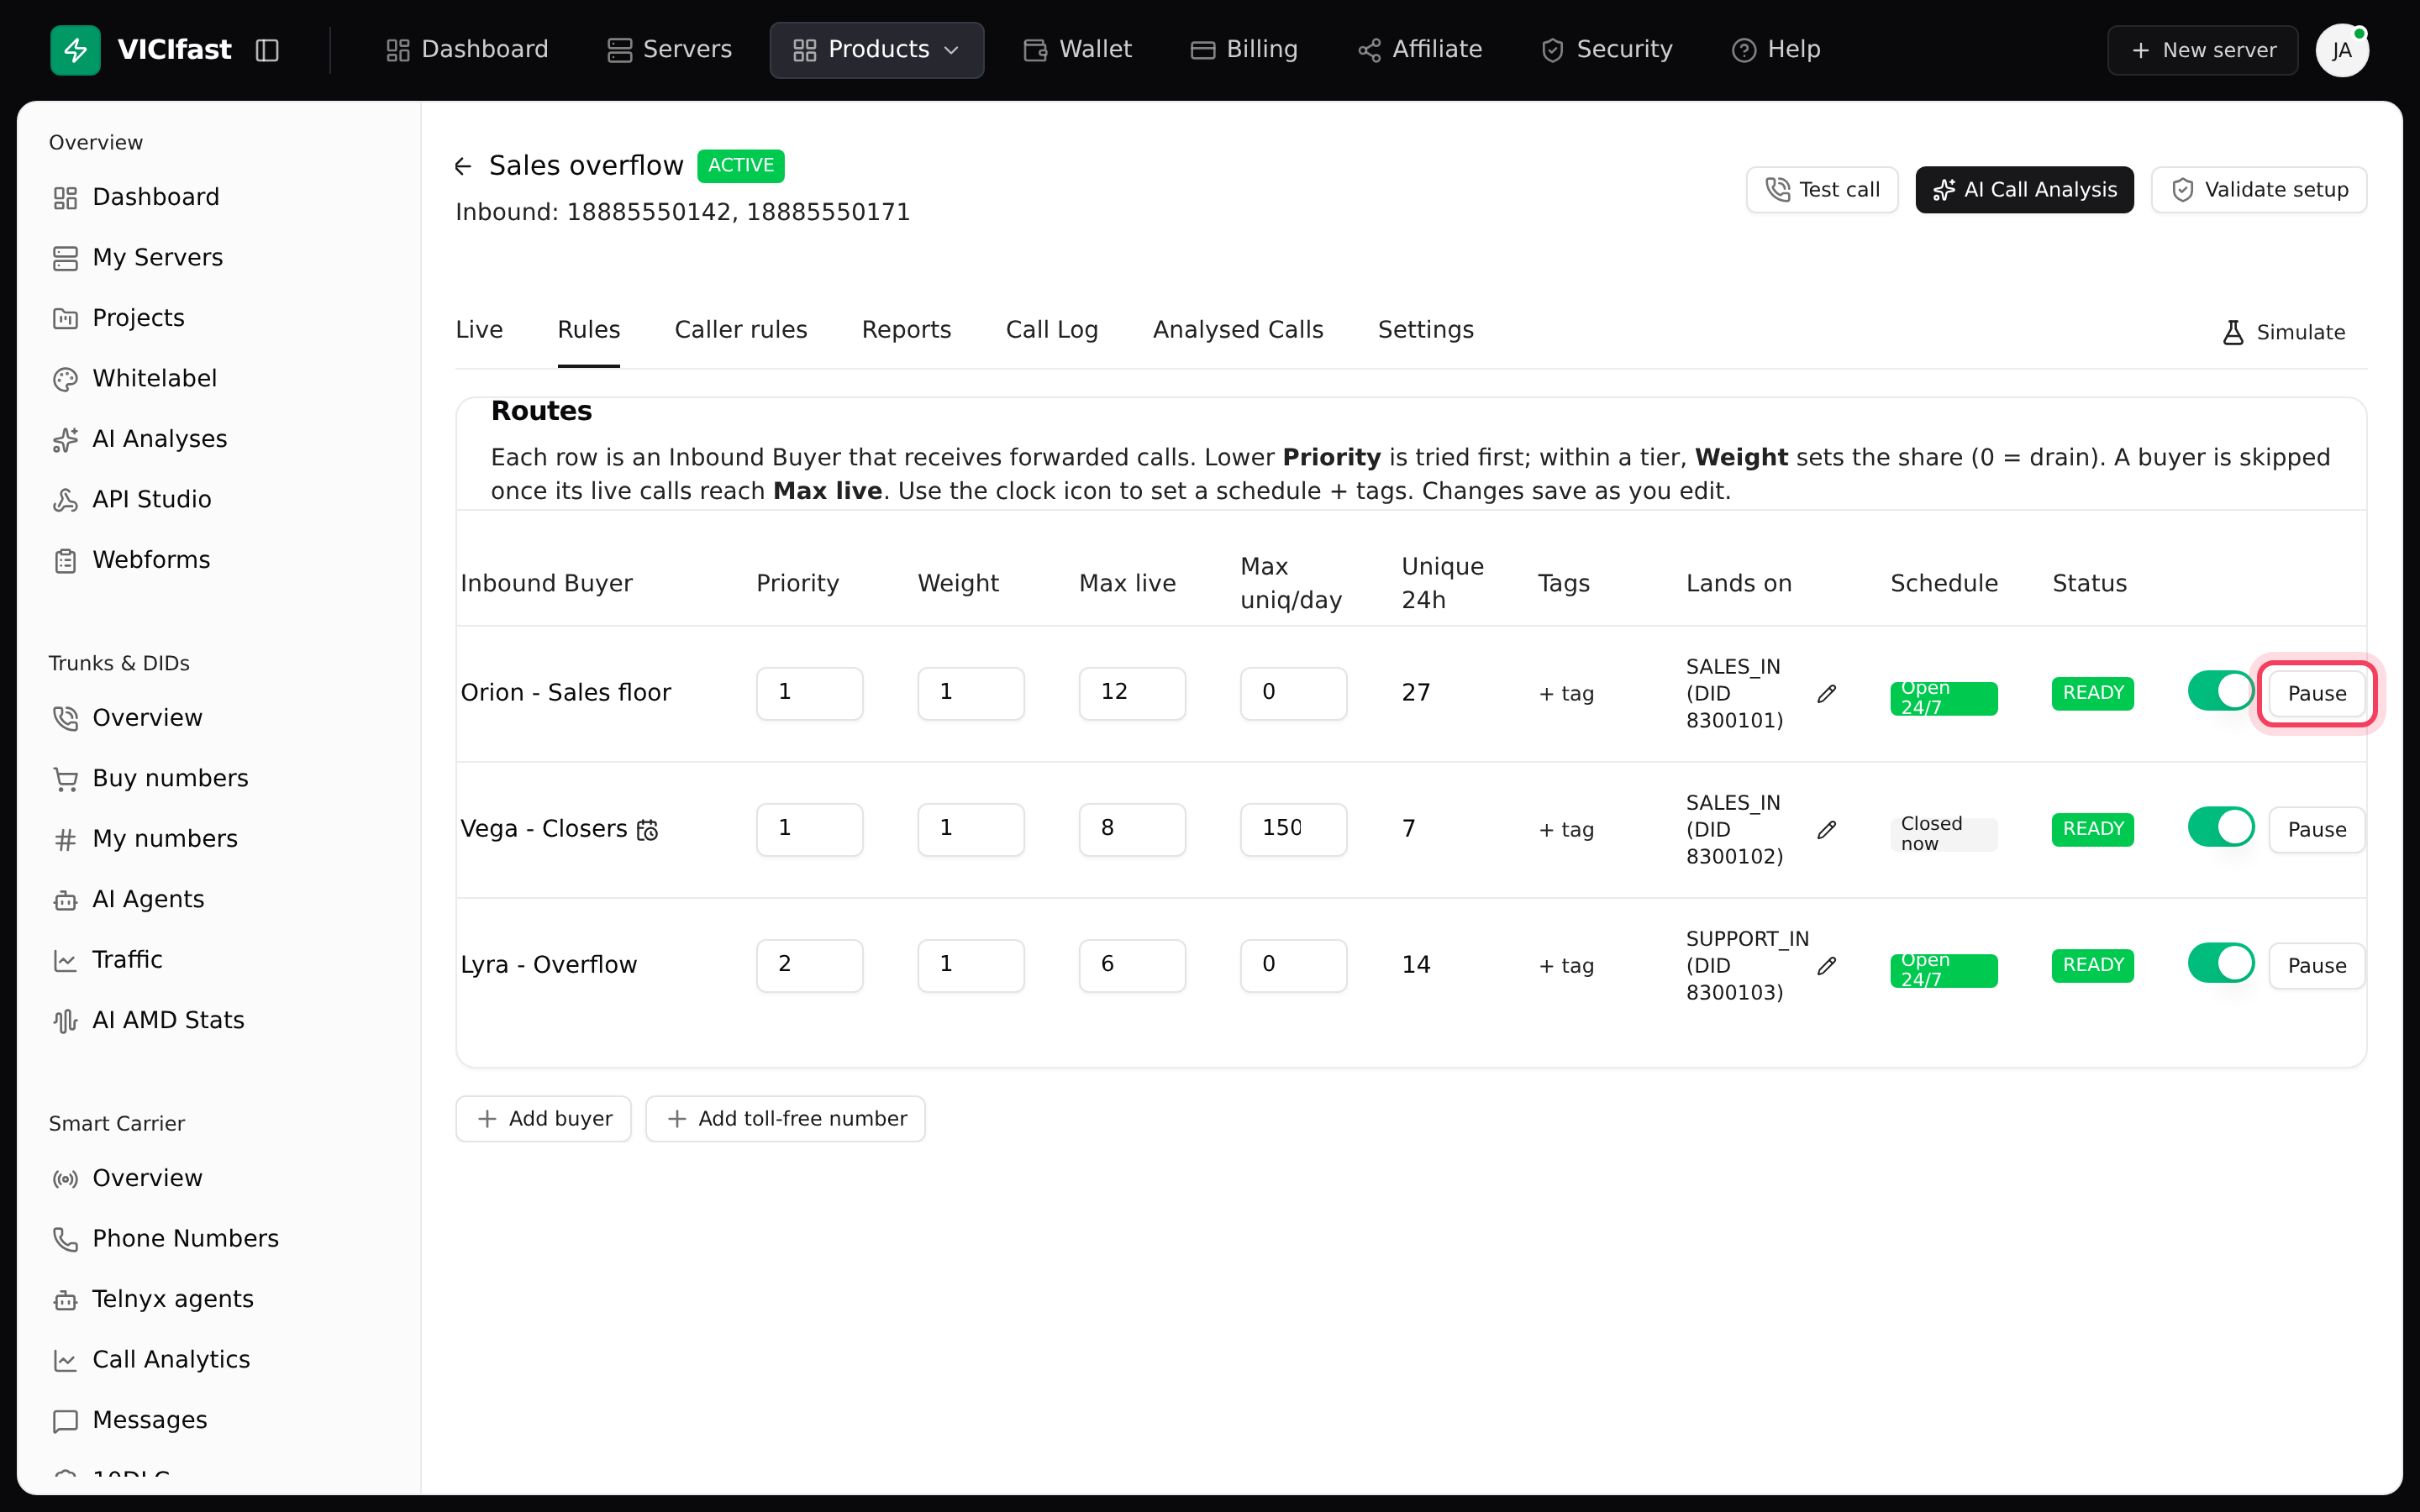
- Rules: one row per destination. Edit Priority, Weight, Max live and Max uniq/day (most different callers per day, 0 means no limit). Pause stops calls to a buyer until you click Resume; the switch turns a destination on or off. The clock button sets opening hours (Add window, then Save schedule & tags); with no hours set it shows Open 24/7. Add buyer and Add toll-free number sit below the table.
- Caller rules: change the spread and stickiness, and the Repeat callers rule.
- Settings: change the time zone, add, pause or remove numbers under Inbound DIDs, or archive the flow.
- Simulate: run made-up traffic through your real rules to see how calls would spread. No real calls are placed and nothing is billed.
If something goes wrong
Frequently asked
- Buyers must be other active servers on your account, not the master itself. If you only have one active server, you can only add toll-free numbers, or you need a second server.
- The setup shows: Toll-free destinations are not available on the platform yet. That is a platform setting, not one on your account: chat with support.
- Each number can belong to one flow only. Remove it from the other flow (Settings tab, Inbound DIDs) or use a different number.
- The flow is still being built or has an error. Wait until the status shows ACTIVE. If it shows ERROR, click Validate setup and follow what it finds.
- Look at its card on the Live tab. It shows why: paused, closed now (outside its hours), drain (weight 0), at cap (Max live reached) or disabled.
› The Add buyer button is greyed out.
› The Add toll-free button is greyed out.
› I get 'one of those inbound DIDs is already in use'.
› Test call says 'Flow is not active.'
› Calls aren't going to one buyer.
Related articles
Tags: forwarding, setup