Bring your own server
Have VICIfast install and manage VICIdial on a machine you already own or rent: the check, the DNS records and the install.
Advanced · 3 min read
Bring your own server (BYOI) is for when you already rent or own a machine and want VICIfast to install and look after VICIdial on it. You keep the hardware and pay for it yourself. We install VICIdial, secure it, and you manage it from the same dashboard as any VICIfast server. Your machine is checked before you pay, and nothing is installed until you do.
What you need
- A fresh install of Ubuntu 22.04, 64-bit, with nothing else on it: no Asterisk, Apache, MariaDB, PHP or FreePBX.
- At least 4 CPU cores. The order page recommends 8 GB of memory and 80 GB of free disk; the check fails below about 4 GB of memory or 40 GB of free disk.
- A public IPv4 address on the machine itself (not behind a router that hides it), outbound HTTPS, and SSH reachable on port 22 or a port you choose.
- Root access over SSH, so you can paste a one-time key. We never ask for your password or a private key.
- A domain you control, for the address your agents log in on, for example dialer.yourcompany.com.
- A VICIfast account. The order page asks you to sign in.
Step 1: Start the order
- On the pricing page, click See BYOI plan, then the button on the BYOI plan card. You can also go straight to vicifast.com/order/byoi.
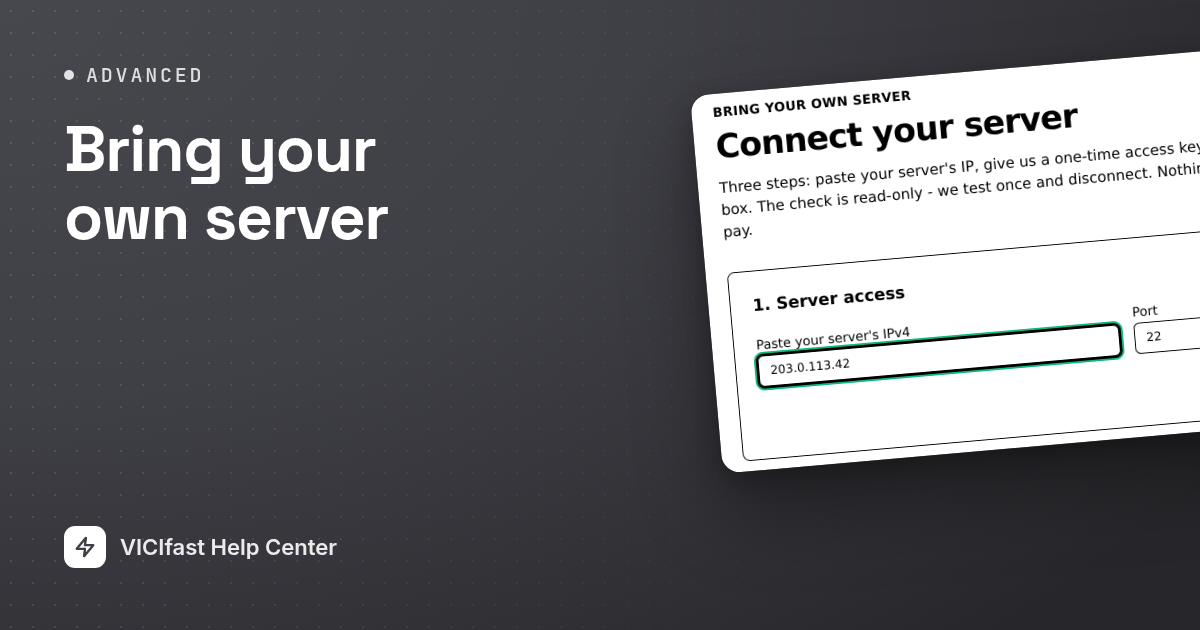
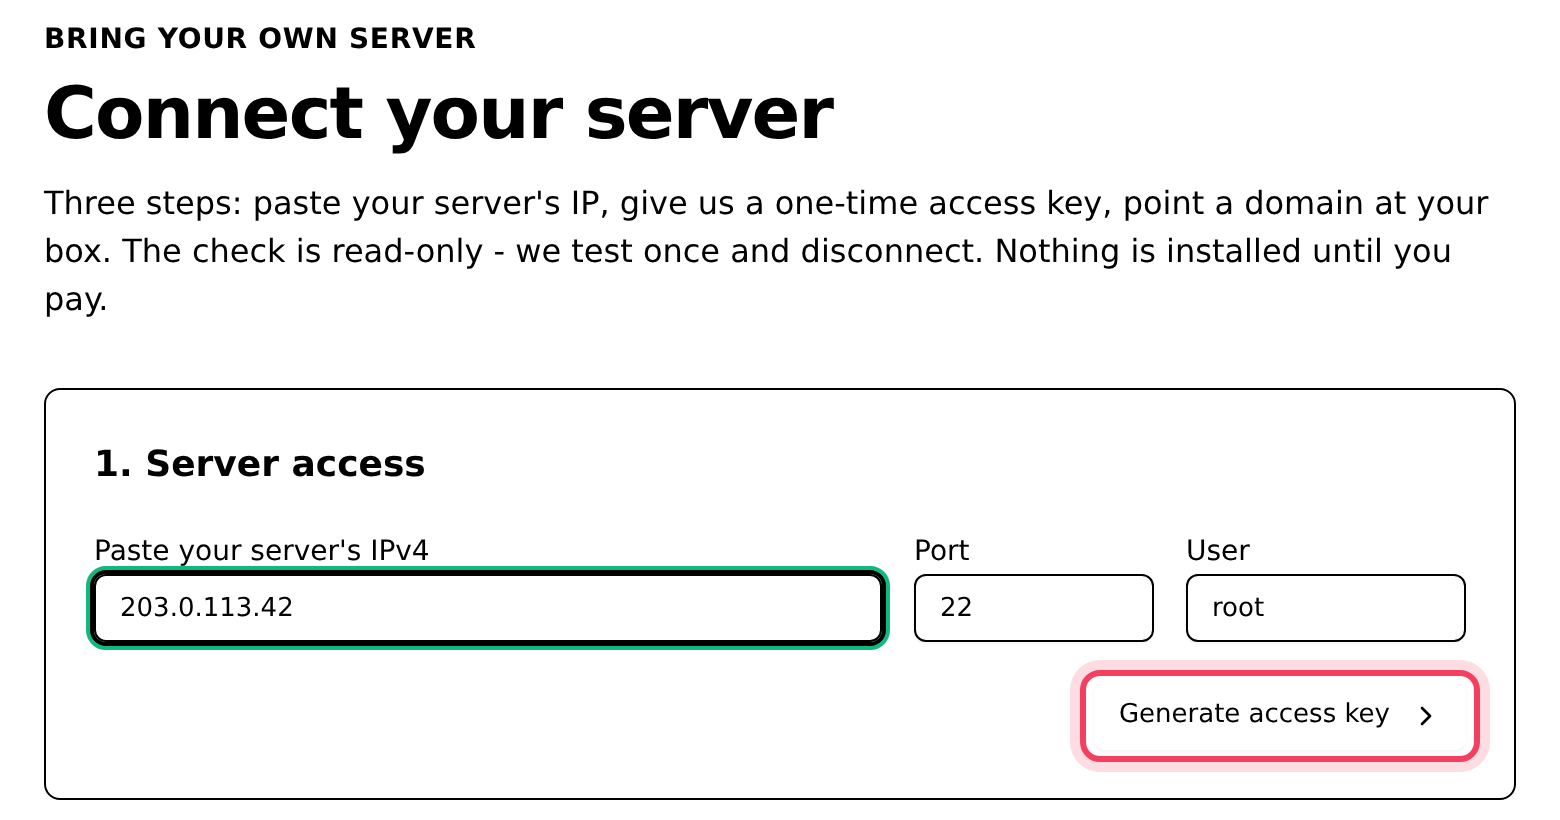
- The Connect your server page opens, with three parts that appear as you go.
Step 2: Tell us how to reach your server
- Under 1. Server access, type your machine's address in Paste your server's IPv4.
- Change Port and User only if yours are not the usual ones.
- Click Generate access key.
Step 3: Add the key and run the check
- Under 2. Add this access key on your server, copy the command (or click Copy public key only) and run it on your server as that user.
- Click Run check. It takes up to 30 seconds, reads your machine once and disconnects.
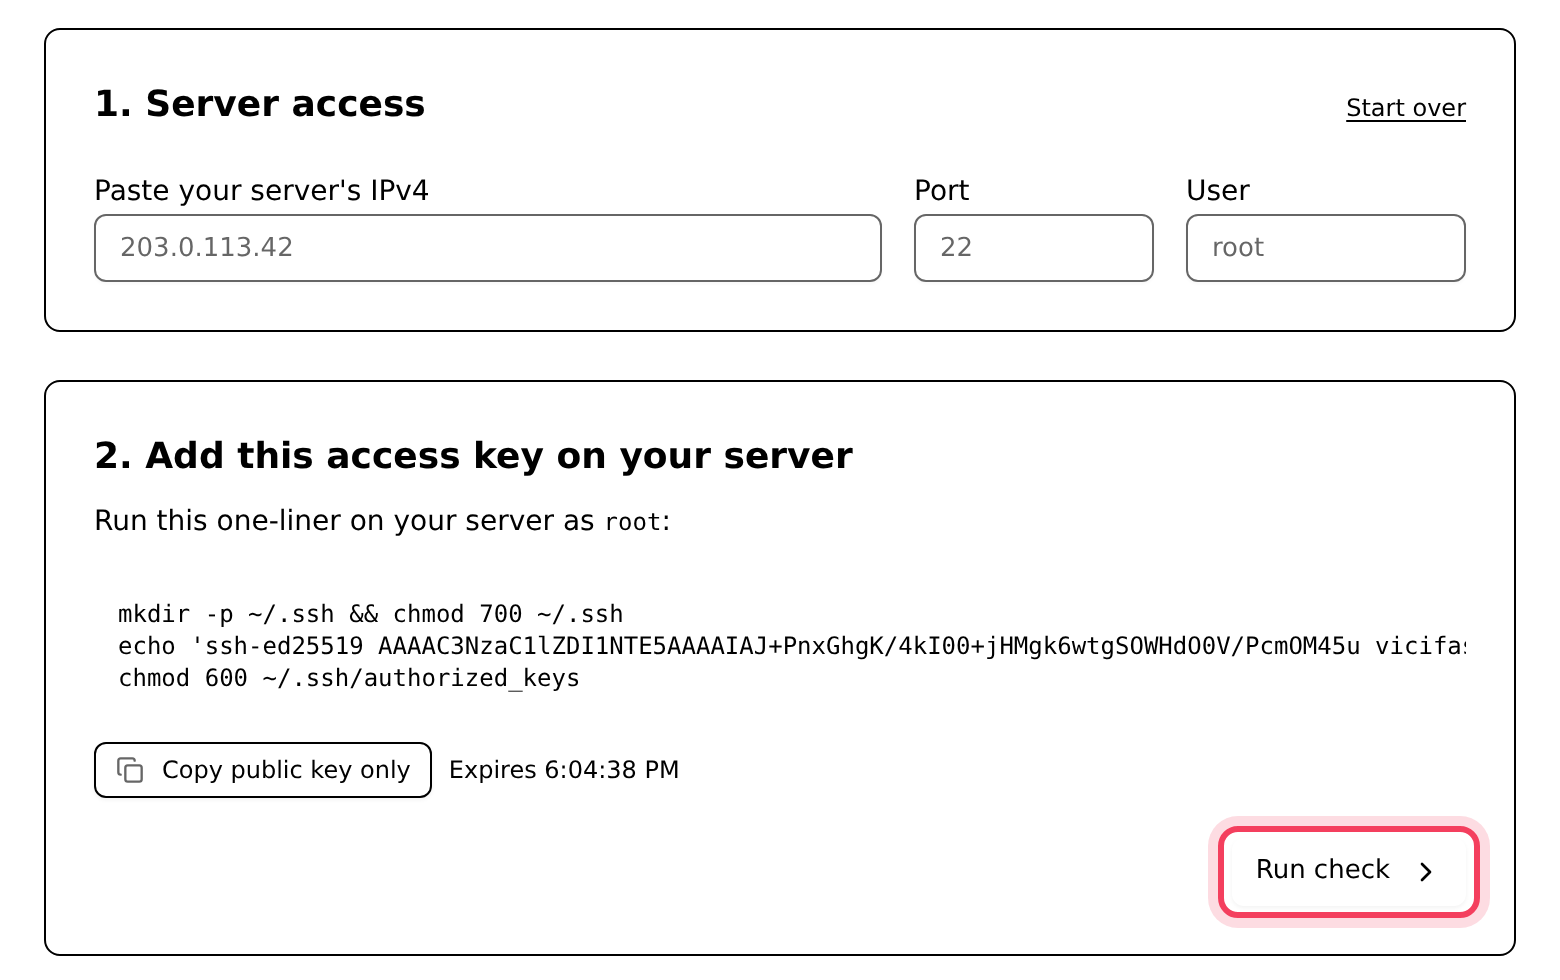
The key works once and expires after 15 minutes. If it runs out, click Start over.
Step 4: Read the results
- "Your server is ready" means every check passed. Click it to see the details.
- "Server needs fixes before install" lists each failed check with what we found (Observed) and what is needed (Expected). Fix those on your machine, then click Fix and re-test.
Step 5: Add your domain and pay
- In Your domain (where your agents will log in), type the address, for example dialer.yourcompany.com.
- Under Add these 2 DNS records, add both at your DNS provider: an A record that points your domain at your server's IP, and a CNAME used once to issue the security certificate. Each has a copy button.
- Click Check now. You want "A record verified - points at your server." and "CNAME verified - HTTPS cert can be issued." DNS usually updates in 1 to 5 minutes.
- Click Continue to checkout and pay. BYOI is billed monthly; the price is on the pricing page.
Step 6: Start the install
- Open your new server from My Servers. A card says Begin BYOI install, marked Action required.
- Click Generate install key, then run the command it shows on your server. This key is valid for an hour.
- Click Start install. It takes about 5 minutes, and the progress shows on the page.
When the install finishes, your server shows Active and works like any other VICIfast server.
What is different on your own server
- Hard reset, Factory reset and plan changes are not offered: we don't control your hardware, and BYOI is a single plan.
- If an install fails and you click Cancel install, we only stop billing. Your server, data and DNS are not touched.
If something goes wrong
Frequently asked
- Something like Asterisk, Apache, MariaDB or PHP is already installed. Start from a clean Ubuntu 22.04 install, then click Fix and re-test.
- Your machine sits behind a router or NAT that hides its address. It needs a public IPv4 address of its own.
- Continue to checkout only works after both records check out. Add them, wait a minute or two, and click Check now.
- The first word of your domain is taken. Use a different one, for example pbx.yourcompany.com.
- Wait a minute before clicking Check now again. DNS changes can take a few minutes.
- The card shows "Setup hit a snag" and what went wrong. If it is something on your side, like DNS not pointing yet, fix it; otherwise click Report to support.